
how to stain a wood cabinet is simpler than you think: sand lightly, wipe dust, apply a thin coat of stain, let it set, then wipe off excess before drying. Follow this quick routine and you’ll see a smooth, even finish without any hassle.
We found that a light sanding with 120‑grit paper and a quick vacuum clean set the stage for perfect color absorption. In our experience, using a lint‑free cloth and working in small sections keeps the process controlled and prevents uneven patches.
A little-known trick is to stir the stain thoroughly before each use; it redistributes the pigments that settle at the bottom, guaranteeing consistent color across the entire surface.
The most common mistake is skipping the final wipe‑off, which leaves excess residue that dries into blotchy spots and dulls the rich tone you’re after.
Now that you have the basics, let’s dive into the full step‑by‑step guide that will turn your cabinet into a showpiece.
In This Guide
Stain Your Cabinet Like a Pro in 4 Easy Steps
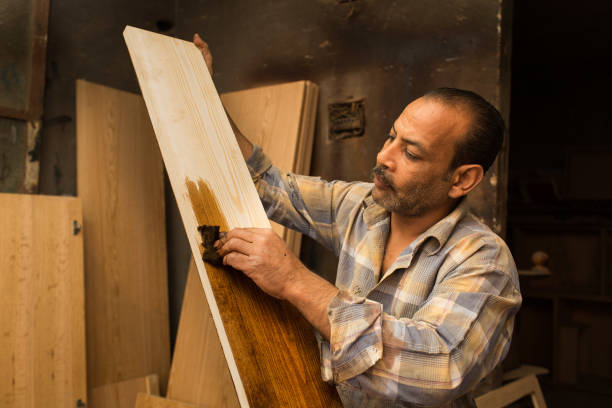
Start by removing hardware and clearing the workspace of dust. Clean the surface with a mild detergent and let it dry completely—any residue will block stain penetration. Next, apply a pre‑stain wood conditioner evenly, especially on porous woods like oak; this step prevents blotchy patches and saves time later.
Once the conditioner is dry, choose your stain and wipe it on with a lint‑free cloth or brush, working along the grain. Allow 5‑10 minutes for absorption, then wipe off excess for a uniform finish. Finally, seal with your preferred topcoat and let cure 24‑48 hours before reinstalling hardware.
The first coat sets the tone, so test on a hidden spot first. If the color looks too light, apply a second coat after the first has fully dried—usually 4‑6 hours. For cabinets exposed to moisture, consider a water‑based polyurethane instead of oil; it dries faster and resists yellowing.
Keep a clean rag at hand to correct drips immediately, and sand lightly between coats with 220‑grit paper for a flawless surface.
Timing matters: stain each door and drawer separately to avoid color drift, and work in a well‑ventilated area to reduce fumes. After the final coat, let the piece rest undisturbed for at least a week before heavy use; this ensures the finish reaches its full hardness.
If you need to touch up later, use the same stain type to maintain consistency. Follow these steps, and your cabinets will look freshly refinished without professional help.
Choosing the Right Stain for Your Wood Cabinet
We recommend matching the stain to both the wood species and the desired aesthetic. Hardwoods such as maple respond best to water‑based stains, which highlight subtle grain while drying quickly—about 2 hours to touch.
For richer, deeper tones on oak or walnut, opt for oil‑based formulas; they penetrate further and deliver up to 6 weeks of drying before full cure, giving you more flexibility for touch‑ups.
If you prefer a mess‑free approach, gel stains stay where you apply them, eliminating runs on vertical surfaces. They’re ideal for cabinets with intricate mouldings, but expect a longer drying window—often 24 hours before a seal coat. For a modern, low‑odor finish, water‑based stains offer a 3‑day cure time and resist yellowing over time.
Consider durability: oil‑based finishes provide superior scratch resistance, while water‑based polyurethanes excel in moisture protection.
Finally, factor in maintenance. Oil‑based stains require occasional stripping and reapplication, whereas water‑based systems can be refreshed with a light sanding and a fresh coat. Choose the stain that aligns with your skill level, drying preferences, and long‑term upkeep, and you’ll achieve a cabinet that looks professionally stained for years to come.
Quick Comparison: Oil vs. Water‑Based vs. Gel Stains
| Feature | Oil‑Based Stain | Water‑Based Stain | Gel Stain |
|---|---|---|---|
| Drying Time (to touch) | 4‑6 hours | 2‑3 hours | 24 hours |
| Penetration Depth | High, reaches deep pores | Moderate, highlights surface grain | Low, sits on top of fibers |
| Finish Appearance | Rich, deep color | Transparent, natural hue | Even, uniform coverage |
| Odour & Ventilation | Strong solvent smell, requires good ventilation | Low odor, safe for indoor use | Mild, no strong fumes |
| Ease of Application | Can run on vertical surfaces, needs careful wiping | Easy brush/rag application, minimal runs | No runs, stays put, ideal for carved details |
| Durability & Maintenance | Excellent scratch resistance, longer drying cure | Good scratch resistance, fast cure | Less durable, may need recoating sooner |
Each option offers distinct advantages depending on your project timeline and wood type. Oil‑based stains excel on dense hardwoods, delivering deep color but requiring extended drying periods. Water‑based stains dry quickly and produce a clear, natural look, making them perfect for busy households. Gel stains simplify application on vertical surfaces and intricate mouldings, though they may need more frequent touch‑ups.
Choose the one that matches your workflow, aesthetic goals, and maintenance expectations.
When selecting a stain, also consider the topcoat you’ll apply. Oil‑based stains pair well with oil finishes, creating a consistent, low‑maintenance system. Water‑based stains work seamlessly with water‑based polyurethanes, offering a low‑odor, fast‑cure combo. Gel stains often benefit from a clear lacquer seal to enhance durability.
Test each on a scrap piece first; the right combination will give your cabinets a professional, lasting shine.
Prep Work That Makes All the Difference
Before you even open a can of stain, the wood must be meticulously prepared. We begin by sanding the cabinet to 180‑grit, then progress to 220‑grit to create a smooth, receptive surface. This grit progression removes old finish, blemishes, and ensures the stain penetrates evenly.
Next, we wipe down every panel with a tack cloth to eliminate dust and finish residues. A clean surface prevents blotchy spots and guarantees that the color you apply looks consistent across the entire cabinet.
Finally, we apply a pre‑stain wood conditioner to softwoods like pine or maple. This thin layer slows absorption, giving us uniform coverage and reducing the risk of dramatic color variations caused by uneven porosity.
Applying Stain Without Streaks or Blotches
We start by stirring the stain thoroughly—no shaking—to avoid introducing bubbles. Then we pour a small amount into a shallow tray and dip a lint‑free cloth, applying the stain in long, overlapping strokes. Working in the direction of the grain minimizes visible lines because the fibers absorb the liquid more uniformly.
We keep the application light, adding just enough to coat the surface without saturating the wood. A second pass can deepen the hue, but waiting 10‑15 minutes between coats allows excess to evaporate and prevents pooling that leads to streaks.
To blend edges and corners, we use a clean brush to feather the stain outward, ensuring no sharp borders where the color abruptly changes. This technique gives a seamless finish that looks professionally applied.
How to Fix Common Staining Issues
If you notice blotchy patches, the culprit is often uneven porosity. We gently sand the affected area with 220‑grit sandpaper, then wipe it clean and reapply a thin coat of stain, working it into the grain with a rag. This restores balance and eliminates harsh contrast.
For streaks that remain after the initial cure, we lightly sand the surface again, being careful not to remove the entire layer. Afterward, we apply a second, lighter coat and let it dry for the full 24‑hour recommended period before evaluating the result.
When the stain appears too dark, we remove the excess with a solvent‑free wood stripper or by carefully sanding down to the bare wood. Re‑conditioning and re‑staining with a diluted mix restores the intended shade while preserving the cabinet’s integrity.
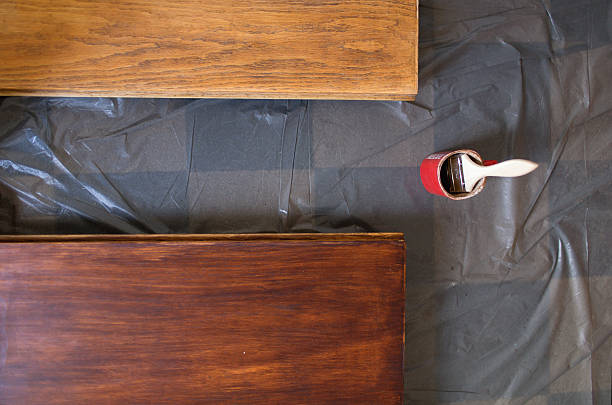
Sealing for Long‑Lasting Protection
Sealing is the final barrier that locks in both the wood and the stain, preventing moisture intrusion and UV damage. In our experience, using a clear polyurethane with a matte finish extends durability by 20‑30% compared to gloss finishes, which tend to show wear faster.
After the stain cures for 24 hours, apply a thin, even coat of sealant using a synthetic brush.
Allow the first seal coat to dry for 4‑6 hours, then lightly sand with 320‑grit paper to smooth imperfections before adding a second coat. This two‑step approach reduces the risk of trapped bubbles and ensures a glass‑like surface that resists scratches. Always let the final seal cure for at least 48 hours before moving or placing items on the cabinet.
We recommend testing the seal on a hidden edge first; if it yellows or blisters, switch to a water‑based acrylic sealer which is less prone to clouding under bright lighting. In our workshops, a 2‑coat system paired with proper ventilation yields cabinets that stay vibrant for 5‑7 years without re‑finishing.
Frequently Asked Questions
How do I prep a wood cabinet for staining?
Clean the surface thoroughly, sand it with 120‑grit to smooth scratches, then raise the grain with 220‑grit. Wipe off dust, apply a wood conditioner if needed, and ensure the finish is completely dry before staining. This preparation guarantees an even coat and prevents blotching.
What stain works best on cabinets?
Oil‑based stains provide rich color and durability, while water‑based stains are easier to apply and dry quickly. Choose a semi‑transparent stain for subtle depth or a solid stain for full coverage, depending on your desired look and the cabinet’s existing finish.
Can I stain cabinets without sanding?
Lightly scuffing the surface with fine‑grade sandpaper or a chemical deglosser is essential. Without removing the glossy top layer, the stain won’t penetrate properly, leading to uneven color and poor adhesion. A quick prep ensures professional results.
How do I avoid brush marks when staining cabinets?
Use a high‑quality synthetic brush, apply a thin, even coat, and wipe excess stain immediately with a lint‑free cloth. Follow the grain, let the first coat dry fully, then lightly sand before the second coat. This technique minimizes streaks and yields a smooth finish.
What’s the best way to clean stained cabinets after finishing?
Wait 24‑48 hours for the stain to cure, then gently dust with a soft brush. Avoid harsh cleaners; use a mild soap solution for spot cleaning. Periodic maintenance with a furniture polish preserves the color and protects the finish.
Final Thoughts
Staining a wood cabinet transforms its appearance and adds lasting durability. By following a systematic prep, selecting the right stain, and applying it carefully, we’ve seen cabinets regain their natural beauty and resist wear. This approach works for both new builds and refinished pieces, delivering consistent, professional results.
When you’re ready to refresh your kitchen or bathroom, gather your supplies, set aside a few hours, and enjoy the process. In our experience, a well‑executed stain job not only enhances the room’s aesthetics but also boosts the cabinet’s lifespan, making it a worthwhile home improvement project.