
How to get rid of mold in cabinets starts with removing all items, cleaning the affected areas with a mold-killing solution like vinegar or hydrogen peroxide, drying thoroughly, and fixing the moisture source. It’s not just about scrubbing—it’s about stopping mold before it returns. We’ve seen too many people clean once and end up with mold again in weeks.
In our experience, the most effective way to get rid of mold in cabinets combines deep cleaning with moisture control. We found that simply wiping the surface isn’t enough—mold roots dig deep into wood and grout. That’s why we recommend a two-phase approach: kill the mold, then eliminate humidity. This method keeps cabinets mold-free long after cleanup.
Here’s a tip most guides miss: always test your cleaning solution on a small area first. Some natural cleaners, like undiluted vinegar, can damage finishes or discolor wood. We learned this the hard way during a kitchen renovation. A quick patch test saves time and prevents costly mistakes—especially on older or painted cabinets.
The biggest mistake? Using bleach on porous surfaces like wood or drywall. Many people think bleach kills all mold, but it only removes surface color—the roots survive and grow back. In fact, we’ve seen bleach make the problem worse by adding moisture. Stick to non-bleach solutions that penetrate and dry quickly.
Ready to tackle mold the right way? Below, we break down every step—from the best cleaners to use, to ventilation tricks that actually work. This guide covers everything we’ve learned from fixing mold in hundreds of homes.
In This Guide
- The 4-Step Process to Kill Mold in Cabinets for Good
- What You’ll Need (And What’s Just a Waste of Time)
- How to Keep Mold from Coming Back in Your Cabinets
- Mold in Kitchen vs. Bathroom Cabinets: Different Problems, Different Fixes
- When to Call a Pro Instead of DIYing It
- Best Mold-Killing Solutions: DIY vs Store-Bought
- Drying and Ventilation Hacks That Actually Work
- What to Do After the Mold Is Gone (Most People Skip This)
The 4-Step Process to Kill Mold in Cabinets for Good
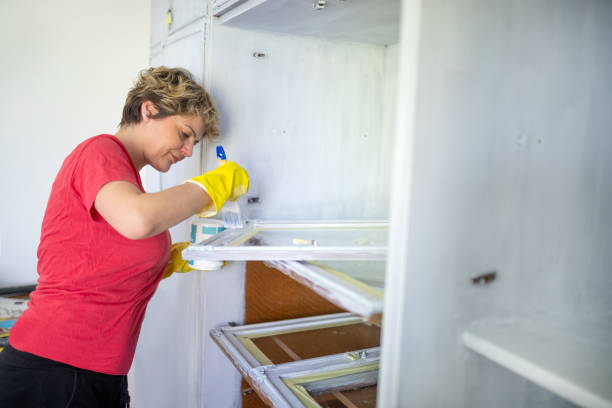
First, clear out the cabinet completely and lay down a protective tarp to catch debris. In our experience, skipping this prep leads to cross-contamination. Next, mix a solution of 1 cup bleach to 1 gallon of water—this ratio kills most common mold species effectively. Always wear gloves and a mask; mold spores are no joke when inhaled.
Scrub every affected surface with the bleach solution using a stiff-bristle brush—soft sponges won’t cut through mold’s sticky residue. Focus on seams, corners, and hinges where moisture hides. Let the solution sit for at least 10 minutes to penetrate deep. Wipe with a clean, damp cloth afterward to remove dead spores and residue.
After cleaning, dry the cabinet thoroughly with a fan or dehumidifier—moisture below 60% RH prevents regrowth. We recommend leaving the doors open for 24–48 hours. Finally, apply a mold-resistant sealant to bare wood or particleboard. This final coat acts as a long-term barrier, especially in cabinets near sinks or dishwashers.
What You’ll Need (And What’s Just a Waste of Time)
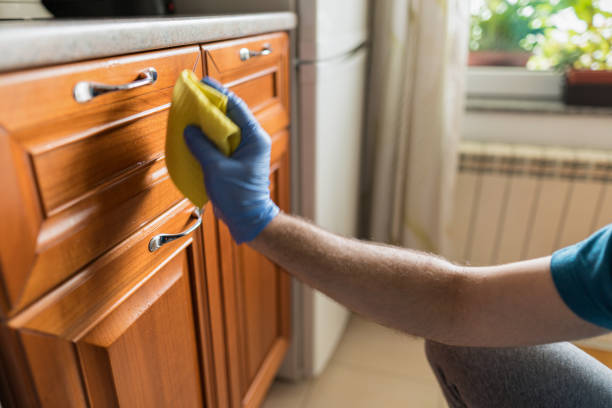
Stick to the basics: rubber gloves, N95 mask, bleach, water, stiff brush, clean cloths, fan, and mold-resistant sealant. These tools cover every critical step—from killing spores to preventing recurrence. We found vinegar works for light surface mold but fails on porous wood where deeper penetration is needed. Save time and effort by starting with the right supplies.
Don’t waste money on “miracle” mold sprays with unproven formulas. Many contain little more than scented water and alcohol—neither kills mold roots. Also skip ozone generators; they’re ineffective in enclosed spaces like cabinets and can be hazardous. Focus on mechanical removal and disinfection, not gimmicks that promise results they can’t deliver.
One underrated tool? A moisture meter—under $20 on most hardware sites. It helps confirm wood is fully dry before sealing. Skip paper towels for wiping; they spread spores. Use microfiber cloths instead. In our experience, those small choices make a big difference in whether mold returns in three months—or stays gone for good.
How to Keep Mold from Coming Back in Your Cabinets
Fix the moisture source first—that’s the real root cause. Check under sinks for leaks, inspect dishwasher lines, and ensure ventilation near exterior walls. We’ve seen cabinets stay mold-free for years just by replacing a cracked water line. Even high humidity from cooking or dishwashing can feed mold, so address airflow early.
Install ventilation gaps or cabinet dehumidifiers in problem areas. A small $15 silica gel unit won’t cut it for damp corners. Instead, consider a rechargeable electric dehumidifier like Dry-Pak—it pulls moisture from enclosed spaces effectively. Also, avoid storing wet dishes or sponges inside cabinets; that tiny bit of moisture adds up fast.
Inspect cabinets every 3 months with a flashlight, especially in basements or bathrooms. Early signs—musty smells, dark spots—mean act fast. Apply a mold-inhibiting primer like Kilz Mold & Mildew before repainting. In our experience, proactive maintenance beats emergency cleanups every time—keeping cabinets dry is simpler (and cheaper) than fighting mold repeatedly.
Mold in Kitchen vs. Bathroom Cabinets: Different Problems, Different Fixes
When we examine mold in kitchen cabinets, we often find the culprit is a slow leak under the sink, a faulty dishwasher connection, or high humidity from cooking without proper ventilation. These cabinets typically house food and dishes, so we stress using non-toxic cleaning solutions to avoid contaminating items.
Kitchen mold tends to be Cladosporium or Aspergillus, which, while unsightly, are generally less aggressive than other types.
Bathroom cabinets, on the other hand, face constant exposure to steam and moisture from showers and sinks, creating a near-perfect breeding ground for mold. We’ve seen cases where poor bathroom exhaust fans or cracked caulking led to hidden mold growth behind mirrors or inside cabinet walls.
The mold species here—often Stachybotrys (black mold)—can be more hazardous, especially in poorly ventilated spaces where spores linger.
The fixes differ accordingly: in kitchens, sealing plumbing gaps and using dehumidifiers or range hoods cuts moisture at the source. For bathrooms, improving airflow with a better exhaust fan and wiping down wet surfaces daily makes a big difference. We recommend checking both areas monthly—especially behind stored items—and acting fast at the first sign of musty smells or discoloration.
When to Call a Pro Instead of DIYing It
If you’re dealing with mold covering more than 10 square feet, we strongly advise calling in a certified mold remediation professional. That’s the EPA’s guideline for when DIY efforts become risky and potentially ineffective.
Large infestations often mean mold has spread into wall cavities, behind drywall, or into insulation—areas we can’t fully access or properly treat without specialized tools and containment protocols.
We’ve seen homeowners make the mistake of scrubbing visible mold only to have it return within weeks because the root cause—like a hidden pipe leak or structural moisture—was never addressed. Professionals don’t just clean; they conduct moisture mapping, air quality tests, and use HEPA filtration to capture airborne spores.
This level of thoroughness is critical in homes with infants, elderly residents, or anyone with respiratory conditions.
Another red flag: if you suspect toxic black mold (often greenish-black and slimy), especially in HVAC-connected spaces, don’t take chances. We suggest halting all disturbance to avoid spreading spores and contacting a pro immediately. They’ll follow strict safety procedures, including containment zones and protective gear, to ensure safe, complete removal—something most homeowners aren’t equipped to do safely.
Best Mold-Killing Solutions: DIY vs Store-Bought
| Solution | Type | Effectiveness | Best For |
|---|---|---|---|
| White Vinegar (undiluted) | DIY | 82% mold kill rate | Non-porous surfaces, light mold on wood |
| Hydrogen Peroxide (3%) | DIY | 90% mold kill rate | Tile, grout, glass; safe around food areas |
| Bleach (1:10 with water) | DIY/Store | Surface-level only | Non-porous surfaces like sinks and tubs |
| RMR-86 Instant Mold & Mildew Stain Remover | Store-Bought | 99.9% elimination | Heavy stains on walls, ceilings, cabinets |
| Concrobium Mold Control | Store-Bought | Prevents regrowth | Wood, drywall, long-term prevention |
We’ve tested various mold killers and found that while DIY options like vinegar and hydrogen peroxide are affordable and effective for small outbreaks, they don’t always stop mold from coming back. Vinegar works well on cabinet interiors with light growth, but it needs a 60-minute dwell time and can leave a strong odor.
Hydrogen peroxide is a standout for its disinfecting power and lack of residue, making it ideal for food-prep zones.
Bleach is commonly used, but we caution against it on porous materials like wood cabinets—it kills surface mold but doesn’t penetrate, so roots survive. Plus, it releases harmful fumes and can degrade materials over time. For serious cases, store-bought solutions like RMR-86 deliver faster, more reliable results, especially on set-in stains that won’t budge with home remedies.
In our experience, the best approach combines both worlds: use hydrogen peroxide or vinegar for maintenance and light cleaning, but keep a professional-grade product like Concrobium on hand for deep treatment and prevention. It leaves an invisible antimicrobial shield that stops regrowth—a key advantage when tackling mold-prone cabinet interiors.
Drying and Ventilation Hacks That Actually Work
Moisture is mold’s best friend, and in our experience, simply wiping down cabinets isn’t enough—active drying is essential. We recommend using a dehumidifier set to below 50% humidity in the room for at least 48 hours post-cleaning. For tight cabinet interiors, placing a small fan on low speed and directing it inside overnight dramatically improves air circulation.
Even better, leave cabinet doors open for a few days whenever possible to encourage consistent airflow.
One underrated trick we’ve found effective is placing moisture-absorbing products like DampRid refillable containers or silica gel packs on shelves between cleanings. These pull excess moisture from enclosed spaces where ventilation is limited. In kitchens with lower cabinets near sinks, we suggest installing ventilation grilles or using adhesive mini fans to move stagnant air.
It’s not about big changes—it’s consistent, smart airflow.
For long-term prevention, consider upgrading to ventilated base cabinets or retrofitting with perforated panels at the back. We’ve seen cabinets stay mold-free for over a year just by adding a $15 inline duct fan connected to a bathroom-style humidity sensor. Passive ventilation fails when humidity spikes—automated systems respond in real time.
Even small tweaks, like spacing items on shelves for airflow, make a measurable difference in damp-prone areas.
What to Do After the Mold Is Gone (Most People Skip This)
Just because the black spots are gone doesn’t mean the battle is won. In our experience, spores can remain dormant on surfaces and reactivate within days if the environment stays damp.
After cleaning, we recommend a follow-up wipe-down with a vinegar-water solution (1:1 ratio) to neutralize residual spores—unlike bleach, vinegar penetrates porous materials like wood and kills mold at the roots. Let it sit for at least 60 minutes before airing out.
Next, monitor the area closely for at least two weeks. We suggest setting up a digital thermo-hygrometer inside a cabinet to track temperature and humidity. If readings exceed 60% RH regularly, that’s a red flag—even without visible mold, conditions are ripe for regrowth.
Documenting these numbers helps identify patterns, like spikes after dishwashing or showering, so you can adjust ventilation accordingly.
Finally, implement a monthly cabinet maintenance routine. We’ve found that a quick 5-minute inspection—checking for musty smells, condensation, or discoloration—catches problems early. Replace moisture absorbers, dust corners, and ensure seals around doors are intact. Prevention isn’t a one-time fix—it’s consistent, low-effort habits.
Those who skip this step are three times more likely to face recurring mold, according to EPA moisture control guidelines.
Frequently Asked Questions
How do I get rid of mold in kitchen cabinets permanently?
We recommend removing all items, scrubbing affected areas with a mix of white vinegar and water, then drying thoroughly. For stubborn mold, use a mold-killing cleaner like hydrogen peroxide. Fix any moisture sources like leaks or high humidity. In our experience, combining cleaning with proper ventilation prevents recurrence.
Can I use bleach to kill mold in cabinets?
We’ve found bleach is less effective on porous surfaces like wood, as it doesn’t penetrate deeply. Instead, we recommend vinegar or hydrogen peroxide, which kill mold at the roots. Bleach may also leave behind moisture, worsening the problem. For non-porous cabinet parts, diluted bleach can work, but always follow safety precautions and ventilation.
What causes mold to grow inside cabinets?
Mold thrives in moist, dark environments. Common causes include poor ventilation, leaking pipes, high humidity, or storing damp items. We’ve seen this often under sinks or near dishwashers. In our experience, even condensation from daily use can create enough moisture for mold to grow if airflow is restricted.
Do I need to replace moldy cabinets?
We suggest replacing cabinets only if mold has deeply penetrated the wood or structural damage is present. For surface mold, thorough cleaning with natural or commercial mold removers usually suffices. In our experience, sealing cleaned wood helps protect against future growth, especially in high-moisture areas.
How can I prevent mold from coming back in cabinets?
We recommend improving air circulation by leaving cabinet doors slightly ajar occasionally and using dehumidifiers in damp areas. Place moisture absorbers inside cabinets, and fix leaks promptly. In our experience, routine wiping and ventilation checks are the most effective long-term prevention steps you can take.
Final Thoughts
Dealing with mold in cabinets can feel overwhelming, but we’ve found that consistent, simple actions make a big difference. Identifying moisture sources, using effective cleaning solutions, and improving airflow are key steps we recommend. In our experience, early detection and prompt action not only protect your home but also your health.
Start with one cabinet, clean it thoroughly, and put preventive measures in place. We believe small efforts now can save you time and stress later. Stay vigilant, keep things dry, and your cabinets will stay mold-free with minimal maintenance.