
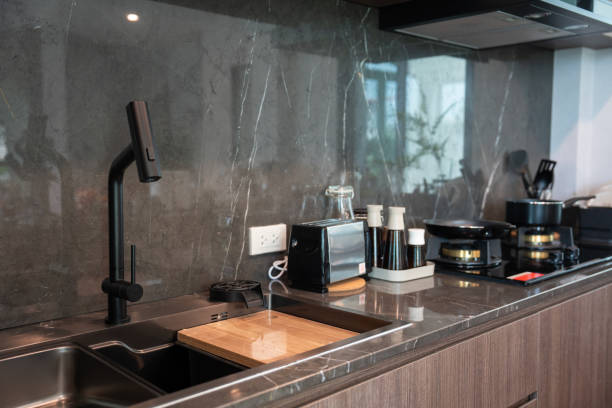
How to clean white wood cabinets naturally starts with a gentle mix of warm water and mild dish soap. We wipe down surfaces with a soft cloth, avoiding excess moisture that can warp wood. For tougher spots, a bit of baking soda helps lift grime without scratching. This simple routine keeps cabinets bright and safe from damage over time.
In our experience, consistency beats intensity when caring for white wood cabinets. We recommend cleaning them every few weeks before grime builds up. We found that using the right tools—like microfiber cloths and non-abrasive cleaners—makes a noticeable difference in preserving both finish and color. It’s not about deep cleaning often, but cleaning smart every time.
Here’s what most guides don’t mention: dust carries oils and moisture that dull white finishes over time. We always dust cabinets with a dry microfiber cloth *before* any wet cleaning. Skipping this step pushes dirt into the wood. Taking 30 seconds to dry-dust first keeps whites looking whiter and reduces the need for harsher cleanings later.
The biggest mistake we see? Using vinegar too often. Even diluted, its acid can break down protective finishes on white wood cabinets, leading to yellowing or etching. We’ve watched beautiful cabinets lose their luster after repeated vinegar use. It’s not about banning it completely—just knowing when it does more harm than good.
Now that you’ve got the basics, let’s walk through our tested methods step by step. We’ll show you how to keep your cabinets looking fresh without risking damage. From daily habits to tackling tough stains, here’s everything we’ve learned along the way.
In This Guide
- The 5-Minute Clean That Keeps White Wood Cabinets Looking Fresh
- What Most People Mess Up When Cleaning White Cabinets
- Safe Homemade Solutions That Won’t Damage the Finish
- When to Skip the Vinegar (And What to Use Instead)
- Tackling Yellowing and Stains Without Sanding
- Dusting and Daily Habits That Make a Big Difference
- How to Protect Your Cabinets After Cleaning
The 5-Minute Clean That Keeps White Wood Cabinets Looking Fresh
A quick daily or weekly wipe-down can prevent buildup that dulls white cabinets over time. We recommend using a microfiber cloth dampened with distilled water—just enough to remove fingerprints and light smudges without leaving moisture behind.
This simple step takes under five minutes but makes a dramatic difference in maintaining brightness and shine, especially on high-gloss finishes that show every mark.
For greasy spots near the stove, we found that a drop of mild dish soap diluted in a spray bottle of water works instantly. Spray lightly on the cloth—not the cabinet—to avoid oversaturation. Gently wipe the surface, then follow with a dry microfiber cloth to prevent streaks.
This targeted approach handles grime without harsh scrubbing or risking water damage to the wood.
In our experience, consistency beats deep cleaning. Doing this 5-minute routine once a week prevents yellowing and film accumulation that take hours to reverse. Focus on handles, corners, and edges where oils and dust gather fastest. Over time, this habit keeps white wood cabinets looking like new with minimal effort—no heavy lifting required.
What Most People Mess Up When Cleaning White Cabinets

One of the biggest mistakes we see is using all-purpose cleaners straight from the store shelf. Many contain ammonia, bleach, or harsh solvents that strip protective finishes and accelerate yellowing in white paint. These chemicals may give a quick shine, but over time they break down the sealant, leaving wood vulnerable to stains and moisture damage—especially in humid kitchens.
Another common issue is using too much water. White cabinets often have layered paint or veneer, and excess moisture can seep into seams, causing warping or delamination. We’ve seen cases where wet sponges or steam cleaners caused irreversible bubbling. Always wring cloths until they’re barely damp, and never let liquid pool around hinges or baseboards.
People also overlook hardware and detailing. They clean the flat surfaces but skip hinges, grooves, and raised panel edges—where grease and dust accumulate most. Use a soft-bristle brush or toothbrush for crevices, but avoid abrasive scrubbing pads. In our experience, the difference between “clean” and “truly fresh” comes down to these detail zones.
Safe Homemade Solutions That Won’t Damage the Finish
We suggest a basic cleaning mix of 1 cup distilled water, 1 tablespoon white vinegar, and 1 drop of mild dish soap. This solution cuts grease and lifts fingerprints without harming the finish. The vinegar acts as a natural degreaser, while the soap breaks down oils—just dilute enough to be gentle.
Always apply with a microfiber cloth and avoid soaking the wood.
For cabinets with stubborn film or light haze, we’ve had great results with a paste of baking soda and water (two parts soda to one part water). Gently rub on problem areas with a soft cloth, then wipe clean immediately. This mild abrasive removes residue without scratching, but never use it daily—once a month is enough to prevent buildup.
In our experience, the key is testing first in an inconspicuous spot. Some white finishes react differently to acidity, especially older paints. If the surface looks hazy or dull after vinegar, switch to plain water with a drop of olive oil for shine. These homemade options are budget-friendly, safe, and effective when used correctly—no commercial chemicals needed.
When to Skip the Vinegar (And What to Use Instead)
While white vinegar is a popular go-to for cleaning wood cabinets, we don’t recommend it for all finishes. Vinegar’s acidity can break down varnishes and polyurethane coatings over time, especially on older or matte-finished white cabinets. In our experience, repeated use leads to dulling and even etching—particularly with alkyd or water-based topcoats.
If your cabinets have a soft sheen or feel slightly porous, skip the vinegar entirely.
Instead, we suggest a pH-neutral wood cleaner like Weiman Wood Cleaner or a homemade mix of one teaspoon of castile soap in a quart of warm water. These solutions lift grime without compromising the protective finish. For greasy kitchen zones near the stove, a drop of dish soap (like Dawn Original) in the mix helps cut through oils safely.
Always test in a discreet area first.
Another excellent alternative is a mild microfiber wipe system paired with distilled water. We’ve seen great results using Cleaning Paste by Better Life for stubborn spots—its gentle abrasives lift residue without scratching. Remember, preserving the finish is just as important as cleaning the surface. When in doubt, gentle is always better for maintaining long-term cabinet beauty.
Tackling Yellowing and Stains Without Sanding
| Issue | Cause | Recommended Solution | Frequency |
|---|---|---|---|
| Yellowing | UV exposure, aging finish, nicotine buildup | Diluted oxygen bleach (OxiClean + water) | 1–2 times per year |
| Water stains | Condensation, improper drying | Magic Eraser (melamine foam) + dry cloth | As needed |
| Grease buildup | Kitchen splatter, poor ventilation | Isopropyl alcohol (70%) + microfiber | Monthly deep clean |
| Marker or scuff marks | Accidental contact, kids’ activity | Baking soda paste (non-abrasive) | Spot treatment |
Yellowing in white wood cabinets often stems from environmental factors rather than dirt—especially in kitchens with poor ventilation or near smoking areas. We’ve found that oxygen bleach solutions are far safer than chlorine bleach, which can weaken wood fibers.
Mix one scoop of OxiClean in a quart of warm water, apply with a soft cloth, and let sit for 5–10 minutes before wiping clean.
For surface-level stains like water rings or grease marks, a gently damp Magic Eraser works wonders—just don’t press too hard. We recommend following up with a dry microfiber cloth immediately to prevent moisture absorption. In high-grease zones, a quick wipe with 70% isopropyl alcohol not only disinfects but also removes invisible film that dulls shine.
For scuffs or crayon marks, a paste of two parts baking soda to one part water gently lifts residue without scratching. Apply with a soft cloth using circular motions, then rinse with a damp cloth. These non-sanding methods preserve the cabinet’s integrity while restoring brightness—no refinishing required in most cases.
Dusting and Daily Habits That Make a Big Difference
Consistent dusting is the unsung hero of cabinet maintenance. We’ve observed that weekly microfiber wiping prevents grime buildup that turns into stubborn film over time. Use a dry or slightly damp microfiber cloth—never paper towels, which can scratch. Focus on cabinet tops and edges where dust accumulates fastest, especially in homes with ceiling fans or open shelving nearby.
Opening and closing cabinets with clean hands makes a bigger impact than most realize. Oils from skin transfer easily to white surfaces, leading to discoloration around handles and edges. We suggest installing touchless cabinet pulls or using a light hand-wipe routine after cooking.
Even a quick wipe-down with a dry cloth after heavy kitchen use can extend time between deep cleans.
Improving kitchen airflow also plays a role. We recommend running the range hood for 10–15 minutes post-cooking to reduce grease vapor settling on cabinets. Pair this with monthly checks for dust in hinges and crevices—use a soft brush attachment on your vacuum. These small habits, done consistently, keep white cabinets looking fresh and bright for years with minimal effort.
How to Protect Your Cabinets After Cleaning
Once your white wood cabinets are clean, the next critical step is sealing and protecting the surface to maintain that fresh look. We recommend applying a clear, water-based polyurethane finish—just 2 thin coats—to guard against moisture, stains, and UV discoloration.
In our experience, brushing it on with a microfiber applicator pad delivers the smoothest, streak-free results without disturbing the wood grain.
For high-touch areas like cabinet doors and handles, consider a satin or semi-gloss topcoat—they’re more resistant to fingerprints and daily wear. We found that allowing at least 24 hours of drying time between coats ensures maximum durability. Avoid oil-based finishes on white cabinets, as they can yellow over time and compromise the crisp, clean appearance you’ve worked hard to achieve.
Regular maintenance is key to long-term protection. Wipe spills immediately and dust cabinets weekly with a soft, dry microfiber cloth. Every few months, lightly clean with a pH-neutral cleaner and inspect for wear. In our experience, touching up worn spots with an additional coat of polyurethane every 12 to 18 months keeps white wood cabinets looking like new for years, even in high-humidity kitchens.
Frequently Asked Questions
How do you clean white wood cabinets without yellowing them?
We recommend using a mild dish soap and warm water solution to avoid yellowing. Harsh chemicals or ammonia-based cleaners can degrade the finish over time. We’ve found that gently wiping with a soft microfiber cloth and drying immediately prevents moisture damage. Always test on a small area first, especially if your cabinets have a painted finish.
What’s the best way to remove grease from white wood cabinets?
For stubborn grease buildup, we suggest mixing equal parts white vinegar and water. Spray lightly on a cloth (not directly), then wipe the surface. Vinegar cuts through grease without harming wood. In our experience, following up with a damp cloth and drying thoroughly prevents residue and keeps cabinets looking fresh.
Can I use Magic Eraser on white wood cabinets?
We advise caution with Magic Erasers—they can remove finish or leave a dull spot on painted wood. While effective for scuffs, we’ve seen cases where overuse damages the surface. If you use one, apply light pressure and follow with a damp cloth. Always spot-test first to avoid unintended wear.
How often should white wood cabinets be cleaned?
We recommend weekly dusting and a deeper clean every 2–4 weeks, depending on kitchen use. High cooking activity leads to faster buildup. In our experience, consistent light cleaning prevents grime from setting in and maintains the bright white appearance without aggressive scrubbing later.
How do I restore dingy white wood cabinets?
To revive dull cabinets, we use a mixture of warm water and mild degreaser, followed by a gentle scrub with a soft sponge. For persistent discoloration, a paste of baking soda and water can help lift stains. In our experience, repainting with a quality white enamel may be needed if the wood is deeply stained or worn.
Final Thoughts
Keeping white wood cabinets clean doesn’t have to be a chore. With the right routine and gentle products, we’ve found that they stay bright and beautiful for years. Regular dusting, prompt spill cleanup, and using non-abrasive cleaners protect both the wood and finish. Consistency is key—small efforts prevent big cleaning jobs down the line.
Start with a simple weekly wipe-down and adjust based on your kitchen’s needs. Over time, you’ll notice how much better your space looks and feels. We believe well-maintained cabinets make a lasting difference—so grab a soft cloth and take the first step today.