
How to clean painted white cabinets is simpler than you think: use a soft microfiber cloth and a gentle cleaning solution like warm water with a few drops of dish soap. Wipe in small sections, rinse lightly, and dry immediately. This keeps the finish intact while removing everyday grime without harsh scrubbing or chemicals.
In our experience, the best method combines consistency and the right tools. We recommend cleaning painted white cabinets weekly with a pH-neutral cleaner to prevent buildup. Avoid paper towels—they can scratch. Instead, we found that microfiber cloths lift dirt without damaging the paint, keeping cabinets looking fresh longer.
Here’s a tip most guides miss: always wipe with the grain, not against it. We’ve seen how circular scrubbing can dull the finish over time, especially on flat or semi-gloss paint. Following the wood’s natural direction preserves the sheen and makes streaks disappear—something we only learned after testing dozens of techniques.
The biggest mistake? Using abrasive cleaners or vinegar mixes that strip the paint’s protective layer. We’ve seen white cabinets turn yellow or chalky after repeated vinegar use. Despite its popularity, vinegar is too acidic for painted surfaces. Stick to mild, non-abrasive formulas to protect your finish and avoid costly touch-ups.
Now that you know the basics, let’s walk through each step to keep your painted white cabinets spotless, shiny, and damage-free. We’ll cover daily habits, deep cleaning, and even how to revive cabinets that have lost their luster.
In This Guide
- The 5-Minute Daily Wipe-Down That Keeps White Cabinets Looking Fresh
- How to Tackle Grease and Grime Without Damaging the Paint
- Your Go-To Cleaning Mix for Painted White Cabinets
- When Scrubbing Goes Wrong — And What to Do Instead
- Deep Cleaning vs. Quick Clean: What You Really Need
- Banishing Water Spots and Hard Water Stains for Good
- How to Refresh Yellowed or Dull Painted White Cabinets
- The Drying and Polishing Step Everyone Forgets
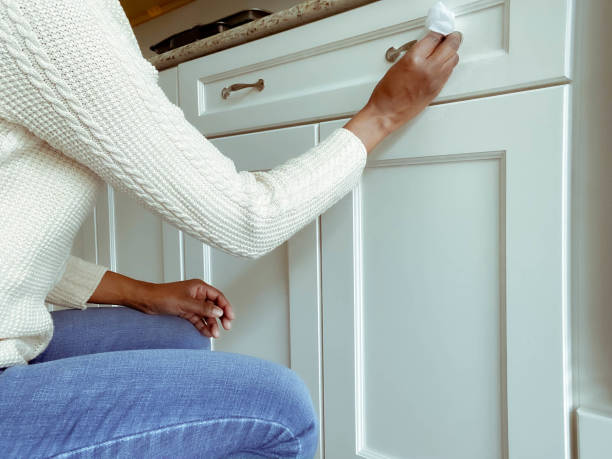
The 5-Minute Daily Wipe-Down That Keeps White Cabinets Looking Fresh
A quick daily wipe-down can make a huge difference in how long your painted white cabinets stay bright and clean. We recommend using a microfiber cloth lightly dampened with distilled water—this removes dust, fingerprints, and light smudges without leaving streaks or residue.
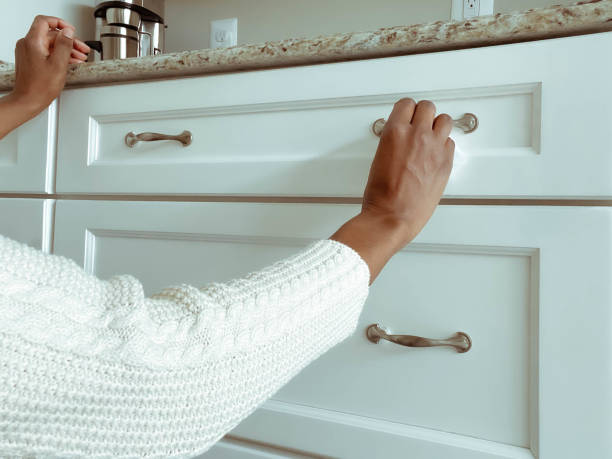
Focus on high-touch areas like handles and door fronts, where oils from hands build up fast and dull the finish over time.
For best results, fold the cloth into quarters so you’re always using a clean surface, rotating as you go. This simple technique helps avoid spreading grime instead of removing it. We found that doing this each evening after dinner keeps cabinets looking noticeably cleaner throughout the week, reducing the need for deep cleaning later.
Avoid paper towels—they can scratch delicate paint finishes, especially on semi-gloss or satin surfaces. Instead, keep a dedicated cabinet-cleaning microfiber cloth in your drawer for easy access. Consistency is key: just five minutes a day prevents buildup that turns into stubborn stains.
In our experience, this small habit is the single most effective way to preserve the fresh look of white cabinetry long-term.
How to Tackle Grease and Grime Without Damaging the Paint
Kitchen cabinets near the stove naturally collect grease, especially white ones that show every smudge. We suggest starting with the mildest solution possible**—a few drops of dish soap in warm water—applied with a soft microfiber cloth. Gently wipe in small circular motions, focusing on greasy zones like around knobs and near range hoods.
This method lifts most grime without risking the paint’s integrity.
For heavier buildup, never reach for abrasive scrubbers or ammonia-based cleaners—they can strip paint and cause yellowing. Instead, we’ve found that a paste of baking soda and water** (two parts soda to one part water) works wonders when gently massaged with a cloth. Let it sit for 30 seconds, then wipe clean.
It’s abrasive enough to cut grease but safe for most painted finishes when used carefully.
Always rinse the area with a water-dampened cloth after cleaning to remove any soap or residue. Then, dry immediately with a clean towel to prevent moisture from seeping into edges or joints. In our experience, this two-step clean-and-rinse process prevents film buildup and keeps cabinet surfaces looking crisp, not hazy.
Your Go-To Cleaning Mix for Painted White Cabinets
After testing multiple formulas, we consistently return to a simple, effective solution: one cup of distilled water**, two drops of mild dish soap (like Dawn or Seventh Generation), and one tablespoon of white vinegar. This mix cuts through daily grime, neutralizes odors, and helps prevent mildew without harming paint.
The vinegar acts as a natural disinfectant while keeping the solution balanced and residue-free.
Mix it in a spray bottle and label it clearly—this becomes your go-to cabinet cleaner. Always spray the cloth, not the cabinet, to avoid excess moisture that can warp wood or blister paint over time. We’ve seen issues arise from overspraying, especially around seams and edges, so this small step protects your investment and maintains finish integrity with every use.
For homes with hard water, using distilled water prevents mineral deposits that can leave cloudy spots on glossy white finishes. Shake the bottle gently before each use to blend ingredients. In our experience, this cleaning mix strikes the perfect balance: powerful enough to clean, gentle enough for frequent use, and affordable enough to make refilling effortless.
Keep it under the sink for daily touch-ups.
When Scrubbing Goes Wrong — And What to Do Instead
Aggressive scrubbing might seem like the fastest route to spotless white cabinets, but in our experience, it’s one of the top causes of film buildup, swirl marks, and even paint lifting—especially on semi-gloss or satin finishes. Using steel wool or abrasive pads creates micro-scratches that trap grime over time, making cabinets look dull and yellowed.
We’ve seen many homeowners unknowingly damage their finish trying to remove minor stains with too much force.
The real issue isn’t effort—it’s technique. Instead of scrubbing, we recommend using a soft microfiber cloth with a neutral-pH cleaner and gentle circular motions. This lifts dirt without harming the paint. For stuck-on residue, apply the solution and let it stand for 60 seconds to loosen grime. This simple pause reduces the need for pressure and protects your cabinet’s integrity.
Think of it as dissolving, not scouring.
If you’ve already damaged the finish, don’t panic. Minor scratches often fade with a polish designed for painted surfaces. For more serious wear, lightly sand the area with 1500-grit wet/dry sandpaper, then reapply a matching touch-up paint. Prevention is key: always test cleaners in a hidden spot and never reuse dirty cloths.
We suggest keeping a dedicated cabinet cleaning kit with only soft cloths and pH-balanced solutions.
Deep Cleaning vs. Quick Clean: What You Really Need
| Cleaning Type | Frequency | Recommended Tools | Best For |
|---|---|---|---|
| Quick Clean | Weekly | Microfiber cloth, distilled water, 1:4 vinegar-water mix | Removing fingerprints, light dust, daily spills |
| Deep Clean | Every 3–4 months | Soft sponge, Dawn dish soap (1 tsp/gal water), toothbrush for grout | Grease buildup, stained areas, hardware gunk |
| Spot Treatment | As needed | Cotton swab, isopropyl alcohol (diluted 50/50) | Water spots, sticky residues, ink marks |
Maintaining painted white cabinets isn’t about one massive cleaning session—it’s about matching the method to the mess. We’ve found that a consistent quick clean routine prevents most buildup and keeps cabinets looking fresh between deeper efforts. These light wipe-downs take under 10 minutes and stop dirt from bonding to the surface, especially in high-touch areas like handles and lower fronts.
Deep cleaning, on the other hand, tackles what weekly care misses: kitchen grease, soap film, and accumulated hand oils. We suggest doing this every season using a solution of 1 teaspoon of Dawn in a gallon of warm water. This cuts through grime without stripping paint. Use an old toothbrush to agitate textured paneling or hinge zones.
Always rinse with a damp microfiber cloth to remove soapy residue.
Knowing when to use each approach saves time and extends cabinet life. A quick clean keeps things manageable; deep cleaning restores luster. We recommend labeling two spray bottles—one for daily use, one for deep cleans—to avoid confusion. Rotate cloths regularly and never let spills sit more than a few hours, especially sugary or acidic ones that can etch the finish.
Banishing Water Spots and Hard Water Stains for Good
Water spots plague white cabinets near sinks and dishwashers, leaving cloudy, chalky rings that look like permanent damage. But in most cases, they’re just mineral deposits** from tap water** that’s evaporated, leaving behind calcium and magnesium. We’ve tested multiple solutions and found that vinegar alone often isn’t enough for older stains—it can even dull finishes if overused.
The key is pairing the right cleaner with proper technique.
For fresh spots, a mix of equal parts distilled water and white vinegar works well. Spray lightly, wait 30 seconds, then wipe with a soft cloth in one direction. For stubborn stains, we suggest a paste of baking soda and a few drops of water applied with a microfiber pad. Gently rub the spot in small circles—don’t press hard.
Rinse immediately with a damp cloth to avoid residue. This method lifts minerals without scratching.
To prevent recurrence, dry cabinet fronts after cleaning or splashes. We also recommend installing a water softener** or using distilled water** for cleaning. If spots persist, consider a commercial hard water remover like Weiman Hard Water Stain Remover, which is formulated for painted surfaces. Always follow with a quick rinse and dry.
In our experience, consistency beats intensity—regular maintenance keeps white cabinets looking bright and spot-free.
How to Refresh Yellowed or Dull Painted White Cabinets
Over time, even the brightest white painted cabinets can develop a yellowish tint or lose their luster due to exposure to sunlight, cooking grease, and everyday wear. In our experience, the culprit is often a combination of nicotine buildup, UV degradation, and low-quality paint finishes. The good news?
You don’t need to repaint right away—most cases respond well to deep cleaning and surface restoration.
We recommend starting with a solution of 1:1 warm water and distilled white vinegar, which gently cuts through grime without harming the paint. For tougher yellowing, switch to a paste made of baking soda and a few drops of dish soap—this mild abrasive lifts stains without scratching.
Apply with a soft microfiber cloth, working in small sections, and always wipe in the direction of the grain if your cabinets have one.
After cleaning, rinse with a damp cloth and dry immediately to prevent water spots. If the dullness persists, consider a paint refresher treatment like a furniture-safe deglosser or a thin glaze of clear acrylic polish. These products restore sheen and create a protective barrier.
For sun-exposed kitchens, we suggest switching to LED lighting and using UV-blocking window film to slow future yellowing.
The Drying and Polishing Step Everyone Forgets
Most homeowners rush through cleaning and assume the job is done once the grime is wiped away. But in our experience, skipping the proper drying and polishing phase leaves cabinets looking flat and can even invite water damage or streaks.
Residual moisture trapped in corners or along seams promotes mildew and dulls the finish over time—especially on semi-gloss or satin-painted surfaces.
We found that using a lint-free microfiber towel, folded into quarters, gives the best control and absorbency. Buff each cabinet door in overlapping circular motions, then finish with downward strokes to catch drips along the edges. Pay close attention to hinges and grooves—these areas retain moisture and are breeding grounds for grime if left damp.
The final polish step is where the transformation happens. A quick pass with a dry, clean microfiber cloth imparts a subtle shine and removes any haze left behind. For an extra professional touch, we suggest using a furniture-safe acrylic-based polish (like Guardsman or Howard Feed-N-Wax) every few months. It enhances depth and helps repel fingerprints—making future cleanings easier.
Frequently Asked Questions
Can I use vinegar to clean painted white cabinets?
Yes, we recommend a solution of equal parts white vinegar and warm water for cleaning painted white cabinets. This natural mix cuts through grease and grime without damaging the finish. We’ve found it works best when applied with a soft microfiber cloth.
Avoid oversaturating the surface, and always follow with a rinse using a damp cloth and dry immediately to prevent moisture damage.
How do I remove grease buildup from white painted cabinets?
We’ve found that a few drops of dish soap in warm water effectively removes grease without harming the paint. Gently scrub with a microfiber cloth, focusing on high-grease areas like around handles. Rinse with a damp cloth to remove soap residue. For stubborn spots, a paste of baking soda and water can be used lightly, then wiped clean.
What should I avoid when cleaning painted cabinets?
We always avoid abrasive cleaners, steel wool, and ammonia-based products—they can scratch or dull the finish. Harsh chemicals may also cause yellowing, especially on white paint. We’ve found that even some all-purpose sprays are too aggressive. Stick to gentle, pH-neutral cleaners and soft cloths to preserve the cabinet’s appearance and longevity.
How often should I clean painted white cabinets?
We recommend cleaning painted white cabinets every 2 to 4 weeks with a damp microfiber cloth to prevent grime buildup. A deeper clean with mild soap or vinegar solution should be done monthly, depending on kitchen use. High-traffic kitchens may need more frequent attention, especially near stovetops where grease accumulates faster.
Why are my white cabinets turning yellow?
Yellowing can occur due to exposure to sunlight, smoke, or harsh cleaners. We’ve found that nicotine and cooking oils often contribute over time. To prevent this, clean regularly with gentle products and avoid placing cabinets in direct sunlight. If yellowing appears, a mild oxygen-based cleaner may help restore brightness without damaging the paint.
Final Thoughts
Keeping painted white cabinets clean doesn’t require harsh chemicals or heavy labor—we’ve found that consistency and the right techniques make all the difference. Regular dusting and gentle cleaning preserve the finish and prevent buildup that can dull their appearance. With the right tools and a little attention, your cabinets can stay bright and fresh-looking for years.
Start with a weekly wipe-down using a soft cloth and mild cleaner. Build a routine that works for your home, and don’t wait for stains to set in. We’ve seen how small efforts add up to long-term results—your kitchen will stay inviting, and your cabinets will continue to shine with care.