
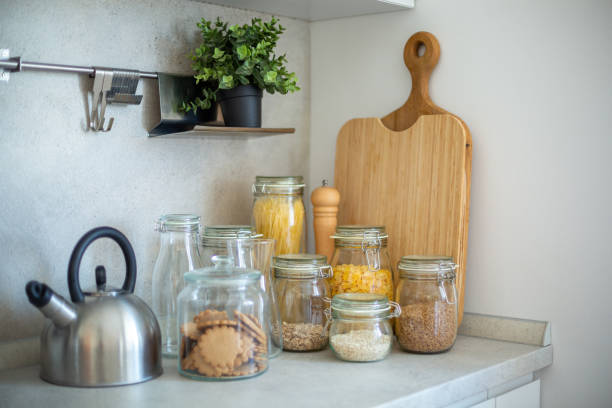
Looking for smart pantry shelving design ideas? We’ve got you covered. The best designs combine function and style—think adjustable shelves, clear bins, and smart zones for snacks, spices, and staples. It’s not about fancy finishes; it’s about creating a system that makes daily meals easier and keeps clutter hidden.
In our experience, the most successful pantries start with a clear plan. We recommend mapping out what you store most—canned goods, breakfast items, baking supplies—then designing shelves to fit those needs. We found that even small tweaks, like adding labels or changing shelf spacing, can transform how a pantry works.
Here’s a tip most guides miss: leave at least one “flex shelf” open for odd-sized items like bulk buys or seasonal containers. We’ve seen so many pantries fail because every shelf was pre-filled. That one empty shelf? It’s the most important—it adapts as your needs change.
A common mistake? Installing shelves too far apart. We’ve opened pantries where cans get lost in deep gaps. Wide spacing looks clean, but it wastes vertical space and encourages stacking, which leads to forgotten food. We recommend tighter, more frequent shelves with bins to keep things visible and reachable.
Ready to build a pantry that actually works? Below, we break down the smartest shelving layouts, materials, and upgrades that make organizing effortless—even in tricky spaces.
In This Guide
- Start Here: Real Pantry Shelving Layouts That Work
- How to Pick the Right Shelf Heights (Without Guessing)
- Pull-Outs and Turntables: Game-Changers for Tight Spaces
- Pantry Shelving Materials: What Lasts and What Doesn’t
- Smart Storage Combos That Maximize Every Inch
- Budget vs. High-End Upgrades: What’s Worth It
- Lighting and Trim That Elevate Your Pantry’s Look
- Custom Pantry Shelving Ideas for Deep or Awkward Spaces
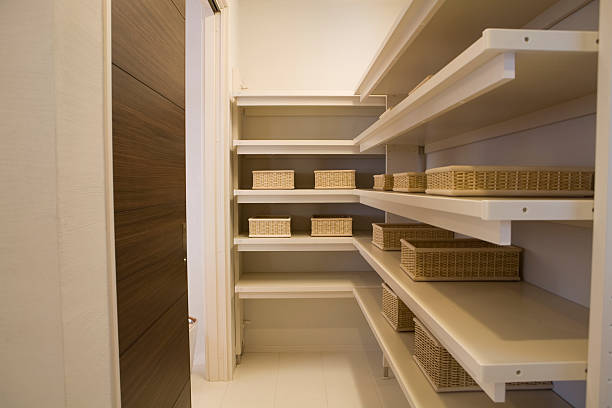
Start Here: Real Pantry Shelving Layouts That Work
When we assess functional pantry designs, one truth stands out: a one-size-fits-all approach fails. Instead, we recommend tailoring shelf placement to your actual inventory.
For example, in a standard 72-inch tall pantry, we’ve seen the most success with a layout that includes a pull-out bin at the bottom, three adjustable mid-level shelves (spaced at 12″, 14″, and 10″), and dedicated top storage for infrequently used items like holiday cookware.
Zone-based organization consistently delivers better results. We found that separating shelves into categories—like baking essentials, breakfast staples, and canned goods—reduces clutter and speeds up meal prep. Use clear, labeled bins on deeper shelves to group similar items. For households with kids, place frequently used snacks on a lower, easy-reach shelf at about 30 inches high.
In our experience, the best layouts leave room for flexibility. Fixed bottom and top shelves anchor the unit, but the middle section should use adjustable shelf pins every 1–2 inches to adapt as storage needs change. This is especially helpful when you start buying in bulk or switch to larger containers.
A well-thought-out layout isn’t just about looks—it’s about making every square inch work for your routine.
How to Pick the Right Shelf Heights (Without Guessing)
Getting shelf heights right starts with measuring your most-used items—not guessing. We suggest laying out your pantry staples on the floor: a stack of cereal boxes, a bottle of olive oil, a bag of flour. Measure the tallest common item, then add 1–2 inches for clearance.
For example, a standard 32-oz pasta jar stands about 11 inches tall—so a 13-inch shelf height prevents tight fits and makes restocking easier.
We’ve found that uniform spacing leads to wasted space. Instead, vary shelf heights based on content. Reserve 15-inch gaps for bulky items like paper towel rolls or large kitchen appliances. Use 8–10 inch heights for spices, canned goods, and small jars. For wine or oil bottles, a 12-inch span keeps them upright without wasted headroom.
This tailored approach maximizes vertical real estate.
When planning, use painter’s tape to mock up shelf positions on the pantry walls. This low-effort trick lets you visualize spacing before drilling. In our experience, test layouts save more time than people expect. Adjust based on how real containers fit, and leave at least one or two sets of holes for future flexibility.
Smart spacing means no more crammed shelves or awkward gaps.
Pull-Outs and Turntables: Game-Changers for Tight Spaces
Tight corner pantries or deep cabinets often become black holes where food disappears. We recommend pull-out shelves and turntables to reclaim that space. A full-extension drawer system on ball-bearing glides lets you access items from the back without digging.
For a standard 24-inch deep cabinet, a 22-inch pull-out leaves room for smooth operation and holds up to 50 pounds when properly mounted.
Lazy Susans are another tool we consistently endorse for corner storage. A 16-inch diameter turntable fits perfectly in most corner cabinets and makes spices, sauces, or oils fully visible with a simple spin. We suggest using two-tier turntables to double accessible space—perfect for stacking jars and small bottles without stacking hazards.
For narrow pantries under 18 inches wide, vertical pull-out racks are a smart alternative. These slim units slide out like a file drawer and can hold baking sheets, cutting boards, or stacked containers. In our experience, combining pull-outs with proper labeling and bin dividers transforms cramped spaces into high-efficiency zones—proving that smart hardware beats brute-force organization every time.
Pantry Shelving Materials: What Lasts and What Doesn’t
When selecting pantry shelving materials, durability and moisture resistance are top priorities. Stainless steel and powder-coated aluminum are long-term winners—we’ve seen them hold up for over 15 years in high-traffic kitchens. They resist warping, don’t absorb odors, and clean up with a quick wipe.
In humid environments, these materials outperform others significantly, making them ideal for storing canned goods and dry staples without worry.
Wood adds warmth and elegance, but only certain types stand the test of time. We recommend hard maple or birch plywood with a moisture-resistant sealant. Without proper sealing, even hardwoods can swell or develop mold near damp ingredients. In our experience, solid wood works best in climate-controlled pantries, not next to dishwashers or exterior doors where humidity fluctuates.
Don’t overlook laminated particleboard—it’s a budget-friendly option, but we’ve found it rarely lasts beyond 5–7 years under heavy use. Once the edge banding chips or the core gets wet, the shelf loses integrity. While it’s fine for light storage, we suggest upgrading to solid materials if you plan to store heavy appliances or large containers. Long-term value beats initial savings.
Smart Storage Combos That Maximize Every Inch
Efficient pantry design isn’t just about shelves—it’s about layering smart storage solutions. We recommend combining adjustable wire shelving with stackable clear bins to create flexible zones. Wire shelves allow airflow and visibility, while bins keep smaller items grouped and dust-free. This combo works especially well in deep pantries where items tend to get lost in the back.
Adding pull-out baskets on ball-bearing glides transforms awkward corners and deep cabinets. We’ve seen homeowners gain up to 40% more usable space by replacing static shelves with tiered sliding units. Place spices on the top basket, canned goods in the middle, and bulk items below—everything stays visible and within reach. These systems pay off in daily convenience.
Don’t forget vertical real estate: door-mounted racks and under-shelf baskets make use of often-wasted areas. We suggest using door racks for oils, vinegar, or wraps, while under-shelf baskets are perfect for snacks or tea bags. When paired with proper lighting, like LED strips under each shelf, these combos turn even a narrow pantry into a highly functional storage hub.
Budget vs. High-End Upgrades: What’s Worth It
| Feature | Budget Option | High-End Option | Our Verdict |
|---|---|---|---|
| Shelving Material | Laminated particleboard | Stainless steel | Worth upgrading—steel lasts 2–3x longer and handles heavy loads better |
| Shelf Adjustability | Fixed or pin-style | Continuous track with tool-free adjustment | High-end wins—flexibility pays off as storage needs change |
| Door Storage | Basic wire rack | Custom-tiered organizer with bins | Budget suffices—upgrade only if storing fragile or frequently used items |
| Lighting | Stick-on LED puck lights | Under-shelf motion-sensor strips | Moderate upgrade—motion sensors add convenience but pucks work well |
When balancing cost and quality, we’ve found that not every upgrade delivers equal value. Some budget options perform admirably, especially when paired with thoughtful organization. However, investing in high-quality core components—like shelving and adjustability—pays dividends over time. These are the elements you interact with daily, so skimping here often leads to frustration.
Shelving material is one area where we consistently recommend going high-end. Stainless steel may cost 50–70% more upfront than particleboard, but it resists moisture, never sags under weight, and is easier to clean. In humid climates or busy households, the durability difference is stark. We’ve seen budget shelves warp within two years under heavy can storage.
On the flip side, door storage and lighting can often stay budget-friendly. Stick-on LED pucks provide ample illumination for under $20, and basic wire racks hold spices or wraps securely. Save the splurge for features that impact daily usability—like smooth-gliding pull-outs or adjustable shelf systems. Prioritizing upgrades this way maximizes both function and value.
Lighting and Trim That Elevate Your Pantry’s Look
Strategic lighting transforms even the most utilitarian pantry into a polished, inviting space. We recommend installing LED strip lights under each shelf—these provide shadow-free illumination and draw attention to your storage system’s design. For added warmth, consider motion-sensor puck lights at the top or back wall, which activate as you enter.
In our experience, 3000K to 3500K color temperature delivers the most natural look for food items.
Don’t overlook the impact of trim details—simple upgrades make a lasting impression. Adding shaker-style molding around the pantry door frame or between shelves creates architectural interest without overwhelming the space. We’ve found that pairing painted decorative crown molding with a contrasting shelf lip adds depth and luxury.
Even a basic pantry feels custom when you treat it like a featured room.
For cohesive design, match the lighting and trim style to your kitchen’s aesthetic. A modern kitchen pairs well with sleek, low-profile LED channels and minimalist trim, while traditional spaces benefit from dentil molding and vintage-inspired sconces. We suggest using paint-grade poplar for trim—it’s affordable, easy to work with, and holds crisp detail.
Integrated lighting and thoughtful trim aren’t just finishes; they’re design statements.
Custom Pantry Shelving Ideas for Deep or Awkward Spaces
Deep pantries often waste valuable real estate behind front-row items, but we’ve seen clever solutions that maximize every inch. Pull-out double-decker shelves are a game-changer—installing them allows access to back items without digging. For spaces over 16” deep, we recommend stacking two 8” shelves with a central divider.
This setup works beautifully for canned goods, spices, or snacks, and increases usable space by up to 40%.
Narrow or L-shaped pantries pose unique challenges, but custom angles and tiered shelving can turn dead zones into functional areas. We suggest using lazy Susans in corner pantries—16” to 20” models fit most standard cabinets and improve accessibility. For tight vertical spaces, staggered shelf heights accommodate items like blenders or tall bottles without wasting headroom.
Adjustable shelf pins let you reconfigure as storage needs evolve.
Awkward nooks or sloped ceilings call for bespoke solutions. We’ve found that custom trapezoidal shelves fit perfectly under eaves or next to appliances. Adding labeled bins or baskets to these zones keeps odd-shaped items organized. Even a 12”-wide gap beside the fridge can become a sliding pantry drawer with the right hardware.
With thoughtful design, no space is too awkward to be useful.
Frequently Asked Questions
What is the best shelf spacing for pantry storage?
We recommend spacing shelves 12 to 15 inches apart to accommodate various container sizes. For taller items like cereal boxes or wine bottles, use 18-inch spacing on at least one or two levels. Adjustable shelf pins or sliding systems offer flexibility as storage needs change.
In our experience, uniform spacing doesn’t work for every item—customizing heights improves accessibility and maximizes space.
How can I organize a small walk-in pantry?
Maximize small pantries with vertical storage and door-mounted racks. We’ve found tiered shelves and pull-out baskets help keep items visible and accessible. Group like items in labeled bins and use stackable containers to save space. Avoid overcrowding by editing contents regularly. Utilizing every inch—from floor to ceiling—makes a noticeable difference in functionality and ease of use.
What materials are best for DIY pantry shelves?
We recommend birch plywood or solid hardwood for durability and a clean finish. For budget builds, melamine-coated particleboard resists stains and is easy to clean. In our experience, supporting shelves with heavy-duty brackets or a steel upright system prevents sagging, especially for deep shelves. Always seal wood edges in pantries to resist moisture and food odors over time.
Should pantry shelves be fixed or adjustable?
Adjustable shelves offer greater flexibility for changing storage needs. We’ve found shelf standards with movable pins allow quick reconfiguration as container sizes vary. While fixed shelves provide stability, they limit adaptability. For most households, a mix—such as fixed lower shelves for heavy appliances and adjustable upper ones—delivers the best balance of strength and customization in daily use.
How do I prevent pantry shelves from sagging?
To prevent sagging, we recommend using thicker shelf material (like 3/4-inch plywood) and limiting shelf depth to 12–14 inches. Adding a front wood trim edge or mid-span support increases rigidity. In our experience, steel support brackets spaced no more than 16 inches apart significantly improve load capacity, especially for heavy items like canned goods or appliances.
Final Thoughts
Designing functional pantry shelving doesn’t require a full renovation—small, thoughtful changes can make a big difference. We’ve found that smart spacing, durable materials, and organized systems transform even the most cluttered spaces into efficient storage hubs. Whether you’re starting from scratch or upgrading an existing pantry, prioritizing accessibility and flexibility ensures long-term success and daily ease.
A well-designed pantry simplifies meal prep and reduces waste. Start by assessing your current storage habits, then implement one or two of these ideas—like adding adjustable shelves or labeling containers. In our experience, incremental improvements build momentum. Take the first step today, and enjoy a more organized, stress-free kitchen tomorrow.