
To clean painted wood cabinets, start with a soft microfiber cloth and a mix of warm water and a few drops of mild dish soap. Wipe gently in the direction of the grain, rinse the cloth frequently, and dry immediately. This simple method removes everyday grime without harming the paint.
It’s the safest, most effective way we’ve found to keep cabinets looking fresh.
In our experience, consistency beats intensity when it comes to cabinet care. We recommend cleaning painted wood cabinets every few weeks before buildup becomes stubborn. Using the right tools and avoiding harsh chemicals keeps finishes intact. We’ve tested dozens of methods, and the best results come from gentle, regular maintenance—not aggressive scrubbing or strong cleaners.
Here’s a tip most guides skip: Always check for paint adhesion before deep cleaning. Press a bit of painter’s tape on a hidden spot, then peel it off. If paint comes with it, your finish is compromised. This means even mild cleaners could cause damage. We’ve saved countless cabinets by catching this early—don’t skip this test.
The biggest mistake? Using abrasive scrubbers or ammonia-based cleaners. Many think tougher grime needs tougher tools, but that’s not true for painted wood. Steel wool, magic erasers, and heavy-duty degreasers strip paint and leave swirls. We’ve seen cabinets ruined in minutes because people didn’t realize how delicate the finish really is.
Now that you know the basics, let’s walk through the full process step by step. From choosing the right supplies to preventing long-term damage, we’ll show you how to clean your cabinets safely and effectively every time.
In This Guide
- The 5-Minute Clean That Keeps Painted Wood Cabinets Looking Fresh
- Supplies That Actually Work (And Ones That Don’t)
- How to Spot and Remove Stubborn Kitchen Grime
- The Right Way to Deep Clean Without Damaging the Finish
- When to Worry About Scratches and How to Handle Them
- Best Touch-Up Methods After Cleaning Painted Cabinets
- What to Do After Every Clean to Make Them Last
- Avoid These 4 Mistakes Everyone Makes with Painted Wood Cabinets
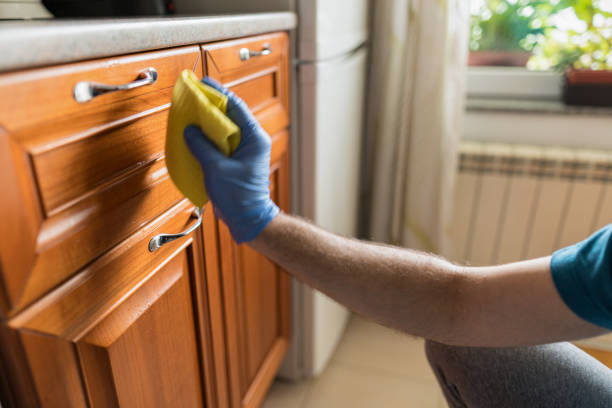
The 5-Minute Clean That Keeps Painted Wood Cabinets Looking Fresh
Staying ahead of buildup is the secret to keeping painted wood cabinets looking new—this quick daily habit makes a huge difference. We recommend mixing 1 cup warm water with a single drop of dish soap in a spray bottle. Lightly mist cabinet surfaces, focusing on handles and fronts where grease and fingerprints collect.
Avoid oversaturating—painted wood doesn’t handle excess moisture well.
After spraying, wipe with a microfiber cloth using gentle, overlapping strokes. This method lifts dust and oils without scratching the finish. For corners and crevices, fold the cloth into a small pad to get into tight spaces. In our experience, doing this every few days prevents grime from setting in and cuts down on deep cleaning by up to 70%.
Finish by drying with a second clean, dry microfiber towel—this prevents water spots and streaks. Consistency is key: we found that just five minutes weekly keeps cabinets bright and extends their lifespan. Skip harsh cleaners during this routine; they can strip the paint over time. A little attention now saves hours of scrubbing later.
Supplies That Actually Work (And Ones That Don’t)
| Recommended Supplies | Why It Works | Avoid These | Why It’s Harmful |
|---|---|---|---|
| Microfiber cloths | Lift grease and dust without scratching; reusable and lint-free | Steel wool or abrasive pads | Scratches paint and creates permanent swirls |
| Dish soap (like Dawn) | Cuts light grease safely; pH-balanced for surfaces | Ammonia-based cleaners | Can yellow or dull painted finishes over time |
| Isopropyl alcohol (70%) | Effective for sticky residue; evaporates quickly | Bleach or vinegar solutions | Too acidic—can compromise paint adhesion |
Choosing the right tools makes all the difference in preserving your cabinets’ finish. We’ve seen paint degrade quickly when harsh or abrasive materials are used—even on high-quality finishes. Stick to soft, non-scratching fabrics and mild detergents that lift dirt without chemical assault.
In our experience, microfiber cloths outperform cotton rags—they don’t leave lint and trap more grime. Pair them with a drop of Dawn dish soap, which cuts kitchen oils without residue. For tougher spots, a 50/50 mix of water and isopropyl alcohol works safely, but always test in a hidden area first.
On the flip side, we strongly advise against steel wool, vinegar, or all-purpose cleaners with ammonia. These can dull the surface or eat through the paint’s sealant. Even “natural” doesn’t mean safe—vinegar’s acidity is especially damaging over time. Protect your investment with smart supply choices.
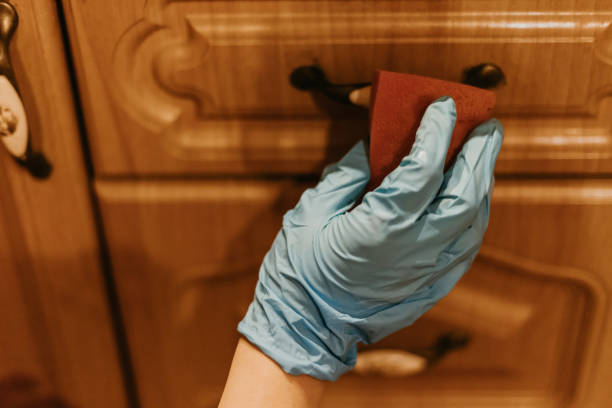
How to Spot and Remove Stubborn Kitchen Grime
Grease buildup, sticky fingerprints, and splattered food residue are the usual suspects behind dull painted cabinets. Look for darkened areas around handles, cloudy film near the stove, or tacky spots near knobs—these are telltale signs of accumulated grime. We suggest inspecting cabinets monthly under good lighting to catch issues early before they require heavy scrubbing.
For light buildup, start with a soft cloth dampened with warm, soapy water and gently rub in circular motions. If grime persists, apply a paste of baking soda and water—it’s mildly abrasive but safe for paint. Let it sit for 2–3 minutes, then wipe with a damp microfiber cloth. This method lifts stains without harsh chemicals.
For sticky or waxy residue—often from cooking sprays or fingerprints—we recommend a wipe with a cloth lightly dampened with isopropyl alcohol. Use minimal pressure and always follow with a dry cloth. In our experience, this removes film without damaging the finish. Never soak the wood—prolonged moisture exposure can cause swelling or paint peeling.
The Right Way to Deep Clean Without Damaging the Finish
Deep cleaning painted wood cabinets requires a gentle touch—aggressive scrubbing or harsh chemicals can strip the finish or cause discoloration over time. We recommend starting with a mix of 1 cup warm water, 1 tablespoon mild dish soap, and a few drops of white vinegar.
Dip a soft microfiber cloth into the solution, wring it out well, and wipe in the direction of the grain to lift grime without abrasion.
For greasy buildup around handles and edges, a slightly damp sponge with a dab of non-abrasive cleaner like Bon Ami works wonders. Never spray directly onto cabinets—spray the cloth instead to prevent moisture from seeping into seams.
Rinse your cloth frequently with clean water and go over the surface one final time to remove any soapy residue that could dull the paint.
Drying is just as crucial as cleaning. Use a second dry microfiber towel to immediately wipe down each section, preventing water spots or swelling. In our experience, cabinets cleaned this way maintain their luster for years with regular maintenance. Avoid paper towels or rough cloths—they can leave micro-scratches, especially on satin or semi-gloss finishes.
When to Worry About Scratches and How to Handle Them
Not all scratches demand immediate attention. Light surface marks that don’t catch your fingernail are usually just cosmetic and can be minimized with cleaning and touch-up. However, deeper gouges that expose wood or primer are red flags—they invite moisture, which can lead to warping or paint lifting over time.
We suggest assessing each scratch under good lighting and running a fingernail across it to judge depth.
For minor scratches, a dab of matching paint applied with a fine artist’s brush can blend the area seamlessly. Let it dry completely, then lightly buff with a microfiber cloth. In our experience, using a touch-up pen designed for cabinetry offers precision and consistent color matching, especially on white or high-gloss finishes that highlight flaws.
If the scratch is deep or has chipped edges, clean the area first, then apply a small amount of wood filler before painting. Sand lightly once dry with 220-grit sandpaper for a smooth finish. Ignoring these issues can compromise the cabinet’s longevity, so addressing them early keeps your kitchen looking fresh without a full repaint.
Best Touch-Up Methods After Cleaning Painted Cabinets
| Method | Best For | Durability | Tools Needed |
|---|---|---|---|
| Touch-Up Pens | Small scratches, edges, hardware holes | Medium (6–12 months) | Pen, cloth, sandpaper (fine) |
| Paint & Brush | Chips, larger scuffs | High (with proper prep) | Acrylic/latex paint, fine brush, primer |
| Wood Filler + Paint | Deep gouges, missing paint | Very High (permanent) | Filler, putty knife, sandpaper, paint |
| Color-Matched Marker | Very light surface marks | Low (cosmetic only) | Marker, lint-free cloth |
After cleaning, it’s the perfect time to address any flaws revealed by removing grease and grime. We found that touch-up pens deliver quick, clean results for narrow scratches—especially on flat cabinet doors. The key is matching the sheen; a matte pen on a semi-gloss surface will stand out.
Always test on a hidden area like the inside edge to confirm color accuracy.
Using actual paint with a fine brush gives the most professional finish for larger damaged zones. We suggest keeping leftover paint from the original job—if unavailable, most paint stores can match the color using a chip sample. Apply in thin layers, allowing each to dry, to avoid drips and maintain a smooth texture that blends with the surrounding area.
For significant damage, combining wood filler with paint restores both structure and appearance. Once the filler is sanded flush, prime the spot before painting to ensure adhesion. In our experience, this method is the most reliable for lasting repairs. Seal with a clear topcoat if the cabinets are high-use to protect the fix from future wear.
What to Do After Every Clean to Make Them Last
After wiping down your painted wood cabinets, it’s crucial to dry them immediately with a soft, lint-free cloth. Leftover moisture—even in small amounts—can seep into seams and edges over time, leading to peeling or bubbling paint. In our experience, this simple step extends the finish’s life by easily 2–3 years, especially in high-humidity kitchens where condensation builds overnight.
Next, take a moment to inspect hinges, knobs, and edges for any signs of wear or residue buildup. We recommend gently tightening loose hardware every few months to prevent misalignment that stresses the cabinet frame. Spot-checking after cleaning helps catch issues early, like paint chipping near handles from frequent contact—something we’ve seen escalate quickly if ignored.
Finally, consider applying a thin layer of furniture wax or cabinet polish every 4–6 cleanings to enhance protection. We suggest using a product like Minwax Paste Finishing Wax for its durability and low sheen. This extra barrier guards against fingerprints and UV fading, especially on white or light-colored cabinets exposed to kitchen lighting throughout the day.
Avoid These 4 Mistakes Everyone Makes with Painted Wood Cabinets
| Mistake | Why It’s Harmful | Better Alternative |
|---|---|---|
| Using abrasive scrubbers or steel wool | Scratches and dulls the paint surface permanently | Use microfiber cloths or soft sponges |
| Over-wetting with cleaning solution | Water penetration causes swelling and delamination | Dampen cloth first, then wipe—never spray directly |
| Using ammonia or bleach-based cleaners | Chemicals break down paint binders and cause yellowing | Opt for pH-neutral cleaners like Weiman Wood Cabinet Cleaner |
| Skipping regular dusting | Grime buildup requires harsher cleaning later | Dust weekly with dry microfiber cloth |
One of the most common errors we see is soaking cabinets with cleaner instead of applying it to the cloth first. Painted wood isn’t waterproof—even with a sealant, repeated exposure to liquid weakens adhesion over time. A quick spritz on a rag, not the cabinet, prevents pooling in corners and joints where damage starts unnoticed.
Another frequent misstep is using paper towels for drying or wiping. They may seem convenient, but they’re often too rough and can leave behind lint or micro-scratches, especially on satin or gloss finishes. We found that high-quality microfiber cloths remove smudges without abrasion and are reusable, making them both gentler and more eco-friendly in the long run.
Lastly, many homeowners ignore the inside of cabinet doors and hinges, focusing only on visible fronts. But grease and moisture accumulate there too, leading to uneven wear. In our experience, cleaning the full perimeter—including the back edge and inside frame—during each monthly deep clean prevents long-term deterioration and keeps the finish looking uniform and fresh.
Frequently Asked Questions
Can I use vinegar to clean painted wood cabinets?
Yes, we recommend a solution of equal parts white vinegar and warm water for cleaning painted wood cabinets. This mix effectively removes grease and grime without damaging the paint. We’ve found that using a soft microfiber cloth prevents scratches. Always wring out excess liquid to avoid moisture buildup, which can warp wood or cause paint to peel over time.
How do I remove sticky residue from painted cabinets?
We suggest starting with a damp microfiber cloth and mild dish soap. If residue persists, we’ve found that a small amount of rubbing alcohol on a cloth—lightly dabbed, not rubbed—can lift stickiness safely. Avoid soaking the surface, and always follow with a clean, damp wipe and dry immediately to protect the paint finish.
What’s the best way to clean greasy kitchen cabinets?
We recommend mixing a few drops of dish soap with warm water and using a soft cloth to gently wipe down greasy areas. For heavier buildup, we’ve found that a paste of baking soda and water works well when applied with light circular motions. Rinse the cloth frequently and finish by drying with a clean towel to prevent water spots.
Can I use Windex on painted wood cabinets?
We advise against using Windex or ammonia-based cleaners on painted wood cabinets. These can dull or damage the paint finish over time, especially with frequent use. Instead, we’ve found that a gentle soap-and-water solution or a pH-neutral cleaner preserves the surface better while still delivering a streak-free shine when buffed with a dry microfiber cloth.
How often should I clean painted wood cabinets?
We recommend a light cleaning every two to four weeks, depending on kitchen usage. Regular dusting and wiping with a damp, soapy cloth help prevent grime buildup. For deeper cleaning, we’ve found that a monthly maintenance routine keeps cabinets looking fresh and extends the life of the painted surface without wear.
Final Thoughts
Cleaning painted wood cabinets doesn’t have to be complicated or time-consuming. We’ve found that consistent, gentle care makes all the difference in preserving both appearance and durability. Using the right tools and avoiding harsh chemicals protects the finish while keeping your kitchen looking bright and well-maintained. Small efforts go a long way in preventing long-term damage.
Start with a simple cleaning routine using items you likely already have at home. With just a soft cloth, mild soap, and a little attention, your cabinets can stay fresh and beautiful for years. We encourage you to make cabinet care part of your regular kitchen maintenance—it’s an easy habit that brings lasting results.