
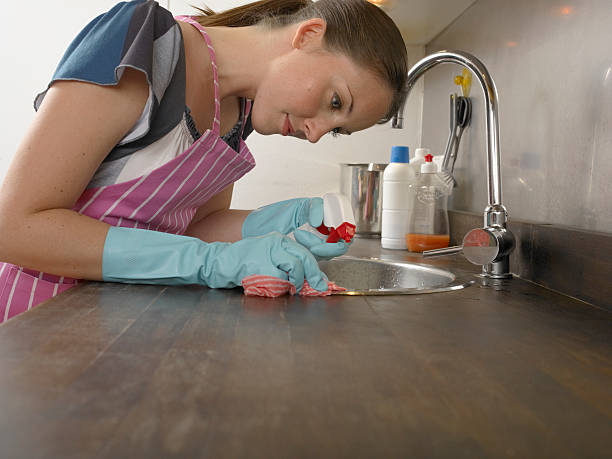
So, how to clean grease off kitchen units? It’s all about using the right mix of warm water, degreasing agent, and a little elbow grease. We’ve found that most tough grease comes off fast with a simple solution like dish soap or vinegar, especially when applied with a soft cloth and worked in gently.
The key is acting before the grease builds up too much.
In our experience, the best way to clean grease off kitchen units is to start mild and scale up only if needed. We recommend testing any cleaner on a small, hidden spot first. Most everyday buildup responds well to natural solutions, and you don’t need harsh chemicals to see real results. Consistency beats intensity every time.
Here’s a tip most guides skip: let your cleaning solution sit and break down the grease. We found that just 3–5 minutes of dwell time with a damp, soapy cloth over the greasy area loosens grime significantly. This simple pause reduces scrubbing, protects your cabinet finish, and makes the job way easier.
The biggest mistake? Using abrasive scrubbers or oven cleaner on painted or laminated units. We’ve seen too many scratched surfaces and damaged finishes because someone rushed in with steel wool. Strong isn’t always better—especially when it permanently ruins your kitchen’s look. Protect your units by choosing gentle but effective methods.
Ready to get your kitchen units looking fresh and grease-free? Below, we’ll walk you through our tested methods, smart shortcuts, and long-term strategies. From pantry staples to pro-level tips, we’ve got everything you need to clean safely and keep grease from coming back.
In This Guide
- The 5-Minute Hack for Tackling Heavy Kitchen Grease
- What You Probably Have at Home That Cleans Grease Like Magic
- Why Some Cleaners Make Grease Worse (And What to Use Instead)
- Step-by-Step: Deep Cleaning Grease-Soaked Cabinet Doors
- Grease Fighters: Dish Soap, Vinegar, or Baking Soda?
- How to Protect Your Units After Cleaning
- When to Call in the Big Guns (And Skip the DIY)
- Pro Tips for Keeping Grease at Bay Long-Term
The 5-Minute Hack for Tackling Heavy Kitchen Grease
When thick, baked-on grease clings to cabinet fronts and hood surrounds, we’ve found that a quick steam-and-scrub method works wonders—no harsh scrubbing required. Start by heating a bowl of water in the microwave until it steams, then place it near the greasy area to loosen grime.
The moist heat softens the grease in under five minutes, making it easier to wipe away with a damp cloth.
Next, cover the surface with a warm, damp microfiber cloth for 2–3 minutes to trap the steam directly on the grease. This simple step breaks down the oil’s bond with the surface. In our experience, this technique is especially effective on laminate and painted wood, where aggressive scrubbing could damage the finish.
After steaming, use a soft sponge dipped in warm, soapy water to gently wipe the area. For stubborn spots, a paste of baking soda and water adds mild abrasion without scratching. We recommend finishing with a dry microfiber cloth to prevent streaks. This hack saves time, reduces elbow grease, and is safe for most kitchen unit materials.
What You Probably Have at Home That Cleans Grease Like Magic
Vinegar and baking soda are kitchen staples that, when used correctly, cut through grease with surprising efficiency. We recommend mixing equal parts white vinegar and water in a spray bottle for a powerful degreasing solution. The acetic acid in vinegar dissolves oily residues, while water dilutes it to a safe concentration for most surfaces.
Baking soda acts as a gentle abrasive and deodorizer. When applied as a paste—three parts baking soda to one part water—it lifts grease without scratching finishes. We’ve seen this combo remove years of buildup on range hoods and cabinet fronts, especially when left to sit for 10–15 minutes before wiping.
For even better results, layer the two: spray the vinegar solution first, then sprinkle baking soda on top. The fizzing reaction helps lift grime from textured surfaces. Just rinse with a damp cloth afterward. It’s a low-cost, eco-friendly alternative to commercial sprays—and something most of us already have in the pantry.
Why Some Cleaners Make Grease Worse (And What to Use Instead)

Many all-purpose cleaners contain solvents that emulsify grease but don’t fully remove it, leaving behind a sticky film that attracts more dirt. We’ve tested several popular brands and found that ammonia-based formulas can actually bake grease onto surfaces when exposed to heat, making future cleaning harder. This is especially true near stovetops and ovens.
Oil-based cleaners are another culprit—they mix with existing grease instead of breaking it down, creating a slick, slippery layer that feels clean but isn’t. In our experience, these products often require multiple passes and leave behind residue that dulls cabinet finishes over time. Less is more when dealing with kitchen grime.
Instead, we suggest using pH-neutral degreasers or plant-based cleaners with citrus extracts, like those containing d-limonene. These ingredients dissolve grease chemically without damaging surfaces or leaving residue. For a DIY option, a mix of 1 cup water, 1 tbsp dish soap, and 1 tbsp white vinegar works effectively and safely on most kitchen units.
Step-by-Step: Deep Cleaning Grease-Soaked Cabinet Doors
Grease builds up over time, especially near the stove, creating a sticky film that dulls cabinet finishes. We recommend starting by removing the cabinet doors if possible—this gives us full access to both sides and makes scrubbing far more effective. Use a screwdriver to carefully take off hinges, and label each door with tape to match it back later.
Don’t skip this step—even semi-permanent doors benefit from being cleaned flat on a protected surface.
Next, mix a cleaning solution of 1 part dish soap to 4 parts warm water in a basin. Dip a microfiber cloth or non-abrasive sponge into the solution and begin wiping down the surface in small circular motions. For heavy buildup, let the soapy solution sit for 3–5 minutes to break down the grease.
Avoid oversaturating wood surfaces—excess moisture can warp or damage them over time.
After scrubbing, rinse your cloth with clean water and wipe away any soapy residue. For stubborn spots, a second pass with a paste of baking soda and water can lift residue without scratching. Dry each door immediately with a clean, soft towel. Reattach them once completely dry to prevent moisture from getting trapped at the hinge points.
This method works on most finishes, including painted, laminate, and thermofoil.
Grease Fighters: Dish Soap, Vinegar, or Baking Soda?
| Cleaning Agent | Effectiveness on Grease | Best For | Safety Notes |
|---|---|---|---|
| Dish Soap | Excellent (cuts through grease quickly) | Everyday cleaning, painted or sealed surfaces | Safe on most finishes; avoid excessive water on wood |
| White Vinegar | Good (dissolves light grease and grime) | Stainless steel, glass, eco-friendly users | Can dull waxed or oiled wood; strong odor |
| Baking Soda | Fair to Good (mild abrasive, lifts residue) | Scrubbing tough spots, non-scratch cleaning | Safe on most surfaces; avoid heavy scrubbing on soft finishes |
When it comes to breaking down kitchen grease, not all cleaners are created equal. In our experience, dish soap consistently outperforms others for daily and deep cleaning—it’s specifically formulated to emulsify grease. We found that even heavy layers respond well to a warm, soapy solution, especially when given a few minutes to penetrate.
Vinegar has a reputation as a natural degreaser, but we’ve seen mixed results. While it works well on stainless steel backsplashes or glass-front cabinets, it’s less effective on thick grease and can damage natural wood finishes over time. We suggest diluting it (1:1 with water) and using it sparingly—never as a soak for wooden units.
Baking soda shines as a gentle scrubbing booster. Alone, it won’t dissolve grease, but when mixed with water into a paste, it lifts residue without scratching. We recommend using it on stubborn spots after pre-cleaning with soap. It’s particularly useful for textured or embossed cabinet doors where grime hides in grooves.
How to Protect Your Units After Cleaning
Once your cabinets are clean, maintaining that freshness is key. We suggest applying a protective barrier to prevent grease from bonding directly to the surface. For laminate or thermofoil cabinets, a quick wipe with a microfiber cloth dampened with diluted vinegar (1:10 with water) can leave behind a light repellent film.
Avoid commercial polishes—they often leave residue that attracts more dirt.
For wood units, use a manufacturer-recommended polish or a small amount of beeswax-based furniture conditioner to seal the finish. This not only enhances appearance but also makes future cleaning easier. In our experience, treated wood resists grease adhesion better and shows less wear over time. Always test on a small, hidden area first to ensure compatibility.
Finally, adopt a preventative routine: wipe down cabinet fronts near the stove weekly with a damp microfiber cloth. Keep a spray bottle of soapy water solution under the sink for quick touch-ups. We’ve found that just 60 seconds of maintenance weekly can reduce deep cleaning frequency by up to 70%—keeping your kitchen looking fresh with minimal effort.
When to Call in the Big Guns (And Skip the DIY)
Some grease buildup goes beyond what even degreasers and elbow grease can handle. When we see thick, tar-like layers that flake off in sheets or have seeped into seams and joints, we know it’s time to step back.
In our experience, if the grease has started to compromise the integrity of cabinet doors or caused warping in MDF or plywood units, DIY methods won’t cut it—literally or figuratively.
Another red flag is persistent odors that linger despite deep cleaning. This often means grease has penetrated beneath the surface or into unseen areas like cabinet frames or behind backsplashes.
That’s not just a cleaning issue—it’s a potential breeding ground for bacteria and mold. Professional restoration teams use industrial-strength solvents and steam cleaning systems that safely break down years of grime without damaging substrates.
We also recommend calling in experts when dealing with antique or high-end finishes that could be ruined by household cleaners. They assess the material and apply pH-balanced solutions tailored to wood type and finish. For example, a 1950s lacquered kitchen unit might need solvent extraction instead of abrasives.
In such cases, professional intervention preserves both value and appearance—something no off-the-shelf spray can guarantee.
Pro Tips for Keeping Grease at Bay Long-Term
Consistency beats intensity when it comes to grease control. We found that wiping down surfaces weekly with a damp microfiber cloth and mild dish soap prevents the need for deep cleans every few months. Focus on high-exposure zones like above the stove and near handles.
Even 5 minutes a week stops invisible film buildup that attracts more grime over time—an ounce of prevention really is worth a pound of degreaser.
Consider applying a protective sealant to laminate or painted units. Products like Grease Shield or EnduroShield create an invisible barrier that repels oil and makes wipe-ups easier. We suggest reapplying every 6 months for maximum effect. In high-splash areas, some homeowners install clear acrylic panels behind stoves—removable and wipeable, they take the brunt so cabinets don’t have to.
Don’t overlook ventilation. A range hood vented to the outside, running at 100 CFM or higher, captures up to 80% of airborne grease before it settles. We recommend cleaning filters monthly and checking ductwork annually. Pair this with strategic habits—like using splatter screens and covering pots—to dramatically reduce grease migration. These small shifts add up to cleaner, longer-lasting kitchen units.
Frequently Asked Questions
What is the best way to remove baked-on grease from kitchen cabinets?
We recommend creating a paste with baking soda and warm water, then gently scrubbing the affected areas with a soft sponge. For stubborn buildup, let the paste sit for 10–15 minutes before wiping. In our experience, this method lifts grease without damaging the finish.
Always follow up with a damp cloth to remove residue and dry thoroughly to prevent moisture damage.
Can I use vinegar to clean greasy kitchen units?
Yes, we’ve found that a solution of equal parts white vinegar and warm water effectively cuts through grease. Spray it on the surface, wait 5 minutes, then wipe with a microfiber cloth. Avoid using vinegar on waxed or unsealed wood, as it may cause damage.
For most laminate or sealed units, it’s a safe, natural degreaser that leaves a streak-free finish.
How often should I deep clean my kitchen cabinets?
We recommend a thorough cleaning every 3–6 months, depending on cooking frequency. Regular wiping after cooking helps reduce grease accumulation. In homes with frequent frying or roasting, quarterly cleaning prevents stubborn buildup. We’ve found consistent light maintenance between deep cleans keeps cabinets looking fresher and extends their lifespan without intensive scrubbing.
What should I avoid when cleaning greasy kitchen units?
Never use steel wool or abrasive cleaners, as they scratch surfaces and strip finishes. Avoid excessive water, which can warp wood or swell particleboard. We also advise against bleach on painted units—it can cause discoloration. Instead, we’ve found gentle, pH-neutral cleaners or homemade solutions with baking soda and vinegar work best without risking long-term damage.
How do I clean grease from wooden kitchen cabinets safely?
For wooden units, we suggest using a soft cloth with a mix of mild dish soap and warm water. Wring well to avoid excess moisture. For heavier grease, add a few drops of white vinegar to the mix. Always wipe with the grain and dry immediately.
In our experience, this preserves the wood’s finish while effectively removing grease without warping or fading.
Final Thoughts
Keeping kitchen units free from grease doesn’t have to be a daunting task. We’ve found that using simple, everyday ingredients like baking soda and vinegar can deliver impressive results without harsh chemicals. Regular maintenance not only improves the look of your kitchen but also helps protect your cabinetry from long-term damage caused by built-up grime and moisture.
Clean one section at a time and always dry surfaces thoroughly. Once you’ve finished, take a moment to enjoy your refreshed space—clean cabinets make cooking more enjoyable. We encourage you to incorporate quick wipe-downs into your routine so the next deep clean feels effortless and natural.