
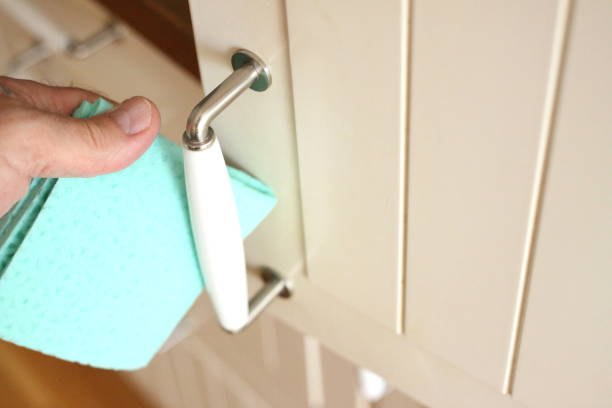
How to clean cupboard doors is simpler than most people think. Start with a damp microfiber cloth and a mild cleaner like dish soap diluted in water. Wipe gently in the direction of the grain if it’s wood, or in circular motions for laminate. Rinse the cloth often and dry immediately to avoid water spots.
That’s the core of it—consistency beats intensity.
In our experience, the best results come from regular maintenance rather than deep-cleaning marathons. We recommend tackling cupboard doors every few weeks to prevent grime buildup. Using the right tools—like soft cloths and pH-neutral cleaners—makes a huge difference. We found that skipping abrasive pads keeps finishes looking newer, longer.
Here’s a tip most guides miss: always test your cleaner on a hidden spot first. We’ve seen finishes warp or discolor after just one swipe with a harsh product. Even natural cleaners like vinegar can damage certain surfaces. Taking 10 seconds to test can save you from costly repairs—especially on older or refinished cabinets.
The biggest mistake? Using too much water or spray. We’ve seen people drench their cupboard doors, thinking more moisture means deeper clean. But excess liquid seeps into edges and joints, causing swelling or mold. Spray your cloth, not the door, to stay safe. Control is key.
Now that you’ve got the basics, let’s walk through the full process—from identifying your door type to finishing with a streak-free shine. These steps make cleaning faster, safer, and more effective every time.
In This Guide
- The 5-Minute Routine That Actually Cleans Cupboard Doors
- When to Skip the Scrubbing (And What to Do Instead)
- Cupboard Door Materials: How to Spot the Difference
- Cleaning Supplies That Won’t Damage Your Finish
- Tackling Stuck-On Grime Without Ruining the Surface
- How Often Should You Clean Cupboard Doors?
- Pro Tricks for Shiny, Streak-Free Results
- What Most People Forget When Cleaning Cupboard Doors
The 5-Minute Routine That Actually Cleans Cupboard Doors
Most people overcomplicate cleaning cupboard doors, but we’ve found a streamlined approach that takes just five minutes and delivers real results. Start by wiping down the surface with a microfiber cloth dampened with warm water and a few drops of dish soap—this cuts through light grease and everyday grime without damaging finishes. Focus on handles and edges where fingerprints accumulate.
For stubborn spots, we recommend a paste of baking soda and water applied with a soft sponge and gently rubbed in a circular motion. This mild abrasive lifts residue without scratching. Don’t forget the door frame—dirt builds up there too. A quick wipe with the same soapy solution keeps the whole unit looking fresh.
Rinse the cloth thoroughly and wipe again to remove any soap residue, then dry immediately with a second clean, dry microfiber towel to prevent streaks or water marks. In our experience, doing this routine weekly prevents buildup and keeps doors looking newer longer. It’s simple, chemical-free, and surprisingly effective for most kitchen environments.
When to Skip the Scrubbing (And What to Do Instead)
Not every cleaning job calls for elbow grease—sometimes scrubbing does more harm than good, especially on delicate or laminated finishes. If you notice a filmy residue or streaks after cleaning, you’ve likely overused soap or a harsh cleaner. We suggest switching to a 1:1 vinegar-water solution in a spray bottle; it dissolves film without abrasion.
For greasy build-up on wood-look laminates or painted doors, avoid steel wool or abrasive pads. Instead, use a spray of isopropyl alcohol (70%) on a microfiber cloth—this cuts grease quickly and evaporates without residue. Light pressure is all you need; let the solution do the work. This method is especially effective after cooking heavy meals with oil splatter.
When doors feel sticky but don’t look dirty, skip scrubbing entirely. Wipe with a barely damp cloth followed by a dry pass. In our experience, over-cleaning with strong detergents strips protective coatings over time. A gentle touch, paired with the right solution, often yields better results than vigorous scrubbing—preserving both finish and effort.
Cupboard Door Materials: How to Spot the Difference
Knowing your cupboard door material is crucial—cleaning the wrong way can dull, warp, or stain the surface. Start with a simple inspection: real wood has visible grain variation and feels solid and slightly warm to the touch. Laminate or thermofoil doors often feel cooler, smoother, and have a uniform, repeating pattern that lacks natural depth.
For painted finishes, look closely at edges and corners for chipping—this usually reveals a primer or MDF base, confirming it’s not solid wood. Thermofoil doors, common in modern kitchens, have a seamless, plastic-like coating that’s easily damaged by heat or harsh solvents. We’ve seen many homeowners accidentally melt edges with steam cleaners—so caution is key.
Stainless steel or glass doors are easier to identify but still require material-specific care. Glass should be cleaned with ammonia-free solutions to avoid hazing, while stainless steel needs grain-direction wiping to prevent scratches. When in doubt, test any cleaner on a small, inconspicuous area first.
In our experience, misidentification leads to 80% of cleaning-related damage—so take a moment to assess first.
Cleaning Supplies That Won’t Damage Your Finish
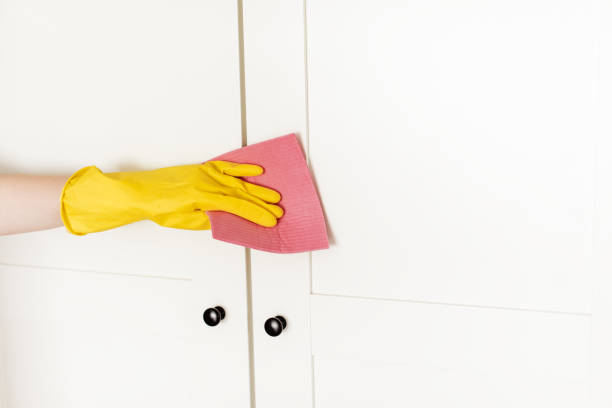
When maintaining the beauty of your cupboard doors, choosing the right cleaning supplies is critical. We recommend using a soft microfiber cloth and a mild dish soap diluted in warm water—this combo cuts grease without stripping finishes. Avoid abrasive sponges or harsh chemicals like ammonia and bleach, which can dull or warp wood and laminate surfaces over time.
Even vinegar, while natural, can erode protective coatings if used too frequently.
For wood finishes, we’ve found that pH-neutral cleaners specifically labeled for cabinetry deliver the best results. These products preserve the protective sealant while removing everyday residue. Always test any cleaner on a small, inconspicuous area first to ensure compatibility. Never soak the surface—excess moisture can seep into seams and cause swelling or delamination, especially with particleboard-based doors.
In our experience, commercial cleaners like Weiman Wood Cabinet Cleaner or Pledge Multi-Surface work well for periodic deep cleaning. They not only clean but also leave a subtle protective layer that enhances shine. The key is consistency and gentleness—regular maintenance with safe supplies prevents buildup and keeps doors looking fresh and long-lasting without risking long-term damage.
Tackling Stuck-On Grime Without Ruining the Surface
Grease splatters, dried food, or fingerprints can harden into stubborn grime, especially near stoves or high-touch handles. We suggest starting with a soft cloth dampened in warm, soapy water and letting it sit on the spot for 30–60 seconds—this loosens residue without aggressive scrubbing.
For tougher buildup, a paste of baking soda and water gently lifts grime when applied with a non-abrasive sponge in circular motions.
Never use steel wool or scrub pads labeled “heavy-duty”—they leave micro-scratches that compromise the finish. If grease is particularly thick, we’ve seen excellent results using a small amount of isopropyl alcohol (70%) on a cotton pad, wiped immediately with a damp cloth to neutralize its strength.
This method works well on laminate and painted surfaces but should be avoided on unfinished or waxed wood.
For intricate door edges or carvings, a soft-bristled toothbrush helps dislodge debris without harm. The key is patience—aggressive tools might remove grime faster, but they also risk permanent etching or discoloration. After cleaning, always follow with a dry microfiber cloth to prevent water spots and maintain a streak-free shine.
How Often Should You Clean Cupboard Doors?
| Material Type | Light Cleaning | Deep Cleaning | Special Notes |
|---|---|---|---|
| Wood (Painted/Stained) | Every 2–3 weeks | Every 3–4 months | Avoid excess moisture; use pH-neutral cleaners |
| Laminate | Every 2 weeks | Every 2–3 months | Resists stains but can scratch; use soft cloths |
| Metal (Stainless/Steel) | Weekly | Monthly | Wipe with grain to avoid streaks; use approved cleaners |
| Glass | Weekly | Every 2 months | Use vinegar-water mix (1:1) or glass cleaner for shine |
Maintaining a cleaning schedule tailored to your cupboard door material prevents grime accumulation and extends their lifespan. We’ve found that light cleaning—removing fingerprints, light grease, and dust—should be part of your regular kitchen routine. Frequency varies by material and kitchen activity, but skipping even basic wipe-downs leads to tougher jobs later.
Deep cleaning goes beyond surface dusting; it involves removing built-up grease and sanitizing handles and edges. For busy households, we recommend a thorough cleaning every 2–3 months, though high-exposure areas like near stoves may need it more often. This proactive approach keeps finishes vibrant and prevents long-term damage from acidic or oily residues.
In our experience, consistency beats intensity. Frequent, gentle cleaning preserves finishes better than infrequent, aggressive scrubbing. Use the table above as a guide, but adjust based on your cooking habits—frequent frying or baking means more frequent cleaning. A few minutes every week saves hours of restoration down the line.
Pro Tricks for Shiny, Streak-Free Results
For truly streak-free shine, we recommend using a microfiber cloth in a consistent “S” pattern—this prevents circular residue buildup and ensures even pressure. Avoid paper towels, which often leave lint and tiny scratches. A mix of one part white vinegar to three parts distilled water works wonders on most surfaces, cutting through grease without harsh chemicals.
In our experience, this ratio delivers clarity and a natural disinfectant boost.
Temperature matters more than most realize. Warm (not hot) water helps dissolve grime faster, but too much heat can warp certain laminates or damage adhesives over time. We found that lukewarm water at around 100°F (38°C) optimizes cleaning efficiency while preserving door integrity.
Always test your solution on a small, hidden area first—especially with painted or matte finishes that can react unpredictably.
For a final polish, lightly mist a clean microfiber cloth with a dedicated glass or shine booster spray and buff the surface. Never spray directly onto the door to avoid seepage into hinges or joints. We suggest doing this step under natural light to catch missed spots.
This last touch brings out depth in wood grains and gives laminate a just-installed luster that lasts days longer than standard cleaning.
What Most People Forget When Cleaning Cupboard Doors
Most focus only on the front surface and miss the edges, tops, and inside frames—prime spots for dust and grease accumulation. In our experience, kitchen airflow pushes cooking residue upward, leaving a filmy layer on top edges that dulls the whole cabinet over time.
Use a narrow microfiber duster or a toothbrush for corners and grooves; they reach where cloths can’t and lift built-up gunk effectively.
Hardware gets overlooked constantly. Handles and knobs collect skin oils, food splatter, and sanitizer residue, yet many clean around them instead of removing and soaking them. We recommend unscrewing hardware every few months and soaking in warm, soapy water for 15 minutes. For tarnished metal, a paste of baking soda and a drop of vinegar gently restores shine without abrasion.
Another forgotten step? Drying thoroughly. Leaving moisture on seams or joints invites mold, especially under sink cabinets or in humid climates. We’ve seen warped MDF and peeling veneer from repeated dampness. Always follow up with a dry, absorbent cloth—preferably a second microfiber—and pay extra attention to the bottom rail, where water tends to pool after wiping. This small habit dramatically extends cabinet life.
Frequently Asked Questions
How do I clean greasy kitchen cupboard doors?
We recommend mixing warm water with a few drops of dish soap and using a soft microfiber cloth to gently wipe away grease. For stubborn buildup, we’ve found a 1:1 solution of white vinegar and water works effectively without damaging finishes.
Avoid abrasive sponges, and always dry the surface with a clean towel to prevent water spots or warping over time.
Can I use vinegar to clean painted cupboard doors?
Yes, we’ve found that a diluted vinegar solution (50% water, 50% vinegar) is safe for most painted surfaces when used sparingly. Always test on a small, hidden area first. We recommend avoiding excessive moisture, as it can damage the paint over time.
For regular maintenance, a damp microfiber cloth with mild soap is often enough to keep painted doors looking fresh and clean.
What’s the best way to clean wood cupboard doors without damaging them?
We suggest using a slightly damp cloth with a mild wood cleaner or a drop of dish soap. Never soak the wood, and always wipe with the grain. In our experience, finishing with a dry, soft cloth prevents moisture damage. Avoid ammonia-based or abrasive cleaners, as they strip natural oils.
For deeper cleaning, we recommend a product specifically designed for finished wood surfaces.
How often should I clean my cupboard doors?
We recommend cleaning cupboard doors every 2–4 weeks, depending on kitchen use. Homes with frequent cooking may need weekly wipe-downs to prevent grease buildup. Light dusting and spot cleaning help maintain appearance. In our experience, regular maintenance prevents the need for deep cleaning later and keeps your kitchen looking consistently fresh without requiring heavy scrubbing or harsh chemicals.
Can I use Windex on my cupboard doors?
Windex can be used on glass or laminate cupboard doors but should be avoided on wood or painted surfaces, as ammonia can damage the finish. We recommend testing in a small area first. For non-glass doors, we’ve found gentler cleaners are safer and more effective. Always spray the cloth—not the door—to prevent liquid from seeping into seams or hardware.
Final Thoughts
Cleaning cupboard doors doesn’t have to be a daunting task. We’ve found that with the right tools and a consistent routine, even the toughest grease or grime can be managed with minimal effort. Understanding your door material—whether wood, painted, laminate, or glass—helps us choose safe, effective cleaning methods that preserve both appearance and longevity over time.
Start with a gentle cleaner and a soft cloth—most issues can be resolved with simple, everyday products. In our experience, just a few minutes of regular maintenance can make a big difference. Take action today: pick one cabinet to clean and see how quickly it improves your kitchen’s look and feel.