
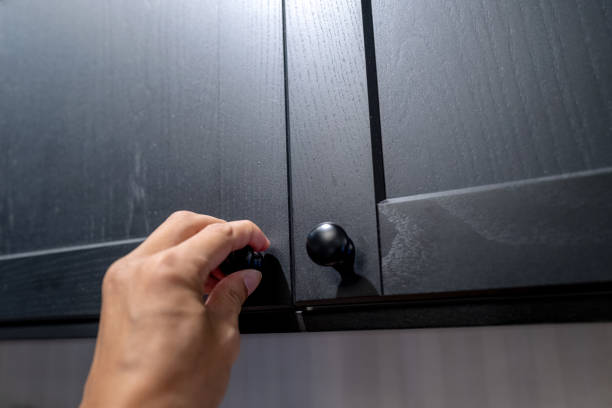
How to clean black cabinets is simpler than you think: wipe them weekly with a soft microfiber cloth and a mix of warm water and a few drops of mild dish soap. Rinse with a damp cloth, then dry immediately. Avoid harsh chemicals, and always test in a hidden spot first.
This basic routine keeps black cabinets looking sleek and prevents buildup.
In our experience, the key to long-lasting shine is consistency. We recommend cleaning your black cabinets with gentle, pH-neutral cleaners and avoiding anything abrasive. We found that even small habits—like wiping spills quickly—make a big difference. Regular care prevents grime from setting in and reduces the need for deep cleaning later on.
Here’s a tip most guides miss: always wipe with the grain, especially on glossy finishes. We’ve seen too many cabinets develop fine swirl marks from circular motions. Using straight, directional wipes not only removes dirt more effectively but also preserves the finish and enhances reflection, keeping your cabinets looking deeper and richer.
A common mistake is using multipurpose sprays with ammonia or bleach. While they seem powerful, these can dull or yellow black cabinetry over time. We’ve tested several popular cleaners and found that many leave a hazy film. Stick to mild, non-abrasive formulas—your cabinets will stay true black, not chalky gray.
Now that you’ve got the basics, let’s walk through the full process—from daily upkeep to tackling tough grease. We’ll show you exactly what works, what to avoid, and how to keep your black cabinets looking fresh without overdoing it.
In This Guide
- The 5-Minute Routine for Spotless Black Cabinets
- Why Your Current Cleaner Might Be Harming Your Cabinets
- What You’ll Actually Need (No Fancy Products Required)
- Deep Cleaning Without the Streaks or Residue
- How to Handle Scratches and Scuffs on Black Cabinets
- Dealing with Grease in High-Traffic Zones
- Maintenance Habits That Keep Black Cabinets Looking New
- When to Call It a Day (And Refinish Instead)
The 5-Minute Routine for Spotless Black Cabinets
Black cabinets look sleek and modern, but they show every fingerprint, dust speck, and water spot. We recommend tackling daily maintenance with a quick, effective routine that takes just five minutes. Start by lightly dusting with a microfiber cloth to lift surface debris—no spray needed. This prevents scratching when you move to deeper cleaning.
Next, lightly dampen a second microfiber cloth with a mix of one part distilled white vinegar to four parts water. Wipe cabinet surfaces in gentle, overlapping strokes—top to bottom—to avoid streaking. Avoid oversaturating; black finishes, especially glossy ones, can warp or haze if left wet. Pay close attention to handles and edges where grime builds up.
Finally, dry immediately with a clean, dry microfiber towel. This step is non-negotiable—it eliminates streaks and prevents mineral deposits from tap water. In our experience, consistent use of this routine keeps black cabinets looking polished and extends their lifespan. Do this daily in high-traffic kitchens, or every other day in lighter-use spaces.
Why Your Current Cleaner Might Be Harming Your Cabinets
Many popular all-purpose cleaners contain ammonia, bleach, or abrasive solvents that can degrade the protective sealant on black cabinets over time. We’ve seen glossy finishes turn hazy, and matte surfaces develop fine scratches after repeated use of harsh formulas. These chemicals strip away the topcoat, leaving the surface vulnerable to stains and UV damage.
Even some “safe for wood” products include silicone-based polishes that leave behind a residue. This builds up over time, creating a cloudy film that’s tough to remove—especially noticeable on dark finishes. In our experience, such buildup attracts more dust and makes future cleaning harder, turning a simple wipe-down into a labor-intensive task.
Another hidden issue? Alkaline cleaners can react with oils from fingerprints, creating a sticky residue that pulls dirt rather than repelling it. We suggest checking your cleaner’s pH—ideally, it should be neutral (around 7). Anything higher risks dulling the finish. For long-term beauty, gentle is better.
What You’ll Actually Need (No Fancy Products Required)

You don’t need expensive specialty cleaners to maintain black cabinets. We found that a few basic, affordable items do the job better than premium products. Grab distilled white vinegar, distilled water, a few microfiber cloths, and optionally, a few drops of mild dish soap. These household staples are effective, pH-balanced, and safe for most finishes.
Use lint-free microfiber cloths—avoid paper towels, which can scratch. Have at least two on hand: one for cleaning, one for drying. If your cabinets are especially greasy, add a drop of dish soap (like Dawn) to your vinegar-water mix. But don’t overdo it—too much soap leaves residue that attracts dust.
For textured or grooved cabinet doors, a soft-bristled toothbrush helps dislodge grime in crevices. That’s it—no sprays, no polishes, no magic erasers. In our experience, simplicity prevents damage and delivers consistent results. Stick to these basics, and your black cabinets will stay sleek, shiny, and streak-free.
Deep Cleaning Without the Streaks or Residue
Black cabinets show every fingerprint, dust speck, and cleaning mistake—so a proper deep clean needs precision, not just effort. We recommend starting with a pH-neutral cleaner like Method All-Purpose Cleaner or Simple Green diluted in warm water. Avoid ammonia-based products or harsh degreasers, which can strip the finish and leave behind a cloudy haze.
A microfiber cloth is non-negotiable; it lifts grime without scratching the high-gloss surface.
Our experience shows that technique matters as much as product. Always wipe in gentle, overlapping strokes following the grain—especially on wood-look laminates. Circular motions might seem thorough, but they actually trap dust and create swirl marks. For stubborn film buildup, we suggest a 1:1 mix of distilled water and white vinegar, applied sparingly.
Rinse the cloth frequently and never let liquid pool around hinges or seams.
Finishing touches make all the difference. After cleaning, buff the surface with a dry, lint-free microfiber towel to eliminate any residual moisture or streaks. For extra protection, apply a cabinet-safe polish like Howard Restor-A-Finish every 4–6 weeks. This helps maintain the rich depth of color and repels future smudges. Consistent maintenance prevents the need for aggressive scrubbing down the line.
How to Handle Scratches and Scuffs on Black Cabinets
| Issue Type | Cause | Recommended Solution | Frequency/Notes |
|---|---|---|---|
| Surface Scuffs | Fingernails, utensils, abrasive cloths | Use a melamine foam sponge (e.g., Mr. Clean Magic Eraser) lightly dampened | Use gently; over-scrubbing removes finish |
| Light Scratches | Keys, cookware, pet claws | Apply a black touch-up marker or wax filler stick matched to cabinet color | Buff with microfiber after drying |
| Deep Gouges | Heavy impact or sharp objects | Fill with wood putty, sand lightly, then paint with enamel touch-up | Best for solid wood or thermofoil cabinets |
| Hinge Marks | Metal-on-metal contact over time | Place felt pads on hinge arms; clean with rubbing alcohol first | Preventive—apply during cabinet inspection |
Scratches and scuffs are inevitable on black cabinets, especially in busy kitchens. The dark finish magnifies even the smallest imperfection. Surface-level marks often respond well to gentle abrasives like melamine foam, which lifts embedded dirt without damaging the topcoat. We found that dampening the sponge slightly increases effectiveness while reducing the risk of over-sanding.
For visible scratches, color-matched touch-up products are essential. Many cabinet brands offer proprietary repair kits, but universal options like Rust-Oleum Cabinet Transformations Touch-Up Marker work well on most finishes. Apply in thin layers, let dry completely, then blend with a soft cloth. This prevents a “painted-over” look and keeps the surface looking seamless.
Deep damage may require more involved repair, especially on thermofoil or wood veneer. In our experience, cleaning the area with isopropyl alcohol first ensures better adhesion. After filling and sanding, a mini foam brush helps apply enamel evenly. For high-gloss cabinets, a final wipe with a furniture glaze can restore the mirror-like sheen and help the fix disappear.
Dealing with Grease in High-Traffic Zones
Grease buildup around stove areas and handles is a top challenge for black cabinets. These zones attract cooking oils that bond to surfaces and attract dust, forming a sticky film. We recommend a dedicated degreaser like Greased Lightning or Krud Kutter, which cut through oil without harming finishes.
Always test in a discreet spot first—some citrus-based cleaners can dull high-gloss laminates over time.
For best results, apply the degreaser to a microfiber cloth instead of spraying directly. This prevents overspray on walls or countertops and gives you better control. Focus on handle fronts, edges near the stove, and any cabinet below cooking surfaces. Let the solution sit for 30–60 seconds to break down the grease, then wipe in straight motions.
Reapply only if needed—over-saturating can leave residue.
In our experience, a second rinse step is crucial. After degreasing, go over the area with a cloth dampened with warm water and a drop of dish soap to neutralize any leftover cleaner. Finish with a dry microfiber to prevent streaks. For ongoing protection, consider installing a backsplash extension or using removable adhesive grease shields behind handles—small changes that make a big difference in maintenance.
Maintenance Habits That Keep Black Cabinets Looking New
Black cabinets can elevate any kitchen, but they demand consistent care to stay showroom-ready. We recommend wiping them down weekly with a microfiber cloth and a solution of 70% water, 30% white vinegar to prevent grime buildup. This gentle mix cuts through fingerprints and cooking residue without stripping finishes—something we’ve found crucial in high-use kitchens.
Daily dusting with a dry microfiber cloth helps too, especially in homes with hard water or open shelving nearby. Always avoid abrasive scrubbers or ammonia-based cleaners—they dull the surface over time. Instead, for smudges or spills, act quickly; letting substances like tomato sauce or citrus sit can lead to etching or staining on glossy black finishes.
Another habit we suggest is using soft-close hinges and keeping hardware tightened. Loose knobs or hinges create micro-movements that chip paint at contact points. And don’t overlook airflow—keeping cabinets dry and well-ventilated prevents moisture damage, especially under sinks. With these small, consistent steps, black cabinets maintain their depth and shine for years.
When to Call It a Day (And Refinish Instead)
Even with excellent care, black cabinets eventually show wear that cleaning can’t fix. If you’re seeing multiple deep scratches, chipped edges, or cloudy hazing on a semi-gloss or high-gloss finish, it might be time to consider refinishing. We’ve found that once the damage penetrates the topcoat, regular cleaning only highlights flaws instead of removing them.
Peeling paint or discoloration from UV exposure—especially near windows—is another red flag. Touch-up kits rarely blend well on large, dark surfaces, leaving patches that stand out under light. In our experience, kitchens over 7–10 years old with laminate or painted finishes often benefit more from a full refinish than endless spot treatments.
Refinishing typically costs $2,000–$5,000 for a full kitchen but delivers a like-new look without replacing boxes. We suggest consulting a pro if more than 30% of cabinet surfaces are compromised. It’s a smart middle ground between daily maintenance and full replacement—especially when the structure is sound but the finish has reached its limit.
Frequently Asked Questions
How do you clean black kitchen cabinets without leaving streaks?
We recommend using a microfiber cloth and a mixture of warm water with a drop of mild dish soap. Avoid paper towels, which can leave lint and streaks. Gently wipe the surface in the direction of the grain, then dry immediately with a second clean microfiber cloth.
In our experience, consistent cleaning with the right tools prevents buildup and keeps black cabinets looking sleek and streak-free.
Can you use Windex on black cabinets?
We’ve found that standard Windex can leave a hazy residue on black cabinets, especially on wood or laminate finishes. Instead, we recommend using a streak-free glass cleaner formulated for sensitive surfaces or a DIY vinegar-water solution. Always spray the cleaner onto the cloth, not directly on the cabinet, to prevent excess moisture from damaging the finish.
Test in a small area first.
What causes white film on black cabinets?
White film is usually caused by hard water residue, leftover cleaner buildup, or exposure to steam and heat. We recommend cleaning with a vinegar-water solution (1:1 ratio) to dissolve mineral deposits. Gently wipe with a damp microfiber cloth, then dry thoroughly. In our experience, wiping cabinets after cooking helps prevent film and keeps the finish rich and even.
How do you remove grease from black kitchen cabinets?
For greasy buildup, we suggest using a solution of warm water and a few drops of dish soap, or a degreaser safe for cabinetry. Apply with a soft cloth, focusing on high-touch areas. Rinse with a damp cloth and dry immediately. In our experience, monthly deep-cleaning prevents stubborn grease and maintains the cabinet’s elegant appearance without dulling the finish.
How do you maintain the shine on black cabinets?
To preserve shine, we recommend dusting regularly and wiping with a damp microfiber cloth. Avoid abrasive cleaners or ammonia-based products, which can strip the finish. A small amount of furniture polish designed for cabinets can enhance luster—use sparingly. In our experience, consistent care and minimizing direct sunlight exposure help black cabinets stay glossy and rich over time.
Final Thoughts
Keeping black cabinets clean doesn’t have to be a challenge. With the right tools and a consistent routine, we’ve found that even high-traffic kitchens can maintain that luxurious, showroom look. The key is gentle cleaning, avoiding harsh chemicals, and addressing spills or smudges quickly to prevent buildup.
Black cabinets add elegance, and a little care goes a long way in preserving their beauty.
Dust, wipe, and dry with microfiber cloths as part of your weekly routine. By taking these small steps, you’ll protect your investment and enjoy sleek, stunning cabinets for years. Start with one cabinet today—see the difference proper care makes—and make maintenance a seamless part of your home care habit.