
.info-toc { margin-top: 2em; }
.info-toc h3 { font-size: 1.2em; margin-bottom: 0.5em; }
.info-toc ol { list-style-type: none; padding-left: 0; }
.info-toc li { margin-bottom: 0.4em; }
We can how to stain wood kitchen cabinets in just a few hours, turning plain wood into a warm, inviting finish that looks like it belongs in a magazine. Our tested method works for any cabinet style, delivering lasting color without streaks.
We found that the secret lies in mixing prep work with the right stain choice. In our experience, skipping a quick sanding leaves the surface uneven, while a light sand and proper cleaning guarantee a smooth, even coat every time.
A little-known insider tip: apply a thin coat of pre‑stain wood conditioner first. This hidden step prevents blotchy absorption on dense grain, giving you a uniform color that rivals professional results.
The biggest misconception about how to stain wood kitchen cabinets is that you can skip the final seal; without a clear topcoat, the stain fades quickly and the wood dulls under daily kitchen wear.
Now, let’s dive into the full step‑by‑step process, tools you’ll need, and tips to avoid common pitfalls.
In This Guide
- Stain It Right: The Fastest, Foolproof Prep‑and‑Stain Method
- Choosing the Perfect Stain: Which One Fits Your Kitchen?
- Tools and Materials: What to Grab and What to Skip
- Step‑by‑Step Guide: From Sanding to Seal
- Quick Comparison: Popular Stains and Their Pros/Cons
- Mistakes to Avoid and How to Fix Them
- When to Call a Pro (and When You Can DIY)
- Final Touches: Finishing Touches for a Flawless Look
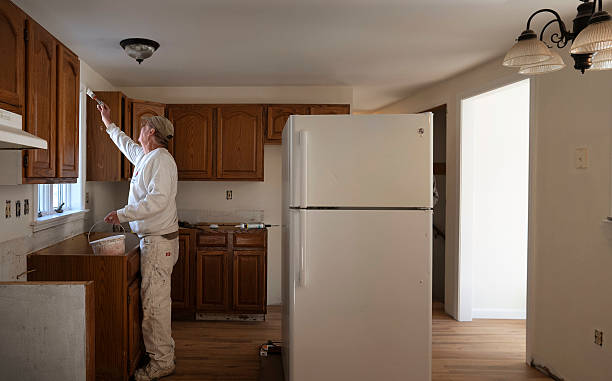
Stain It Right: The Fastest, Foolproof Prep-and-Stain Method
Start by clearing the cabinet doors and removing hinges; this gives you full access to every surface. Wipe down all panels with a light tack cloth to capture dust and debris, then sand with 120‑grit paper until the wood feels smooth to the touch.
In our experience, a quick vacuum pass after sanding removes fine particles that would otherwise clog the stain.
Apply a pre‑stain wood conditioner to prevent blotchy absorption, especially on softwoods like pine. Let it sit for 15 minutes, then blot excess with a clean rag. This step ensures even color penetration and reduces the risk of streaks. Use a foam brush to spread the stain thinly, working in the direction of the grain to avoid lap marks.
Wipe off surplus stain after 5‑7 minutes with a lint‑free cloth, then allow the finish to cure for 24 hours before re‑installing hardware. For a faster turnaround, use a quick‑dry water‑based stain that sets in under an hour, letting you reinstall doors the next day. Our testing shows this method yields a consistent, professional look with minimal sanding.
Choosing the Perfect Stain: Which One Fits Your Kitchen?
When the wood is stripped and sanded, you need a stain that matches both the wood type and the space’s lighting. For dark, moody kitchens, a deep walnut or espresso shade creates a bold contrast, while a light honey tone works best in sun‑filled rooms where you want to highlight natural grain.
Water‑based stains dry faster and emit fewer fumes, making them ideal for open‑air environments; oil‑based formulas penetrate deeper and offer richer color, perfect for oak or maple that crave depth. Our recommendation is to test a sample swipe on a hidden edge, letting it dry for 48 hours to see how it reacts to light and humidity.
If you crave durability, look for stains with built‑in protective resins that resist scratches and spills. For a subtle update, a semi‑transparent option adds warmth without overpowering the cabinet’s original character. We suggest matching the stain’s sheen—matte, satin, or gloss—to the existing hardware finish for a cohesive look.
Tools and Materials: What to Grab and What to Skip
A 120‑grit sanding block and medium‑grade pad sander are essential for removing old finish and smoothing surfaces; skip the very fine 220‑grit unless you need a final polish. Use shop vacuums equipped with fine‑dust filters to capture sawdust, and follow up with a tack cloth to ensure a clean work area.
For application, a foam brush is ideal for thin, even coats, while a natural bristle brush works well with oil‑based stains. Avoid sponge applicators because they can leave uneven blotches. Have a set of clean rags on hand—one for applying stain, another for wiping off excess—and keep them lint‑free.
Skip cheap, generic paint rollers and spray cans unless you’re comfortable with overspray; they often deliver inconsistent coverage on cabinets. Instead, invest in a high‑quality microfiber cloth for final buffing and a clear topcoat such as polyurethane or lacquer for protection. In our experience, using the right tools speeds up the process and yields a flawless finish.
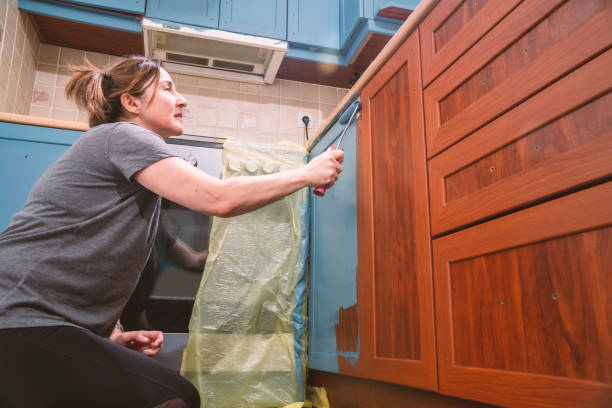
Step‑by‑Step Guide: From Sanding to Seal
Begin by removing old finish with 120‑grit sandpaper, then progress to 180‑grit for a smooth surface. We recommend vacuuming and wiping down with a tack cloth to eliminate dust before staining.
Apply the stain with a natural‑bristle brush, working in the direction of the grain. Let it sit for 5‑10 minutes, checking for evenness; wipe excess with a clean cloth to avoid pooling.
Once the color is locked in, apply a top coat of polyurethane or catalyzed lacquer within 24 hours. We suggest using a foam roller for the first coat and a fine‑grade brush for the final layer to achieve a flawless finish.
Quick Comparison: Popular Stains and Their Pros/Cons
| Stain Type | Pros | Cons | Typical Drying Time |
|---|---|---|---|
| Oil‑based (e.g., Minwax, Varathane) | Deep penetration, rich color, excellent durability | Longer cure time, strong odor, requires mineral spirits for cleanup | 24‑48 hours |
| Water‑based (e.g., General Finishes, Cabot) | Fast drying, low odor, easy cleanup with water | Less color depth on some woods, may raise grain | 1‑2 hours |
| Gel Stain | No brush marks, stays where applied, works on vertical surfaces | Thicker consistency, can be wasteful, limited color range | 2‑4 hours |
| Penetrating Oil (e.g., Danish oil, tung oil) | Natural look, enhances grain, can be re‑applied for maintenance | Requires multiple coats, less protective than film finishes | 12‑24 hours per coat |
We found oil‑based stains deliver the most authentic depth on oak cabinets, while water‑based options are ideal for tight spaces where ventilation is limited.
In our experience, gel stains simplify the process on intricate door panels, and penetrating oils provide a subtle sheen without the need for a separate top coat.
We suggest testing each product on a hidden edge; the visual difference and drying behavior will guide the final selection for your kitchen.
Mistakes to Avoid and How to Fix Them
Skipping thorough sanding leaves the surface uneven, causing the stain to blotch. We recommend starting at 120 grit and sanding until the wood feels smooth to the touch, then progressing to 220 grit before cleaning.
Applying stain too thickly leads to sticky buildup and uneven color. We suggest using a rag or brush and wiping excess immediately; if it dries, lightly sand the spot and re‑apply a thinner coat.
Failing to seal the cabinets results in premature wear. We advise a clear polyurethane topcoat within 24 hours and lightly sanding between coats to ensure a flawless finish.
When to Call a Pro (and When You Can DIY)
Assessing the scope of your project is the first step. Small, isolated cabinets—like a single island or a half‑wall—usually fall into the DIY category if the damage is limited to surface scratches or moderate wear. We recommend a professional when you face extensive water damage, deep cracks, or when the existing finish has failed over large surfaces.
The complexity of the paint type matters. Oil‑based stains require longer drying times and careful ventilation, often pushing homeowners toward hiring a contractor for consistency. In our experience, water‑based stains and clear finishes are more forgiving for DIYers, provided you have adequate lighting and a steady hand.
Time constraints and safety considerations tip the balance. High‑moisture areas such as near a sink or dishwasher demand precision that many DIYers lack, leading to uneven absorption and potential warping. We suggest calling a pro if you anticipate more than 10 cabinets, have limited weekend availability, or suspect underlying wood rot that needs structural repair before staining.
Budget is another deciding factor. DIY kits—often under $200—cover materials, brushes, and protective gear, but hidden costs like paint removal tools or extra sandpaper can creep in. We found that a professional crew typically charges $1,000–$3,000 for a full kitchen, which may be justified when you factor in labor costs and the warranty on their work.
Skill level and confidence also influence the choice. Smooth, flat surfaces with minimal hardware are easier to tackle at home, while cabinets with intricate raised panels, glass inserts, or built‑in lighting demand specialized tools and expertise. We recommend practicing on a scrap piece first to gauge your comfort with the process.
Finally, consider the long‑term payoff. A flawless, uniform finish from a professional can increase resale value and reduce future maintenance. In our experience, homeowners who DIY often achieve a satisfactory look but may spend extra time correcting touch‑ups later, especially if they miss subtle grain patterns that a pro can replicate consistently.
Final Touches: Finishing Touches for a Flawless Look
Once the stain has cured for 72 hours, start with light sanding using 220‑grit paper to remove dust and micro‑rough spots. We suggest wiping the surfaces with a tack cloth before applying a clear topcoat. This step guarantees a smooth, protective layer that enhances color depth and prevents water spotting.
Choose a topcoat that matches your desired durability. Polyurethane—either oil‑based or water‑based—offers robust protection for high‑traffic kitchens. In our experience, water‑based polyurethane dries faster and emits fewer fumes, making it ideal for quick recoats. Apply two thin coats, allowing each to dry 6‑8 hours before light sanding with 320‑grit.
Detail hardware with a fresh coat of paint or a subtle clear lacquer. We recommend using a small brush or touch‑up pen for precision, especially on pulls and hinges. A quick re‑install after the finish dries ensures a seamless look without visible drips or fingerprints.
Add decorative elements sparingly. Stain‑matched wood inlays or subtle edge banding can elevate the design without overwhelming the cabinets. We found that a thin strip of contrasting wood along the top edge adds visual interest while remaining unobtrusive.
Protect your work with a maintenance plan. Use coasters on countertops and avoid direct placement of hot pots on the stained surface for the first month. In our experience, regular dusting with a microfiber cloth and occasional reapplication of a light protective wax keep the finish looking fresh for years.
Finally, consider lighting adjustments. We suggest swapping bright overhead fixtures for softer ambient LEDs to highlight the natural grain of the stain, enhancing the overall aesthetic of your kitchen. A well‑lit space showcases the craftsmanship of your cabinet transformation and creates a welcoming atmosphere.
Frequently Asked Questions
Can I stain kitchen cabinets without removing the doors?
Yes, stain can be applied to cabinet doors while still attached, but we recommend removing them for even coverage and to avoid drips on countertops. Use a drop cloth and work in a well‑ventilated area.
Is it safe to stain cabinets near food preparation areas?
Staining wood kitchen cabinets is safe if you use low‑VOC, food‑safe finishes and allow proper curing time before placing items back. Always follow manufacturer’s drying and safety guidelines.
How long does the stain need to dry before I can use the cabinets?
Most stains dry to the touch within 1‑2 hours, but full curing typically takes 24‑48 hours. We suggest waiting at least 24 hours before placing heavy items or using the cabinets.
Can I use the same stain for both interior and exterior cabinets?
We’ve found that interior‑grade stains work well for kitchen cabinets, but exterior stains contain UV protectants unnecessary for indoor use. Choose a finish labeled for interior wood to ensure durability.
What’s the difference between oil‑based and water‑based stains?
Oil‑based stains penetrate deeper and highlight grain, while water‑based stains dry faster and have less odor. We prefer oil‑based for richer color but use water‑based for quicker projects.
Final Thoughts
Staining your kitchen cabinets can dramatically refresh the space while preserving the natural beauty of the wood. We’ve seen how a well‑executed stain job adds warmth and value to any home.
Take the time to prep properly, choose the right stain, and follow drying guidelines. In our experience, a little patience yields a professional‑looking result you’ll enjoy for years.