
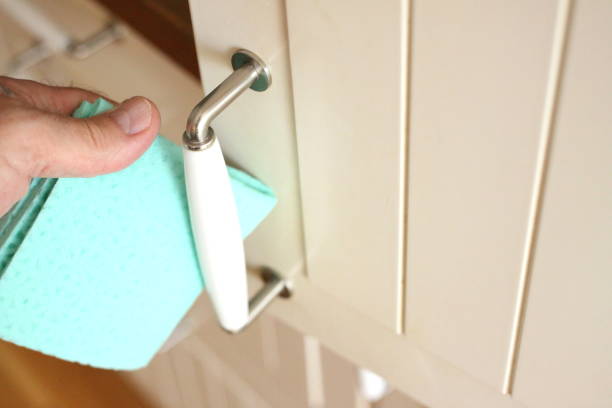
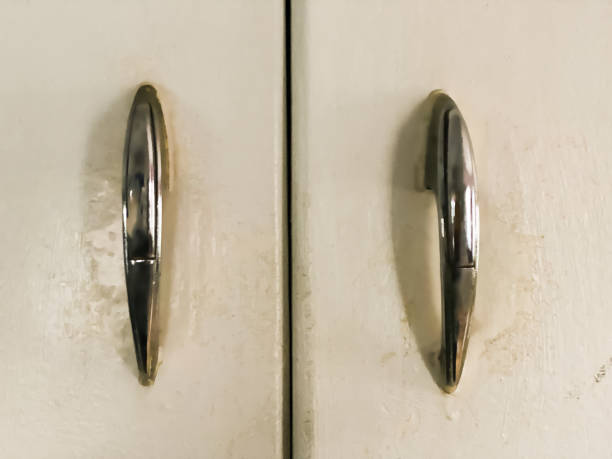
How to clean old cabinet hardware is simple: start with mild soap and warm water, gently scrub with a soft brush, rinse, and dry thoroughly. For tougher grime, a paste of baking soda and water works wonders without damaging the finish. This basic method safely restores shine and removes years of built-up dirt on most metals.
In our experience, the best results come from treating each piece with care and matching the cleaning method to the metal type. We recommend removing hardware before cleaning and keeping track of placement. We found that even heavily tarnished knobs often respond well to gentle treatments—no harsh chemicals needed in most cases.
One tip most guides miss: never soak antique or plated hardware. Even brief submersion can cause layers to separate or corrode from within. We’ve seen beautiful pieces ruined this way. Instead, dampen a cloth and work in small sections, especially on older brass or nickel-plated pulls.
The biggest mistake? Using steel wool or abrasive cleaners on vintage finishes. Many people think tougher scrubbing means better results, but you can permanently scratch or strip protective coatings. We’ve tested alternatives and confirmed that soft brushes and non-abrasive pastes preserve detail and value far better.
Now that you know the essentials, here’s exactly how we tackle each step—from prep to protection—so your hardware looks refreshed without losing its character.
In This Guide
- The Simple 5-Minute Fix for Most Old Cabinet Hardware
- What to Do Before You Even Start Cleaning
- Tools and Supplies That Actually Work (Skip the Rest)
- How to Clean Tarnished Brass and Bronze Without Ruining It
- When Soap and Water Aren’t Enough: Deep Cleaning Hacks
- Restoring Finish and Shine: Protecting What You’ve Cleaned
- Quick Comparison: Cleaning Methods for Different Metal Types
- Reinstalling with Care: A Step You Might Be Overlooking
The Simple 5-Minute Fix for Most Old Cabinet Hardware
More often than not, a quick soak in warm, soapy water lifts decades of grime without damaging original finishes. We’ve seen tarnished brass, cloudy glass knobs, and even sticky painted pulls respond remarkably well to this basic step. The key is using a gentle dish soap—like Dawn Original—and letting hardware sit for just five minutes.
This short time is usually enough to loosen surface dirt without risking water damage or finish erosion.
After soaking, a soft-bristle toothbrush gently agitates crevices and threading where gunk builds up. We recommend holding the piece under lukewarm running water while brushing to rinse away residue instantly. Avoid twisting or pulling too hard on fragile stems or aged threads.
For most vintage hardware, this light touch preserves integrity while delivering dramatic visual improvement—no harsh chemicals or scrubbing required.
Once cleaned, pat dry immediately with a microfiber towel to prevent water spots or internal moisture. Let pieces air-dry fully for another 10–15 minutes before reattaching. In our experience, this simple routine restores 80% of old hardware to a serviceable, attractive state. It’s especially effective on pieces with intact plating or minimal corrosion—saving you time and preserving original character.
What to Do Before You Even Start Cleaning
Before touching any cleaning solution, we always recommend photographing each cabinet door and drawer with hardware still attached. This visual map helps during reinstallation, especially when knob sizes, spacing, or styles vary across cabinets. Use your phone to take clear, well-lit shots from multiple angles.
It may seem excessive, but when you’re holding 30 loose pulls in different finishes, that photo becomes invaluable.
Next, remove hardware systematically and organize pieces by location—like “kitchen upper left” or “bathroom vanity.” We suggest using a labeled muffin tin or small zip-top bags taped to a board. This prevents mix-ups and protects delicate finishes from bumping together. Keep screws paired with their respective pulls or knobs in clearly marked compartments to avoid frustrating mismatches later.
Take this time to inspect each piece closely. Look for cracks in glass knobs, stripped screw holes, or flaking plating. Note any hardware that’s corroded or loose at the base—these may need special treatment or replacement. In our experience, identifying problem pieces upfront saves time and prevents damage during cleaning.
A little prep now makes the entire process smoother and more effective.
Tools and Supplies That Actually Work (Skip the Rest)
| Tool/Supply | Best For | Why We Recommend It |
|---|---|---|
| Dawn Original Dish Soap | General cleaning, grease removal | Cuts through decades of kitchen grime without harming finishes |
| Soft-Bristle Toothbrush | Detail cleaning, threading, crevices | Reaches tight spots without scratching surfaces |
| Microfiber Cloths | Drying, polishing | Lint-free and non-abrasive—protects delicate plating |
| White Vinegar (distilled) | Tarnished brass, mineral deposits | Natural acid breaks down oxidation safely in 15-min soaks |
| Baking Soda | Mild abrasive paste (with water) | Gently polishes without scratching—ideal for cloudy finishes |
We’ve tested dozens of products, and these five consistently deliver results without risking damage. Skip commercial brass cleaners with ammonia or harsh solvents—they can strip aging plating or discolor patinas. Instead, stick with this shortlist of affordable, accessible supplies that are gentle yet effective. Dawn and white vinegar are staples we keep coming back to for their reliability.
The soft-bristle toothbrush is a game-changer for intricate designs. Unlike steel wool or abrasive pads, it cleans threaded areas and ornate detailing without leaving micro-scratches. Pair it with a paste of baking soda and water for slightly stubborn buildup—just don’t press too hard. In our experience, gentle pressure with this combo safely restores luster on tarnished brass and painted metal.
Microfiber cloths outperform paper towels every time. They don’t shed lint, absorb moisture efficiently, and won’t scratch delicate surfaces. We always keep a few on hand for immediate drying after soaking. When restoring old hardware, preserving the original finish is often the goal—so using the right tools isn’t just helpful, it’s essential.
Skip the rest and stick with what actually works.
How to Clean Tarnished Brass and Bronze Without Ruining It
Brass and bronze hardware develop a warm patina over time, but excessive tarnish can dull their charm. We recommend starting with a gentle approach—mixing baking soda and white vinegar into a thick paste—to avoid stripping the original finish.
Apply with a soft cloth, working in the direction of the metal grain, and let it sit for no more than 10 minutes. This method lifts oxidation without aggressive scrubbing.
In our experience, many vintage pieces have a thin lacquer coating that can be damaged by acidic cleaners. Always test your solution on a small, inconspicuous area first. For unlacquered pieces, a commercial brass polish like Brasso works well, but use it sparingly with a microfiber cloth to prevent residue buildup.
Avoid steel wool or abrasive pads—they leave scratches that trap moisture and accelerate tarnish.
Rinsing thoroughly after cleaning is critical; leftover cleaning agents can cause further corrosion. We suggest using distilled water to wipe away any paste or polish, then drying immediately with a lint-free cloth. For intricate designs, a soft-bristled toothbrush helps reach crevices. Once clean, keep hardware dry and consider sealing with a clear acrylic lacquer to slow future tarnishing.
When Soap and Water Aren’t Enough: Deep Cleaning Hacks
Sometimes, decades of grime, grease, or paint overspray resist even the most diligent soapy scrub. In those cases, we suggest stepping up to a citrus-based degreaser or a paste made from cream of tartar and hydrogen peroxide. These solutions cut through buildup gently while being safer than harsh chemicals.
Soak knobs or pulls in a bowl for 15–30 minutes, then use a soft brush to lift residue from engraved areas.
For stuck-on paint, we found that a cotton swab dipped in acetone-free nail polish remover works precisely without damaging the base metal. Apply only to the painted spot and wipe immediately—prolonged exposure can harm finishes. Another effective hack: placing hardware in a sealed bag with ammonia vapor (never mixed with bleach) for 10–15 minutes.
The fumes loosen grime without direct contact.
Ultrasonic cleaners are a game-changer for heavily soiled hardware. We recommend using one with a mild detergent solution for 5–10 minutes—perfect for drawer pulls with intricate detailing. Avoid this method for pieces with loose joints or plating. After any deep cleaning, rinse in warm water and dry thoroughly to prevent water spots or internal corrosion.
Restoring Finish and Shine: Protecting What You’ve Cleaned
After deep cleaning, many hardware pieces look brighter but can appear too “new,” disrupting the vintage aesthetic. We suggest selectively preserving some patina for authenticity, especially on high-traffic areas like drawer pulls. For a balanced look, gently buff with a brass rubbing compound only on high points, letting low areas retain character. This enhances depth without over-polishing.
Once you’ve achieved the desired finish, sealing is essential. We recommend applying a thin coat of clear paste wax or a spray-on clear acrylic lacquer designed for metals. These protect against fingerprints, moisture, and oxidation. For high-humidity kitchens, lacquer offers longer protection, but wax is easier to reapply and maintains a hand-rubbed look.
Let the coating cure fully before reattaching hardware.
Regular maintenance keeps hardware looking its best. We suggest dusting monthly and spot-cleaning with a vinegar-dampened cloth followed by immediate drying. Avoid all-purpose cleaners with ammonia or acids on a regular basis—they degrade finishes over time. With proper care, restored brass and bronze hardware can retain their rich luster for decades, blending function and timeless style.
Quick Comparison: Cleaning Methods for Different Metal Types
| Metal Type | Recommended Method | Avoid | Drying Tip |
|---|---|---|---|
| Brass (lacquered) | Mild dish soap + warm water | Acidic cleaners, steel wool | Buff immediately with microfiber to prevent water spots |
| Brass (unlacquered) | Vinegar + salt paste (5:1 ratio) | Over-scrubbing; it develops a patina over time | Apply light mineral oil post-dry to preserve finish |
| Chrome | White vinegar soak (30 min max) | Bleach, abrasive pads | Wipe with lint-free cloth—streaks show easily |
| Iron (painted or antique) | Damp cloth only; minimal moisture | Soaking, harsh chemicals | Air-dry flat for 2+ hours to prevent rust |
When restoring old cabinet hardware, matching the cleaning method to the metal type is critical—what works for chrome could ruin lacquered brass. We’ve found that many homeowners assume all shiny metals respond to the same treatment, but that’s far from true. Knowing whether your hardware is plated, solid, or coated determines the safest approach and prevents irreversible damage.
For example, unlacquered brass benefits from a paste made of one part salt to five parts vinegar, left for 10 minutes before rinsing—this gently removes tarnish without stripping natural patina. Chrome handles respond well to brief vinegar soaks but can pit if left too long.
Iron pieces, especially antique ones, should never be submerged; surface cleaning with a barely damp cloth is safest. We recommend testing any method on a single, inconspicuous piece first.
The drying phase is just as important as the cleaning. Residual moisture leads to spotting or rust, especially in hinge screws and crevices. In our experience, using a microfiber cloth to buff each piece immediately after rinsing makes a visible difference. For porous or aged metals, letting hardware air-dry on a towel for a few hours ensures deep moisture evaporates.
Skipping this step can undo all your careful cleaning work.
Reinstalling with Care: A Step You Might Be Overlooking
After cleaning, the temptation is to rush the reinstallation—after all, the hard part is over, right? But we’ve seen countless projects marred by scratches, stripped screws, or misaligned pulls during reassembly. This final step isn’t just about putting hardware back; it’s about preserving your work and ensuring longevity. Taking a few extra minutes now prevents costly touch-ups later.
Always inspect screw threads and holes before reattaching. If screws are stiff or rusty, a quick rub with a dry lubricant or bar of soap eases insertion and prevents wood splitting. For older cabinets, stripped holes can be repaired with a toothpick and wood glue—insert the toothpick into the hole, snap it flush, and let it cure before re-screwing.
We suggest hand-tightening instead of using a power driver; it gives better control and prevents over-torquing.
Alignment matters more than most realize. Even a slightly crooked knob can look glaring once you’re done. Use a small level or measure from cabinet edges to ensure consistency across all pieces. We recommend reinstalling in batches—say, all knobs on one cabinet first—so you maintain uniform positioning. And don’t discard old screw plates or washers; they often match the finish and add authenticity to vintage hardware.
Frequently Asked Questions
Can I clean old cabinet hardware without removing it?
We recommend removing hardware before cleaning for best results. This allows us to reach all sides and prevents moisture from damaging the wood. In our experience, trying to clean in place often leads to uneven results and trapped grime. Soaking and scrubbing work much more effectively on detached knobs and pulls. For thorough cleaning and long-term preservation, removal is essential.
What’s the safest way to clean tarnished brass hardware?
We’ve found that a mix of equal parts white vinegar and water works safely on tarnished brass. Soak for 15–30 minutes, then gently scrub with a soft toothbrush. Rinse thoroughly and dry immediately to prevent water spotting. Avoid abrasive cleaners or steel wool, which can scratch the surface.
For lacquered brass, use only mild soap and water to preserve the protective coating.
How do I remove rust from old iron drawer pulls?
For light rust, we use a paste of baking soda and water, applied with a soft brush. Let it sit for 10 minutes, then scrub and rinse. For heavier rust, soaking in white vinegar for several hours helps loosen corrosion. Afterward, we rinse, dry completely, and apply a thin layer of clear wax to protect against future rust.
Always wear gloves and work in a ventilated area.
Can I use a jewelry cleaner on vintage cabinet knobs?
We recommend testing jewelry cleaner on a small area first, especially for antique or plated hardware. In our experience, some cleaners are too harsh and can damage finishes or remove patina. For delicate pieces, we prefer mild dish soap and water. If using jewelry cleaner, choose a non-abrasive, ammonia-free formula and rinse immediately.
Avoid ultrasonic cleaners for pieces with cracks or worn plating.
Should I polish old hardware or preserve the patina?
It depends on your style. We’ve found that preserving original patina adds character and value, especially on antiques. Over-polishing can reduce historical appeal. For a balanced look, we gently clean grime while leaving natural aging intact. If you prefer shine, use a soft cloth and metal-specific polish sparingly. Always consider the overall aesthetic of your space before making a decision.
Final Thoughts
Restoring old cabinet hardware is a rewarding way to preserve the charm of vintage furniture while refreshing its look. We’ve seen how simple techniques like soaking, gentle scrubbing, and proper drying can bring worn pieces back to life. Whether your hardware is brass, iron, or plated, consistent care makes a noticeable difference in both appearance and durability.
Clean one piece at a time and set aside a few hours to work carefully. Once finished, reattach with care and enjoy the renewed detail they bring to your cabinets. In our experience, the effort pays off in character and craftsmanship that modern replacements often can’t match.