
How to clean oil stains from wooden cabinets is simple: act fast with a mix of baking soda and a gentle oil-free cleaner. Gently rub the paste onto the stain with a soft cloth, let it sit briefly, then wipe clean. This method lifts grease without harming the wood’s finish—perfect for fresh spills and light buildup.
In our experience, the key to success lies in using non-abrasive ingredients that pull oil out rather than push it deeper. We found that many people rush with harsh cleaners, but we recommend patience and gentle absorption. A little baking soda or cornstarch can go a long way when applied correctly.
Here’s a tip most guides miss: always work with the grain, even when wiping dry. Going against the grain can scratch the finish and spread trapped oil into untouched areas. We’ve seen this small move make the difference between a clean surface and a dull, streaky mess.
The biggest mistake? Soaking the wood with liquid cleaners. We’ve watched homeowners drench cabinets trying to dissolve grease, only to warp or discolor the wood. Oil stains don’t need more moisture—they need absorption. Wet wipes and steamers often do more harm than good.
Now that you know the basics, let’s walk through each step in detail—from quick fixes to deep treatments—and help you pick the safest, most effective way to restore your cabinets.
In This Guide
- The 5-Minute Trick for Fresh Oil Stains on Wooden Cabinets
- When the Stain Won’t Budge: Old Oil Spots Need This
- What Most People Mess Up When Cleaning Wood Cabinets
- Your Oil Stain Removal Options Compared
- How to Protect Your Wood After Cleaning
- Homemade Cleaners That Actually Work on Grease
- Don’t Use Vinegar Like This—It Can Ruin Your Finish
- Restoring Shine Without Damaging the Wood
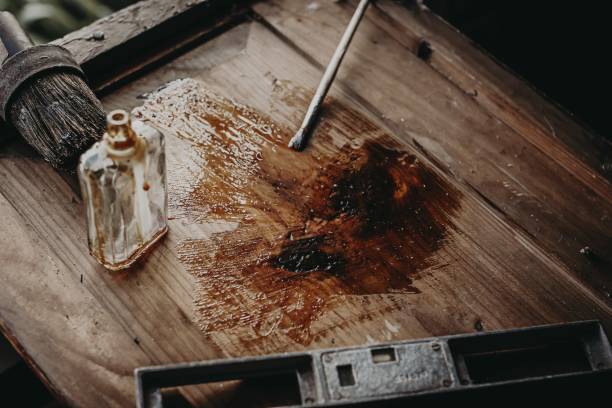
The 5-Minute Trick for Fresh Oil Stains on Wooden Cabinets
When oil spills on wooden cabinets, acting fast is everything—within the first 5 minutes, the stain hasn’t fully penetrated the finish, and we can often reverse the damage with a simple absorbent. We recommend grabbing cornstarch or baking soda immediately. These common kitchen powders pull oil from the wood surface without scratching or dulling the finish.
The key is to cover the stain completely and let it sit—don’t rub.
After gently sprinkling a thick layer over the spot, we suggest letting it dwell for at least 4–5 minutes. The powder will start to clump as it absorbs the oil—this is exactly what we want. Using a soft, dry cloth, lightly brush the residue away in the direction of the wood grain. If any oily sheen remains, repeat once.
This method works best on sealed wood with a polyurethane or lacquer coating.
In our experience, skipping this first-response step leads to much more intensive cleaning later. The longer oil sits, the deeper it seeps—especially into unfinished edges or worn areas. For best results, keep a small container of baking soda under the sink. Treating fresh spills this way prevents discoloration and avoids the need for harsher solutions.
Prevention starts the moment the drip happens.
When the Stain Won’t Budge: Old Oil Spots Need This
Old oil stains on wooden cabinets are tricky because the oil has oxidized and bonded with the wood fibers, often darkening the grain. At this stage, absorbents alone won’t cut it—we need a mild degreasing agent that won’t strip the finish.
We’ve found that a paste made from baking soda and dish soap (one part Dawn to two parts baking soda) works surprisingly well. It’s gentle but effective on set-in grime.
Apply the paste with a soft cloth, using small circular motions for about 30 seconds. Let it sit for no more than 2 minutes—any longer and moisture can damage the wood. Then, wipe clean with a damp microfiber cloth and immediately dry with a second towel.
We’ve seen this method lift stubborn yellowish stains from maple and cherry cabinets without causing cloudiness or etching.
If the stain persists, we suggest a second pass with a diluted vinegar solution (1 part white vinegar to 3 parts water), but only on sealed surfaces. Never use full-strength vinegar—it’s too acidic and can dull the finish. For deep-set stains on older cabinets, light sanding with 220-grit paper followed by a touch-up of matching finish may be necessary.
Patience and gentle progression are essential here.
What Most People Mess Up When Cleaning Wood Cabinets
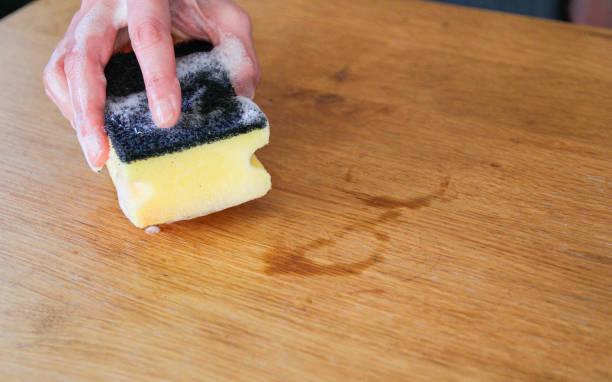
The biggest mistake we see? Using too much water or liquid cleaners directly on wood. Wood swells and finishes haze when saturated—even a few drops left to sit can cause lasting damage. We suggest always applying cleaners to a microfiber cloth, not the cabinet surface.
This gives us full control and prevents pooling in seams, hinges, or joints where moisture hides.
Another common error is reaching for harsh degreasers like bleach, ammonia, or oven cleaner. These strip protective finishes and leave wood vulnerable to future stains. Even products labeled “natural” can be too abrasive if they contain citrus or vinegar in high concentrations. In our experience, less is more—a diluted pH-neutral cleaner is safer and just as effective over time.
People also overlook the importance of grain direction when wiping. Scrubbing back and forth across the grain can create fine scratches that catch dirt. Always move with the grain, especially on stained or lighter woods. Finally, skipping the drying step invites mildew and warping. We recommend a two-cloth system: one damp with cleaner, one dry—every single time.
Your Oil Stain Removal Options Compared
| Method | Effectiveness | Safety for Wood | Time Required |
|---|---|---|---|
| Baking Soda Paste | High for fresh stains | Excellent – non-abrasive | 2–8 hours |
| Dish Soap + Warm Water | Moderate – best for surface grease | Very Good | 15–30 minutes |
| Commercial Degreaser | High – penetrates deep | Fair – may strip finish | 10–20 minutes |
| Vinegar + Baking Soda Mix | Moderate to High | Good – pH-balanced combo | 1–4 hours |
| Mineral Spirits | Very High – for set-in grease | Poor – use with caution | 30–60 minutes |
When tackling oil on wooden cabinets, not all cleaners deliver the same results. In our experience, baking soda paste consistently outperforms others for fresh spills, lifting grease without harming the wood’s natural finish. It’s gentle, accessible, and works through mild abrasion and absorption.
Commercial degreasers act fast and cut through thick grime, but we’ve seen them dry out or discolor sensitive wood finishes if left too long. For surface-level grease, a simple mix of dish soap and warm water often suffices—especially on painted or sealed cabinets.
For stubborn, aged stains, mineral spirits can be effective, but only when used sparingly and wiped immediately. We suggest reserving harsher options for emergencies and always testing on a hidden area. Ultimately, matching the method to the stain’s age and wood type leads to the best outcomes.
How to Protect Your Wood After Cleaning
After removing an oil stain, the wood may be temporarily more porous or stripped of its natural oils. This leaves it vulnerable to future stains and moisture damage. In our experience, skipping post-cleaning protection is one of the biggest oversights homeowners make—especially in high-use kitchens.
We recommend applying a thin coat of food-safe mineral oil or a beeswax-based wood conditioner to restore moisture and create a subtle barrier. For finished cabinets, a polish with carnauba wax enhances shine and adds a protective layer without buildup. Avoid silicone-heavy products—they can cause clouding over time.
Going forward, preventative maintenance makes a big difference. Wiping cabinets monthly with a microfiber cloth dampened with a mild vinegar solution keeps grease from accumulating. For areas near stoves, consider a removable liner or transparent film shield to catch splatter before it sets in.
Homemade Cleaners That Actually Work on Grease
Not all DIY solutions are equal—some just spread grease around. But we’ve found a few homemade mixtures that genuinely lift oil from wood without harsh chemicals. The standout is a paste of baking soda and water (3:1 ratio), which acts as a gentle abrasive and grease absorber. It’s safe, cheap, and effective for most light-to-moderate stains.
Another reliable option combines 1 cup of white vinegar, 1 cup of water, and a squirt of dish soap like Dawn. Spray it on, let sit for 5 minutes, then wipe with a soft cloth. The vinegar cuts through residue while the soap emulsifies oil—perfect for cabinet fronts with built-up kitchen grime.
For tougher jobs, we suggest a hybrid paste: 2 parts baking soda, 1 part hydrogen peroxide, and a few drops of lemon juice. Apply with a toothbrush for textured surfaces, then wipe clean after 10–15 minutes. Always follow with a damp cloth and dry immediately to prevent moisture damage.
Don’t Use Vinegar Like This—It Can Ruin Your Finish
While vinegar is often hailed as a natural cleaning wonder, we’ve seen it do serious damage when used straight on wooden cabinets. The acidity in undiluted white vinegar can break down the protective finish over time, especially on older or waxed surfaces. In our experience, even a 50/50 vinegar-water mix can dull finishes after repeated use—something many DIY cleaners overlook.
It’s not that vinegar has no place in cabinet care, but we recommend reserving it only for greasy build-up on sealed, modern finishes—and even then, using it sparingly. Always follow up with a rinse using a damp, not wet, cloth to neutralize any lingering acid.
For most oil stains, gentler options like dish soap or mineral spirits are far safer and more effective.
The real risk comes when people spray vinegar directly onto cabinets, thinking it disinfects and degreases without consequences. But wood finishes aren’t designed to handle repeated acid exposure. Over weeks or months, this habit leads to hazy patches, peeling varnish, or even etching on the surface.
We suggest avoiding vinegar entirely on antique or hand-rubbed finishes where the wood’s luster is irreplaceable.
Restoring Shine Without Damaging the Wood
After removing an oil stain, cabinets can look flat or uneven—especially if cleaning products stripped some of the finish. We recommend finishing with a quality wood conditioner or paste wax to bring back the natural depth. Products like Minwax Paste Wax or Howard Feed-N-Wax not only restore luster but also create a protective barrier against future spills and stains.
Apply a thin layer using a lint-free microfiber cloth, working in the direction of the grain. Let it haze over for about 10–15 minutes, then buff gently with a clean section of the cloth. In our experience, this step makes a dramatic difference—particularly on cherry, walnut, or stained maple cabinets that rely on surface finish for their warmth and richness.
For daily maintenance, we suggest a spray polish made specifically for wood, like Method Wood for Good, which adds subtle shine without buildup. Avoid silicone-heavy sprays that create a fake, plastic-like gloss. Instead, aim for products that nourish the wood while enhancing its appearance—keeping your cabinets looking clean, not chemically stripped.
Frequently Asked Questions
Can I use vinegar to clean oil stains from wooden cabinets?
Yes, we recommend a mix of white vinegar and warm water for light oil stains. Combine equal parts, dampen a soft cloth (don’t soak), and gently wipe the stain. Always follow with a dry microfiber cloth to prevent moisture damage. In our experience, vinegar works well for fresh stains but may not remove older, set-in oil without repeated effort.
What should I do if the oil stain has darkened the wood?
A darkened area often means oil has penetrated deeply. We’ve found that using a paste of baking soda and mineral spirits helps lift discoloration. Apply with a soft cloth, rub gently in a circular motion, then wipe clean. Test on a hidden area first. If the stain persists, lightly sanding and refinishing may be necessary.
Is it safe to use dish soap on wooden cabinets?
We recommend using a few drops of mild dish soap in warm water, applied with a barely damp cloth. Avoid soaking the wood, and dry immediately with a soft towel. Harsh soaps or excessive water can strip the finish, so we always advise gentle application and immediate drying to preserve the wood’s integrity.
How can I remove an old, stubborn oil stain from wood?
For set-in stains, we suggest a paste of baking soda and water or commercial wood cleaner. Cover the stain, let it sit for 10–15 minutes, then gently rub with a soft cloth. If that fails, we’ve found mineral spirits applied sparingly with a cotton ball can break down the oil without harming the finish.
Will olive oil remove oil stains from wood cabinets?
No, we don’t recommend using olive oil—it can leave a greasy film and attract dirt. While some believe it restores shine, we’ve found it worsens oil buildup over time. Instead, use dedicated wood cleaners or vinegar-based solutions that lift stains without residue.
Final Thoughts
Dealing with oil stains on wooden cabinets doesn’t have to be overwhelming. We’ve found that acting quickly and using the right method for the stain’s age and severity makes all the difference. Whether it’s a gentle vinegar wipe or a more targeted mineral spirits treatment, preserving your wood’s finish is possible with patience and care.
Clean one spot at a time, always test solutions first, and protect your cabinets with a quality wood polish afterward. In our experience, regular maintenance prevents future stains and keeps cabinets looking beautiful. Take it step by step—you’ve got this.