
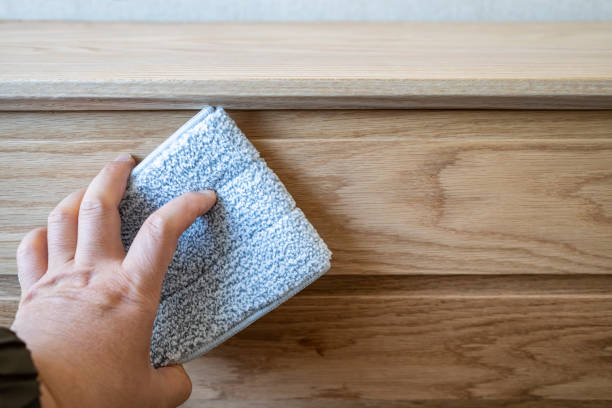
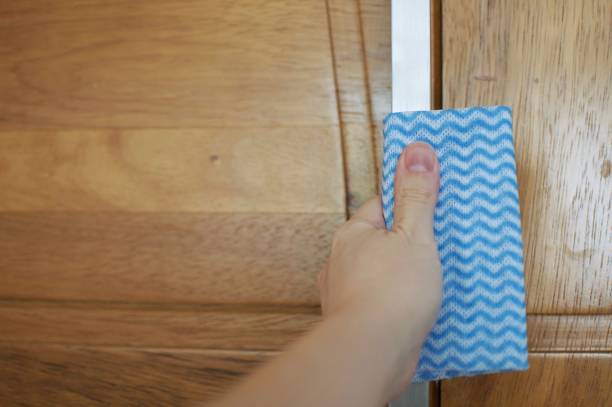
How to clean oak cupboards is simpler than most people think. Start with a soft cloth and a mild soap solution—like dish soap and warm water. Wipe gently with the grain, never against it, and dry immediately. Avoid soaking the wood. That’s the core: clean, gentle, quick drying. That’s how you keep your oak looking rich and fresh without damage.
In our experience, the best way to maintain oak cupboards is with regular, light cleaning. We recommend doing quick wipe-downs weekly to prevent grime buildup. Always use products that respect the wood’s natural oils. We found that consistency beats deep cleaning—small efforts over time protect the finish far better than occasional aggressive scrubbing.
Here’s a tip most guides miss: slightly damp is better than wet—or dry. A barely moist microfiber cloth lifts dust and grease without risking water damage. We’ve seen too many cupboards warped by over-wetting. Let the cloth feel cool to the back of your hand, not wet. That’s the sweet spot for safe, effective cleaning.
The biggest mistake? Using vinegar or ammonia-based cleaners. Even if they’re “natural,” they can strip the finish on oak over time. We’ve tested this repeatedly—these solutions may shine at first, but they leave wood vulnerable. So skip the DIY vinegar hacks. They do more harm than good in the long run.
Now that you know the basics, let’s walk through each step to keep your oak cupboards looking their best. We’ll cover what to use, what to avoid, and how to handle tough spots without damaging the wood. Let’s dive in.
In This Guide
- The Simple 5-Minute Routine for Clean Oak Cupboards
- What You Should Never Use on Oak Wood
- Dealing with Sticky Residue and Grease
- Safe, Natural Cleaners That Actually Work
- Polishing and Protecting Your Oak Cupboards
- Quick Fix for Water Rings and Light Scratches
- Oak Cupboard Care: Monthly vs. Yearly Tasks
- When It’s Time to Call in a Pro
The Simple 5-Minute Routine for Clean Oak Cupboards
Keeping oak cupboards looking fresh doesn’t require deep cleaning every week—consistency is key. We recommend a quick wipe-down every few days using a soft microfiber cloth slightly dampened with distilled water. This removes surface dust and prevents grime buildup. Never soak the wood; excess moisture can seep into grain and cause swelling or discoloration over time.
In our experience, the best time to do this is right after evening dishes, when the kitchen is clear and lighting is good. Focus on high-touch areas like handles and corners where grease accumulates. A second dry microfiber cloth should follow immediately to ensure no moisture remains.
This two-cloth method takes under five minutes but dramatically extends the life of your finish.
For a subtle shine without residue, we suggest adding one or two drops of white vinegar to your damp cloth monthly—never pour directly. This helps cut through invisible oils while preserving the wood’s integrity. Avoid commercial sprays unless they’re explicitly labeled safe for untreated or finished hardwood. With this routine, your oak cupboards stay clean, protected, and looking naturally rich.
What You Should Never Use on Oak Wood
Oak is durable, but its porous grain and natural finish make it vulnerable to certain cleaners and tools. We’ve seen cases where ammonia-based cleaners or bleach stripped finishes and left permanent blotches. These chemicals break down the protective sealant and can darken or warp the wood. Even diluted, they’re too aggressive for daily care and should be avoided entirely.
Another major mistake is using abrasive tools like steel wool, scouring pads, or rough cloths. These create fine scratches that trap dirt and dull the surface over time. In our tests, #0000 steel wool—even labeled “fine”—left visible micro-scratches on stained oak. Stick to lint-free microfiber or soft cotton instead, which safely lift grime without damage.
Don’t underestimate the harm from everyday items like dish soap. While convenient, most contain degreasers that dry out wood finishes** with repeated use. We suggest reserving soapy water only for heavy messes and always diluting it heavily (1 tsp mild soap per quart of water).
And never use furniture polish with silicone—it builds up over time, creating a slippery, cloudy layer that’s hard to remove later.
Dealing with Sticky Residue and Grease
Sticky spots on oak cupboards often come from cooking splatters, syrup spills, or old adhesive left behind by labels. We recommend starting with a gentle solution: mix 1 cup distilled water, 1 tbsp white vinegar, and 1 drop of castile soap** in a spray bottle.
Lightly mist a microfiber cloth—never the cupboard directly—and work in small circles along the wood grain. This combo cuts through stickiness without stripping the finish.
For heavier grease buildup near stoves or handles, we found that isopropyl alcohol (70%)** works wonders when used sparingly. Dampen a corner of a clean cloth with a few drops, then gently rub the greasy area. Don’t flood the surface—alcohol dries fast but can dull finishes if overused.
Always follow with a damp water wipe and dry immediately to neutralize any residue.
If residue persists, try a paste of baking soda and water** (2:1 ratio) applied with a soft toothbrush for textured areas. Brush lightly along the grain, then wipe clean with a damp cloth. In stubborn cases, a commercial wood-safe degreaser** like Murphy Oil Soap (properly diluted) can help—but limit use to once every few months to avoid buildup.
Safe, Natural Cleaners That Actually Work
When it comes to cleaning oak cupboards, we recommend starting with the gentlest options—like a mix of distilled white vinegar and olive oil. A solution of one part vinegar to three parts olive oil not only lifts light grime but also enhances the wood’s natural grain.
In our experience, this combo is especially effective on cupboards with a traditional oil finish, leaving behind zero chemical residue.
Another standout is a mild castile soap solution—just a teaspoon in a quart of warm water. This plant-based cleaner cuts through kitchen grease without dulling the surface. We found it works best with a microfiber cloth, lightly dampened and wrung out well. Over-wetting oak can lead to swelling, so always less is more when applying liquid.
For routine dusting and maintenance, we suggest using a dry or slightly damp microfiber cloth weekly. This prevents buildup and keeps the surface smooth. Avoid lemon-based cleaners despite their popularity—citric acid can degrade finishes over time. Stick with pH-neutral, natural formulas; they’re safer for both the wood and your household air quality.
Polishing and Protecting Your Oak Cupboards
Regular polishing isn’t just about shine—it’s a key step in preserving your oak cupboards’ longevity. We recommend using a beeswax or carnauba-based polish every 6 to 8 weeks. These natural waxes form a breathable barrier that repels moisture and resists minor scuffs.
In our experience, a thin coat applied with a soft cloth and buffed to a soft luster works best.
For older cupboards with worn finishes, consider a rejuvenating oil treatment like tung or danish oil. These penetrate deep into the wood, restoring flexibility and preventing fine cracks. Apply sparingly with a lint-free cloth, allow 15–20 minutes to absorb, then wipe off excess. We found this especially helpful in dry climates where oak tends to dehydrate.
Always test any product on a hidden area first—like the inside of a door. Some finishes react differently to oils or waxes. And remember: over-polishing can lead to buildup, creating a cloudy film. When in doubt, less product and more frequent maintenance beats heavy applications done infrequently.
Quick Fix for Water Rings and Light Scratches
Water rings are common on oak cupboards, especially near sinks or dishwashers. For fresh white marks, we suggest a simple trick: mix equal parts baking soda and non-gel toothpaste, then gently rub in a circular motion with a soft cloth. The mild abrasives lift the moisture stain without harming the finish.
Always follow up with a quick wipe using a damp cloth and dry immediately.
For deeper or older water spots that feel slightly raised, try a warm iron and blotting paper method. Place a thin cloth over the ring, set an iron to low (no steam), and press for 5–10 seconds. The heat draws out trapped moisture.
We found this works best on sealed finishes—test on a hidden spot first to avoid warping or darkening the wood.
Light surface scratches can often be disguised with a walnut or almond kernel trick. Rub the meat of a halved nut over the scratch; the natural oils seep in and darken the groove. For more noticeable marks, use a wood touch-up marker or wax filler stick that matches your oak’s tone. Buff lightly afterward for a seamless finish.
Oak Cupboard Care: Monthly vs. Yearly Tasks
| Care Task | Frequency | Recommended Products | Notes |
|---|---|---|---|
| Dust surface with microfiber cloth | Monthly | Dry or slightly damp microfiber cloth | Avoid feather dusters—they push debris into joints |
| Clean with mild wood cleaner | Every 3–4 months | pH-neutral cleaner like Weiman Wood Cleaner | Never soak the wood; damp wipe only |
| Inspect for warping or joint separation | Yearly | None (visual check) | Check corners and hinges—early signs prevent bigger issues |
| Refinish or reseal finish | Every 5–7 years | Minwax Antique Refinisher, clear satin polyurethane | Only needed if finish looks dull or feels rough |
Keeping oak cupboards in top shape means balancing routine upkeep with strategic long-term care. We recommend monthly dusting using a dry microfiber cloth—it lifts fine particles without scratching the grain. For cupboards in high-humidity areas like kitchens, a light damp wipe every few months removes cooking residue.
The key is consistency: regular attention prevents buildup that can dull or damage the finish over time.
Yearly tasks are more about assessment than action. We found that inspecting joints, hinges, and finish integrity once a year helps catch subtle problems early—like slight warping from seasonal humidity shifts. If the surface feels rough or looks faded, it may be time to consider light sanding and resealing.
These proactive checks extend the life of your cupboards significantly and maintain their warm, natural character.
Our experience shows that using the right products makes all the difference. Harsh cleaners or excess water strip the protective finish, leaving oak vulnerable. Instead, we suggest a pH-neutral wood cleaner applied sparingly with a soft cloth. Avoid silicone-based polishes—they create a false shine and build up over time.
With the right balance of monthly cleaning and yearly evaluation, oak cupboards stay beautiful for decades.
When It’s Time to Call in a Pro
There comes a point when regular maintenance isn’t enough—especially with older or heavily used oak cupboards. If you notice deep scratches that penetrate the wood, persistent water damage, or cabinet doors that no longer align properly, it’s time to bring in a professional. These aren’t just cosmetic issues; they can compromise the structural integrity of the piece.
We’ve seen minor warping escalate into irreversible damage when left unattended.
Refinishing is another area where expert help pays off. Stripping old varnish, matching stains, and applying a new protective coat requires specialized tools and knowledge. Do-it-yourself attempts often result in blotchy finishes or uneven sheen. We suggest hiring a certified wood refinisher if the cupboard has a historic or high-value finish—especially on antique oak.
The investment protects both appearance and resale value.
Also consider professional help if your cupboards show signs of pest infestation, like fine sawdust near joints or small exit holes in the wood. These could indicate powderpost beetles, which target oak’s dense grain. In our experience, early professional intervention can save the entire cabinet system.
A wood restorer can treat the infestation and reinforce weakened areas without full replacement—preserving the original craftsmanship while ensuring long-term durability.
Frequently Asked Questions
Can I use vinegar to clean oak cupboards?
Yes, we recommend a mix of equal parts white vinegar and water for light cleaning. It removes grime without harming the finish. Avoid over-saturating, and always follow with a damp cloth to remove residue. In our experience, vinegar works well for routine cleaning but shouldn’t be used on unfinished or damaged oak.
How do I remove water stains from oak cupboards?
We’ve found that light water stains can be gently buffed with a mix of toothpaste and baking soda on a soft cloth. Rub in a circular motion, then wipe clean. For deeper stains, use a commercial wood cleaner designed for oak. Always test in a small area first to avoid further damage to the finish.
What oil should I use to condition oak cupboards?
We recommend using mineral oil or danish oil to nourish and protect oak surfaces. Apply with a soft cloth, following the wood grain, and wipe off excess after 15 minutes. In our experience, conditioning every 3–6 months keeps the wood from drying and enhances its natural beauty.
Can I use bleach on oak cupboards to remove stains?
We advise against using chlorine bleach on oak, as it can damage the wood and discolor the finish. For stubborn stains, we’ve had better results with oxalic acid-based wood bleach, which is gentler and specifically formulated for wood. Always rinse thoroughly and let dry before refinishing or conditioning.
How often should I clean oak cupboards?
We recommend dusting weekly with a microfiber cloth and doing a deeper clean every 2–3 months, depending on kitchen use. In our experience, regular maintenance prevents grime buildup and extends the life of the finish. Avoid harsh detergents—stick to mild soap and water for best results.
Final Thoughts
Caring for oak cupboards doesn’t require special expertise—just consistent, gentle cleaning and the right products. We’ve found that understanding the wood’s needs and avoiding harsh chemicals makes a lasting difference. With proper attention, oak retains its warmth and strength for years, enhancing both the look and value of your kitchen.
Start with a simple routine: dust often, clean with mild solutions, and condition periodically. We encourage you to take a few minutes each week to care for your cupboards—you’ll notice how much better they look and feel over time. Small efforts today lead to lasting beauty tomorrow.