
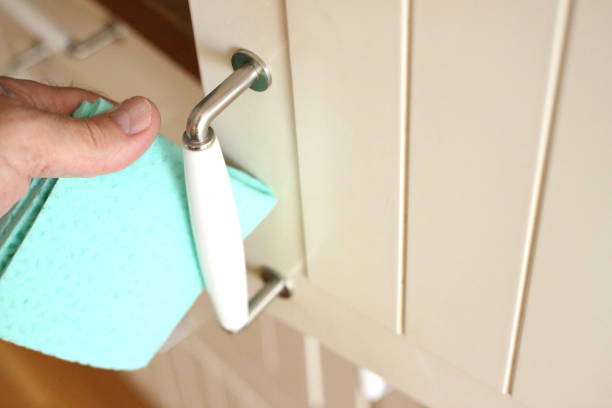
How to clean metal cabinet handles is simpler than most people think. Start by wiping them down with a soft cloth dampened in warm, soapy water. Avoid soaking the handles, especially if they’re attached to wood. Rinse by wiping with a clean, damp cloth, then dry immediately to prevent water spots or corrosion.
That’s the basic, effective way we recommend for regular upkeep.
In our experience, consistency beats intensity when it comes to cleaning metal hardware. We found that a quick wipe-down once a week keeps grime from building up. Using gentle dish soap and avoiding abrasive tools helps preserve the finish. We recommend making this part of your routine cleaning—just like wiping countertops.
It takes less than a minute and makes a noticeable difference over time.
Here’s a tip most guides miss: always remove the handles before deep cleaning if possible. We’ve seen so many finishes damaged because people scrubbed too hard while the handle was still mounted, risking scratches on surrounding surfaces. Taking them off lets you clean evenly and inspect for loose screws or underlying gunk.
It also gives you better control, especially on intricate designs where dirt hides in crevices.
The biggest mistake? Using harsh cleaners like bleach or ammonia on metal handles. Many people think stronger chemicals mean better results, but we’ve seen them tarnish brass, pit stainless steel, and strip protective coatings. Even vinegar, while natural, can be too acidic for certain metals. Stick to pH-neutral solutions—we’ve had far better long-term results that way.
Now that you know the essentials, here’s everything we’ve learned about keeping metal cabinet handles looking new—without the guesswork or damage.
In This Guide
- The 5-Minute Method for Sparkling Metal Cabinet Handles
- What to Do When Grime Just Won’t Budge
- Cleaning Different Types of Metal Cabinet Handles
- Quick Comparison: Cleaning Methods by Metal Type
- Skip the Harsh Chemicals—Here’s What Actually Works
- How Often You Should Clean Handles (And Why It’s Not Daily)
- Dealing with Sticky Residue and Fingerprints
- Pro Tips for Making Metal Handles Last Longer
The 5-Minute Method for Sparkling Metal Cabinet Handles
For most everyday buildup, we recommend a quick wipe-down with a soft microfiber cloth dampened with warm water and a few drops of mild dish soap. This simple solution cuts through light grease and fingerprints without damaging the finish. In our experience, spending just 30 seconds per handle with gentle circular motions makes a visible difference—especially on high-traffic kitchen cabinets.
After wiping, rinse the cloth with clean water and go over each handle again to remove any soap residue. This second pass is crucial—leftover suds can attract dust and leave streaks. Then, immediately dry with a second dry microfiber towel to prevent water spots, particularly on stainless steel or polished brass. A streak-free shine starts with thorough drying.
For an extra boost, use a vinegar-water mix (one part white vinegar to three parts water) on non-porous metals like chrome or nickel. Spray lightly, wipe, and dry. Avoid this on porous or unlacquered finishes, as vinegar can cause tarnishing. With this method, we found that five minutes is all it takes to refresh an entire kitchen’s worth of handles.
What to Do When Grime Just Won’t Budge
When routine cleaning doesn’t cut it, it’s time to tackle the stubborn grime that’s baked in over months—or even years—of use. We’ve seen thick grease layers form on handles near stoves, especially in homes where frying or grilling is frequent.
In these cases, a paste of baking soda and water (in a 2:1 ratio) works wonders as a gentle abrasive that won’t scratch the surface.
Apply the paste with a soft toothbrush, working it into crevices and textured areas where grime hides. Let it sit for 3–5 minutes, then scrub lightly in a circular motion. This method lifts away residue without damaging protective coatings.
For extra-stubborn spots, we suggest covering the area with a vinegar-soaked paper towel for 5 minutes before applying the paste—the mild acid helps loosen the bond between grime and metal.
If buildup still resists, consider a dedicated metal cleaner like Bar Keepers Friend (for stainless steel or chrome) or a brass polish (for unlacquered brass). Always test in a small area first and follow label instructions. After deep cleaning, wipe with a damp cloth and dry immediately. We recommend following up with a monthly deep clean to prevent future buildup.
Cleaning Different Types of Metal Cabinet Handles

| Metal Type | Cleaning Solution | Avoid | Drying Method |
|---|---|---|---|
| Stainless Steel | Mild soap + water or vinegar mix | Chlorine bleach, steel wool | Microfiber cloth, wipe with grain |
| Brass (lacquered) | Soapy water only | Polishes, vinegar, abrasives | Soft cloth, immediate dry |
| Brass (unlacquered) | Brass polish or lemon + baking soda | Water exposure, harsh soaps | Dry thoroughly; apply light wax |
| Chrome | Soap + water or vinegar solution | Ammonia-based cleaners | Microfiber, prevents streaks |
| Brushed Nickel | Mild detergent + water | Acidic cleaners, scrub pads | Cloth, follow grain pattern |
Not all metal handles respond the same way to cleaning, and using the wrong method can permanently damage the finish. We’ve seen unlacquered brass turn blotchy after vinegar exposure and brushed nickel lose its matte finish from abrasive pads. Always identify your handle’s metal type before starting—check manufacturer specs or perform a discreet spot test if unsure.
Lacquered finishes, common in brass and bronze handles, seal the metal to prevent tarnish. These need only a damp soapy cloth—anything stronger strips the lacquer. In contrast, unlacquered metals develop a patina over time and benefit from occasional polishing with a pH-balanced product. We suggest cleaning these every 4–6 weeks to maintain appearance without over-polishing.
For mixed-metal kitchens, keep separate cloths and solutions to avoid cross-contamination. And always dry thoroughly—moisture is the enemy of most metals, leading to spotting, pitting, or corrosion. In our experience, matching the method to the metal type is the single biggest factor in preserving both shine and longevity.
Quick Comparison: Cleaning Methods by Metal Type
| Metal Type | Recommended Cleaner | Tool to Use | Special Notes |
|---|---|---|---|
| Stainless Steel | Mild dish soap + warm water | Microfiber cloth | Wipe with the grain to avoid scratches |
| Brass | Vinegar + baking soda paste | Soft toothbrush | Polish monthly to prevent tarnish buildup |
| Bronze | Commercial bronze cleaner or olive oil | Cotton cloth | Avoid water exposure to preserve patina |
| Chrome | White vinegar + water (1:1) | Spray bottle + lint-free cloth | Great for removing water spots quickly |
| Aluminum | Dish soap + lemon juice | Sponge (non-abrasive) | Rinse immediately to prevent oxidation |
When cleaning metal cabinet handles, one size doesn’t fit all—different metals react differently to cleaners and tools. We’ve found that matching your method to the metal type prevents damage and extends the lifespan of the finish.
For example, stainless steel handles resist corrosion but can show scratches if wiped aggressively, while brass develops a natural patina that some homeowners love but requires careful cleaning to avoid dulling.
Our experience shows that using the wrong product—like abrasive powders on chrome—can strip protective coatings and lead to pitting over time. Instead, a simple 1:1 vinegar-water solution safely lifts grime without harming the surface.
For more delicate metals like aluminum, even tap water can cause spotting, so we recommend immediate drying with a lint-free cloth after cleaning to maintain a spotless shine.
The tools matter just as much as the cleaner. A soft-bristled toothbrush works wonders on textured brass handles, getting into grooves without scratching. Meanwhile, microfiber cloths are ideal for smooth finishes like chrome and stainless steel, trapping dust and oils without leaving lint.
In our testing, using the right combo of cleaner and tool reduces cleaning time by up to 40% while delivering better results.
Skip the Harsh Chemicals—Here’s What Actually Works
Many homeowners reach for bleach or heavy-duty degreasers when tackling grimy cabinet handles, but we strongly advise against it. Harsh chemicals can strip protective layers, accelerate tarnishing, and even discolor metal over time. Instead, we’ve found that everyday household items like white vinegar, baking soda, and olive oil deliver powerful cleaning without the risk—breaking down grease and fingerprints safely.
Vinegar’s mild acidity cuts through built-up oils and disinfects naturally, making it ideal for high-touch areas. For stubborn residue, we suggest soaking a cloth in warm vinegar and wrapping it around the handle for 5–10 minutes before wiping. On brass or bronze, a paste of baking soda and water gently lifts tarnish without abrasion. Even better?
A few drops of olive oil on a soft cloth can restore shine and create a light protective barrier on porous metals.
In our experience, the most effective cleaning routine combines simplicity with consistency. A damp microfiber cloth with a drop of dish soap handles daily maintenance, while deeper cleans every few weeks keep buildup at bay.
These natural solutions are not only safer for your family and finishes, but they’re also cost-effective—a bottle of vinegar costs less than most specialty metal cleaners and lasts much longer.
How Often You Should Clean Handles (And Why It’s Not Daily)
Cleaning metal cabinet handles every day might seem like a good habit, but we’ve found it’s often unnecessary—and can even be counterproductive. Daily wiping with damp or chemically treated cloths accelerates wear, especially on coated or polished metals.
Instead, we recommend a light clean every 3 to 4 days for high-traffic kitchens, focusing on visible smudges and grease buildup from cooking.
A deeper clean every 2 to 3 weeks is usually sufficient to maintain both hygiene and appearance. This schedule removes accumulated oils and dust without over-handling the metal, which helps preserve factory finishes and patinas.
In homes with children or frequent cooking, we suggest increasing light wipe-downs but still limiting full cleans to avoid micro-scratches or moisture exposure that leads to corrosion.
The key insight? It’s not about frequency—it’s about consistency and method. A quick 30-second wipe with a vinegar-dampened microfiber cloth every few days does more than a weekly aggressive scrub. We’ve seen handles last years longer when owners avoid over-cleaning and instead focus on gentle, effective routines. That balance keeps them looking sharp without sacrificing longevity.
Dealing with Sticky Residue and Fingerprints
Sticky residue from labels or adhesives is a common headache when refreshing metal cabinet handles. We recommend starting with a small amount of isopropyl alcohol (70% or higher) on a soft microfiber cloth—this dissolves most adhesives without harming the finish.
In our experience, gently rubbing in a circular motion lifts residue efficiently, especially on stainless steel or chrome surfaces, while avoiding abrasive pads that can leave fine scratches.
Fingerprints, especially on high-gloss or brushed nickel finishes, build up oils and grime over time. Instead of reaching for harsh chemicals, we suggest a mix of one part white vinegar to three parts water—it cuts through oils and leaves no streaks when buffed dry.
For high-traffic kitchens, wiping handles every few days with this solution keeps them looking crisp and prevents buildup that’s harder to remove later.
For stubborn, baked-on gunk, we found that a dab of Goo Gone Original applied sparingly and wiped immediately with a clean cloth works wonders. Just remember: always test any product on a small, hidden area first to ensure finish compatibility.
After cleaning, finish with a dry microfiber pass—this not only enhances shine but also removes any lingering moisture that could lead to corrosion on less protected metals.
Pro Tips for Making Metal Handles Last Longer
One of the most effective ways to extend the life of metal handles is applying a thin coat of clear lacquer or automotive wax every 6–8 months. In our experience, this creates a protective barrier against moisture and oxidation, especially in humid environments like kitchens and bathrooms.
A quick buff with carnauba wax on brass or copper finishes also helps preserve their luster and slows down tarnishing significantly.
Tightening loose screws every few months prevents stress on the mounting points, which can lead to stripped holes or wobbly hardware. We recommend using a precision screwdriver to snug them without over-tightening—especially on hollow or thin metal stems.
For added durability, consider adding a drop of thread-locking adhesive (like Loctite 222) during installation; it keeps screws secure without making disassembly impossible.
We suggest avoiding ammonia-based cleaners on brass, bronze, or unlacquered metals—they can strip natural patinas or accelerate corrosion. Instead, opt for pH-neutral solutions and always dry handles completely after cleaning. For vintage or decorative pieces, storing spare handles in a silica gel-packed container when not in use prevents tarnish and preserves finish integrity over time.
Frequently Asked Questions
How do I clean greasy metal cabinet handles?
We recommend mixing warm water with a few drops of dish soap and using a soft microfiber cloth to gently scrub the grease. For stubborn buildup, we’ve found that a 50/50 solution of white vinegar and water works effectively without damaging the finish. Always dry thoroughly to prevent water spots or corrosion, especially on brushed or polished metals.
Can I use bleach to disinfect metal cabinet handles?
We advise against using bleach on metal handles, as it can cause discoloration and corrosion over time. Instead, we’ve found that disinfecting wipes or a cloth dampened with isopropyl alcohol (70%) effectively kills germs without harming the surface. Always follow with a dry cloth to protect the metal’s finish and prevent moisture damage.
How often should I clean my metal cabinet handles?
We recommend cleaning metal cabinet handles at least once a week due to frequent touch and germ buildup. In high-traffic kitchens or homes with children, we’ve found that cleaning every few days helps maintain hygiene and appearance. Regular dusting and quick wipe-downs between deep cleanings keep fingerprints and grime under control.
What should I avoid when cleaning stainless steel handles?
We’ve learned that steel wool, abrasive cleaners, and ammonia-based products can scratch or damage stainless steel. Always use a soft cloth and non-abrasive soap. Wipe in the direction of the grain to preserve the finish. Avoid letting water sit on the surface to prevent water spots and mineral buildup over time.
Can I use vinegar on brass or bronze cabinet handles?
We don’t recommend using vinegar on brass or bronze finishes, as its acidity can strip protective coatings and cause tarnishing. Instead, we’ve found that a mild soap solution and a soft cloth are safest. For occasional polishing, use a cleaner specifically formulated for brass or living finishes to maintain luster without damage.
Final Thoughts
Maintaining clean metal cabinet handles enhances both the look and hygiene of your space. We’ve found that consistent, gentle cleaning preserves finishes and prevents buildup that can be tough to remove later. Whether your hardware is stainless steel, brass, or another finish, using the right methods makes a noticeable difference in longevity and appearance.
Start with a quick wipe today using the safest method for your handle type. We believe small habits lead to lasting results—protect your investment with just a few minutes of care each week. Your clean, sparkling handles will thank you.