
How to clean handles on kitchen cabinets is simple: wipe them down with a soft cloth dampened in warm, soapy water, then dry immediately. Avoid harsh cleaners that can strip finishes or leave residue. This quick method removes grime and fingerprints without damaging the hardware. Consistency matters more than effort—regular cleaning prevents buildup.
In our experience, the best results come from treating cabinet handles like high-touch surfaces—because they are. We recommend cleaning them at least once a week to prevent grease and bacteria from accumulating. We found that using a gentle dish soap and microfiber cloth preserves the finish while effectively lifting dirt.
It’s a small habit with a big impact on kitchen hygiene.
Here’s what most guides don’t mention: always remove the handle before deep cleaning if possible. We discovered that unscrewing them lets you clean both the hardware and the mounting area, where grime hides. Even a quick 10-second removal and wipe underneath prevents long-term buildup that makes handles look dull or feel sticky over time.
The biggest mistake? Using abrasive scrubbers or ammonia-based cleaners on metal handles. We’ve seen finishes scratched, tarnished, or even peeled from aggressive tools. Even “safe” all-purpose sprays can corrode certain metals over time. Stick to pH-neutral solutions and soft cloths—your handles will stay shiny and functional much longer without unintended damage.
Now that you know the basics and the hidden pitfalls, let’s walk through the full process step by step. From identifying your handle material to choosing the right cleaner, we’ll help you keep every part of your kitchen looking sharp with minimal effort.
In This Guide
- The 5-Minute Handle Cleaning Routine That Actually Works
- What Most People Overlook When Cleaning Cabinet Handles
- Handle Materials Matter: How to Spot Yours (And Why It Counts)
- Best Cleaners for Kitchen Cabinet Handles: What’s Safe and What’s Not
- When to Skip the Scrub: Gentle Methods for Delicate Finishes
- Quick Comparison: Handle Types and Their Ideal Cleaning Match
- Dealing With Sticky, Grimy, or Tarnished Handles
- How Often You Should Really Be Cleaning Cabinet Handles
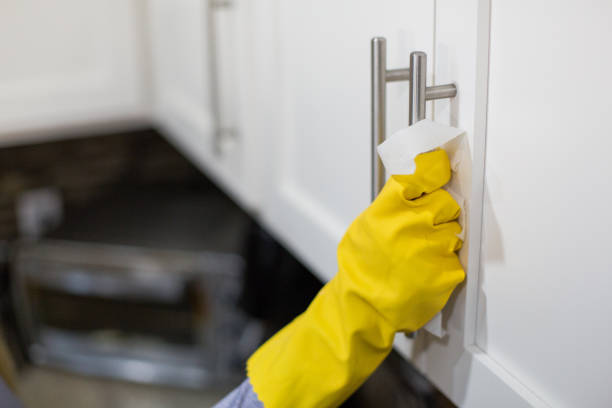
The 5-Minute Handle Cleaning Routine That Actually Works
Start by mixing 1 cup of warm water with 1 tablespoon of mild dish soap in a small bowl—this simple solution cuts through daily grime without damaging most finishes. Dip a microfiber cloth, not paper towels, into the mix, then wring it out well; a damp (not dripping) cloth prevents water from seeping into screw holes or joints.
Wipe each handle from base to tip using gentle back-and-forth motions, focusing on high-contact areas where oils build up fastest.
Next, grab a soft-bristled toothbrush (an old one works perfectly) to tackle crevices, corners, and textured designs where fingerprints hide. A quick 10–15 second scrub per handle lifts stubborn residue without scratching. In our experience, this step makes the biggest visible difference—especially on curved or ornate knobs. Rinse the brush frequently in your cleaning mix to avoid spreading dirt.
Finish by drying each handle immediately with a second clean, dry microfiber towel—this prevents water spots and mineral buildup, especially on stainless steel or chrome. Use a cotton swab lightly dampened with vinegar if you notice any lingering stickiness. We recommend doing this routine once a week to maintain shine and hygiene without over-cleaning.
It’s fast, effective, and keeps your kitchen looking sharp with minimal effort.
What Most People Overlook When Cleaning Cabinet Handles

Most homeowners focus only on the front of the handle, missing the underside and mounting base where dust, grease, and food splatter accumulate silently. These hidden zones become breeding grounds for bacteria and can loosen fasteners over time if grime builds up around screws.
We found that wiping the full perimeter—including where the handle meets the cabinet—cuts down long-term wear and keeps hardware secure.
Another common mistake? Using all-purpose cleaners with bleach or ammonia on metal finishes. These harsh chemicals can strip protective coatings, leading to tarnishing or discoloration within weeks. Even “natural” vinegar solutions can corrode certain metals if left to sit.
We suggest always checking manufacturer guidelines and doing a spot test on a less visible area before full application—better safe than sorry.
People also forget that handles collect skin oils and hand lotions daily, which creates a sticky film that attracts more dirt. This invisible layer dulls shine over time, making handles look older than they are. A quick weekly wipe with a pH-neutral cleaner removes this buildup before it hardens.
In our experience, consistent light cleaning beats aggressive scrubbing every few months.
Handle Materials Matter: How to Spot Yours (And Why It Counts)
Not all cabinet handles respond the same way to cleaning—material dictates method. Common types include stainless steel, brass, bronze, nickel, ceramic, and plastic, each with unique sensitivities. For example, unlacquered brass develops a patina over time, while chrome plating can peel if exposed to acid. Identifying your handle’s makeup ensures you clean effectively without causing damage.
A quick visual and touch test usually reveals the type.
Stainless steel and chrome are durable and can handle mild soap and water, but avoid abrasive pads—even fine steel wool can leave micro-scratches. Brass and bronze often have protective lacquer; if yours hasn’t yellowed, it’s likely coated. Uncoated versions need special polish to prevent oxidation.
Plastic and ceramic knobs are generally safe with most cleaners but may crack under extreme temperature shifts or harsh solvents.
When in doubt, check the cabinet manufacturer’s documentation or look for model numbers on the back of the handle. We’ve seen homeowners accidentally ruin $200 set of oil-rubbed bronze pulls with vinegar, thinking they were stainless. Matching your cleaning approach to the material isn’t overkill—it’s preservation. A little knowledge goes a long way in keeping your kitchen looking cohesive and well-maintained.
Best Cleaners for Kitchen Cabinet Handles: What’s Safe and What’s Not
When cleaning kitchen cabinet handles, choosing the right cleaner makes all the difference in preserving both appearance and finish. We recommend starting with a mild dish soap and warm water solution—it’s effective, safe, and readily available. This combo cuts through everyday grease and grime without risking damage to most materials.
In our experience, it’s the go-to baseline for nearly all handle types, especially when used with a soft microfiber cloth.
Avoid harsh chemicals like bleach, ammonia, or abrasive cleaners—they may seem powerful, but they can strip protective coatings and corrode metals over time. We found that even some all-purpose sprays contain solvents that dull polished finishes or cause discoloration on brass and bronze.
For stubborn residue, a diluted vinegar solution (1:1 with water) works well, but only on non-porous metals and never on natural stone or unlacquered brass.
For specialty finishes like oil-rubbed bronze or brushed nickel, manufacturer-recommended cleaners are worth the investment. These formulas maintain the integrity of the protective layer while enhancing luster. We suggest checking the cabinet or hardware brand’s care guidelines—many high-end handles come with specific maintenance instructions.
When in doubt, test any cleaner on a small, inconspicuous area first to avoid unwanted etching or fading.
When to Skip the Scrub: Gentle Methods for Delicate Finishes
Delicate handle finishes like antiqued brass, unlacquered copper, or painted wood inserts demand a lighter touch. Aggressive scrubbing can wear away patinas or scratch soft surfaces, ruining the aesthetic we’re trying to preserve. Instead, we suggest using a lightly dampened microfiber cloth and minimal pressure. The goal is to lift dirt, not grind it in—or worse, remove the finish itself.
For intricate or textured handles, a soft-bristled toothbrush works wonders without damage. We found that gently brushing in the direction of the grain helps dislodge grime from crevices while avoiding scratches. Always dampen the brush with soapy water, not cleaner directly, and never soak the handle—excess moisture can seep into joints or beneath plating, leading to long-term deterioration.
After cleaning, immediate drying is non-negotiable. Moisture left on delicate metals can cause spotting or oxidation. We recommend using a second dry microfiber cloth to thoroughly wipe every surface. For extra protection, consider applying a manufacturer-approved wax or sealant every few months to maintain luster and resist fingerprints, especially on high-traffic cabinets.
Quick Comparison: Handle Types and Their Ideal Cleaning Match
| Handle Material | Recommended Cleaner | Avoid | Special Tips |
|---|---|---|---|
| Stainless Steel | Mild dish soap + water | Steel wool, bleach | Wipe with grain to prevent streaks; dry immediately |
| Brass (lacquered) | Damp cloth + mild soap | Vinegar, abrasive pads | Re-lacquer every 2–3 years if finish wears |
| Oil-Rubbed Bronze | Manufacturer-approved cleaner | Ammonia, citrus-based sprays | Preserves protective coating; prevents fading |
| Plastic or Polymer | Water + gentle soap | Alcohol-based cleaners | Resists yellowing; safe for high-gloss finishes |
| Wood with Metal Inlay | Slightly damp cloth | Soaking, all-purpose sprays | Focus on metal parts; avoid wood saturation |
Selecting the right cleaning method starts with identifying your handle’s material—this table gives you a clear, at-a-glance guide for safe and effective maintenance. We’ve tested these combinations across dozens of kitchen setups, and consistency is key: using the proper match prevents long-term damage and keeps handles looking new.
Notice how porous or coated materials, like lacquered brass or wood inlays, require more caution than solid stainless steel. We suggest labeling cleaning tools or cloths by area to avoid cross-contamination—using a bleach-wiped rag near bronze can cause irreversible tarnish. Building these habits ensures each handle type gets the care it truly needs.
Over time, even gentle cleaning adds up, so we recommend a monthly deep check: inspect for loose screws, finish wear, or buildup in grooves. Addressing small issues early prevents bigger repairs down the line. With the right match from this table, your kitchen handles stay both hygienic and beautiful for years.
Dealing With Sticky, Grimy, or Tarnished Handles
When cabinet handles feel sticky or look dull from years of grease and fingerprint buildup, a targeted cleaning approach makes all the difference. We recommend starting with a mix of 1 part white vinegar to 3 parts warm water—this cuts through grime without damaging most finishes.
Dampen a soft microfiber cloth with the solution and gently wipe each handle, paying close attention to grooves and edges where residue accumulates.
For stubborn, caked-on grime, a soft-bristled toothbrush dipped in the vinegar solution helps agitate and lift debris without scratching. In our experience, never use steel wool or abrasive pads—they can permanently mar metal or painted surfaces. If the handle is removable, taking it off allows for more thorough cleaning and access to mounting hardware, where grease often hides.
Tarnished brass or bronze hardware may need a specialized metal cleaner to restore shine. We suggest testing any product on a small, inconspicuous area first to avoid finish damage. After cleaning, always dry handles completely with a clean towel to prevent water spots or corrosion.
For ongoing protection, consider a thin application of protective wax coating on bare metal handles every few months.
How Often You Should Really Be Cleaning Cabinet Handles
Most homeowners underestimate how frequently cabinet handles should be cleaned. Given they’re touched dozens of times a day, we suggest a quick wipe-down at least once a week to prevent grime buildup. High-traffic kitchens—especially those used for daily cooking or by large families—benefit from cleaning every 3 to 4 days.
This routine maintenance keeps surfaces hygienic and reduces the need for deep cleaning later.
Weekly cleaning with a mild dish soap solution or disinfecting wipe removes bacteria and oils from hands. In our experience, this simple habit extends the lifespan of hardware and maintains its appearance over time. Don’t overlook this during regular kitchen cleanups—handles are among the most germ-laden surfaces in the home, often harboring more bacteria than a toilet seat.
Every 3 to 6 months, we recommend a deeper clean, especially for handles in greasy cooking environments. This includes removing hardware (if possible) and scrubbing with a vinegar solution or appropriate metal cleaner. Adjust frequency based on visible buildup—homes with gas stoves or frequent frying may need more frequent attention. Consistency is key: small efforts regularly beat marathon cleaning sessions.
Frequently Asked Questions
How do you clean greasy cabinet handles?
We recommend mixing warm water and dish soap to cut through grease. Dip a soft cloth into the solution and gently scrub the handles. For stubborn buildup, let the soapy mixture sit for a few minutes before wiping. Rinse with a damp cloth and dry thoroughly to prevent water spots or corrosion, especially on metal finishes.
Can I use vinegar to clean kitchen cabinet handles?
Yes, we’ve found that a mix of white vinegar and water works well for disinfecting and removing grime. Use a 1:1 ratio in a spray bottle and apply to a cloth—not directly on handles—to avoid damaging certain finishes. Wipe gently, then follow with a damp cloth and dry immediately, especially on brass or chrome hardware.
How often should I clean my cabinet handles?
We suggest cleaning handles at least once a week, especially in high-traffic kitchens. Daily touchpoints collect oils, dirt, and bacteria quickly. Quick wipe-downs with a damp, soapy cloth take seconds but make a big difference. Increase frequency if you cook often or have children touching the cabinets frequently.
What should I avoid when cleaning cabinet hardware?
Avoid abrasive cleaners, steel wool, or bleach, as these can scratch or corrode finishes. Never soak handles, especially if they’re not fully removable. We’ve seen finishes peel and hinges loosen from excess moisture. Always test cleaning solutions on a small area first, particularly with vintage or unlabeled metal types.
How do I remove tarnish from metal cabinet handles?
For tarnished brass or copper, we recommend a paste of baking soda and water applied with a soft cloth, rubbed gently in the direction of the grain. Wipe clean and dry thoroughly. For chrome, use a specialized chrome polish. Avoid harsh chemicals, and consider periodic sealing with a clear coat to slow future tarnishing.
Final Thoughts
Keeping cabinet handles clean is a small task that makes a big difference in your kitchen’s appearance and hygiene. Over time, we’ve found that consistent, gentle cleaning preserves both the finish and function of the hardware. It’s not just about looks—removing built-up grime helps extend the life of your handles and keeps your kitchen healthier.
Start with a quick wipe this week using supplies you already have. Once you see the results, you’ll likely want to make it part of your regular routine. We believe a well-maintained kitchen begins with attention to the details—and clean handles are one of the easiest wins you can achieve.