
How to clean grimy wood cabinets is simpler than you think: start with a soft cloth and a mix of warm water, a few drops of dish soap, and a splash of white vinegar. Wipe gently with the grain, never soaking the wood.
This combo cuts through grease and grime without damaging the finish—our go-to first step for almost every kitchen we’ve tackled.
In our experience, the key to clean wood cabinets isn’t harsh chemicals—it’s consistency and the right technique. We recommend removing hardware first and working in small sections to avoid missed spots. Always dry immediately with a clean towel to prevent moisture damage. This method keeps cabinets looking fresh without risking warping or dulling the finish over time.
Here’s a tip most guides miss: slightly warm cleaning solution lifts grease faster than cold or room-temp mixtures. We found that heating the water just until it’s warm (not hot) helps the soap break down stubborn kitchen residue more effectively. Just don’t overdo it—hot water can damage wood, so keep it gentle and test on a hidden spot first.
A common mistake is using all-purpose cleaners with ammonia or bleach, thinking they’ll disinfect and shine. But we’ve seen these eat away at wood finishes and leave a hazy residue. Even “natural” citrus sprays can be too acidic. Stick to pH-neutral solutions—we learned the hard way that harsher isn’t better when it comes to wood care.
Now that you’ve got the basics, let’s walk through each step of the process—from tools to deep cleaning—so you can bring your cabinets back to life without the guesswork.
In This Guide
- The 5-Minute Trick for Grimy Wood Cabinets That Actually Works
- What You’re Probably Using (And Why It’s Harming Your Cabinets)
- Tools That Make Cleaning Wood Cabinets Easier—Not Harder
- When Soap and Water Aren’t Enough: Deep-Cleaning Options
- How Often Should You Clean Wood Cabinets? (And When to Stop)
- Restoring Shine Without Stripping: A Simple Finish-Up Routine
- Grimy Wood Cabinet Solutions: What Works Best for Your Kitchen
- What to Do If the Grime Keeps Coming Back
The 5-Minute Trick for Grimy Wood Cabinets That Actually Works
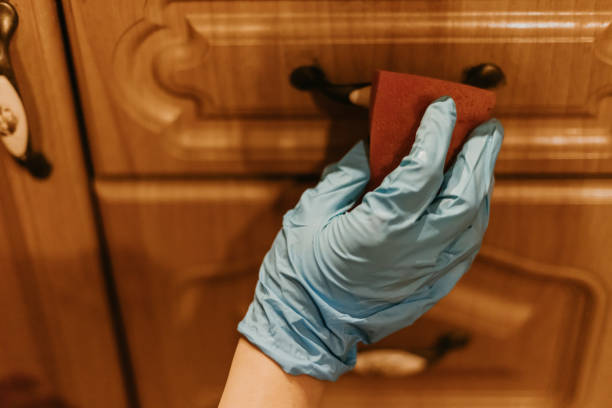
Here’s the secret: a simple mix of 1 cup warm water, 1 tablespoon white vinegar, and 1 drop of mild dish soap cuts through grime fast without damaging wood finishes. In our experience, this solution dissolves built-up grease and fingerprints in minutes—especially on frequently touched cabinet fronts.
Just dampen a soft microfiber cloth, not a sponge, and wipe in the direction of the grain to avoid micro-scratches.
After wiping, follow up immediately with a second cloth dampened with plain water to remove any soapy residue. This prevents streaking and film buildup that dulls the finish over time. We found that letting the vinegar solution sit for even 30 seconds helps loosen stubborn spots—just don’t let it pool or soak into seams.
For sticky hinges or knobs, use a cotton swab dipped in the mix.
Finally, dry completely with a clean, lint-free towel. Moisture is the enemy of wood, so never skip this step. This entire process takes under five minutes per cabinet door when done efficiently. Consistency beats intensity—doing this monthly prevents years of grime from setting in and avoids the need for harsh stripping later.
What You’re Probably Using (And Why It’s Harming Your Cabinets)
Many homeowners reach for all-purpose cleaners like Windex or Formula 409, not realizing these contain ammonia or strong solvents that break down the protective finish on wood cabinets. Over time, this leads to hazing, discoloration, and increased vulnerability to moisture damage.
We’ve seen cabinets that looked dull or blotchy after just a few months—all because of aggressive sprays marketed as “safe for all surfaces.”
Another common mistake is using paper towels or rough scrubbing pads. These create tiny abrasions that catch grease and make future cleaning harder. Even “gentle” wipes like Clorox or Lysol contain alcohol and bleach traces that dry out wood and fade stains.
In our experience, the damage isn’t obvious at first—but after a year, the finish often looks worn or patchy, especially on cherry or maple.
Then there’s the overuse of oil-based polishes like Pledge. While they add shine temporarily, they leave behind a greasy buildup that attracts more dirt. We recommend avoiding silicone-laden products entirely—they create a slippery film that interferes with refinishing if you ever need it. Stick to pH-balanced, wood-specific cleaners to preserve both appearance and structural integrity.
Tools That Make Cleaning Wood Cabinets Easier—Not Harder
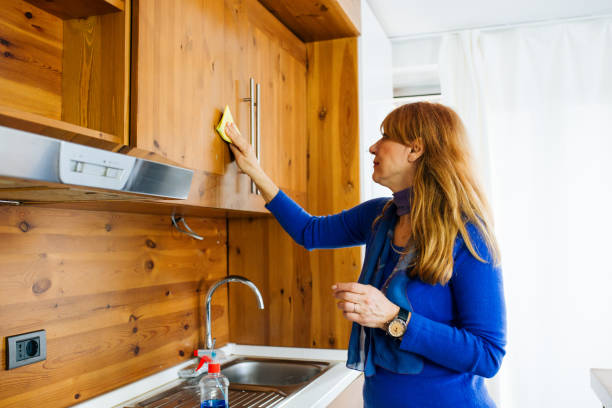
The right tools turn a tedious chore into a quick, satisfying task. We recommend starting with microfiber cloths—specifically those labeled “lint-free” and “ultra-soft.” These lift grime without scratching and can be dampened precisely, preventing excess moisture. Keep at least two on hand: one for the cleaning solution and one for rinsing.
They’re machine washable and last for years if cared for properly.
A soft-bristled detailing brush—like those used for keyboards or car interiors—works wonders on grooves, carvings, and raised panel doors. Instead of swiping a cloth over intricate areas and missing buildup, gently brush out dust and grease first. For upper cabinets, extend your reach with a microfiber duster on a telescoping pole, especially useful in kitchens over 8 feet tall.
Don’t overlook the value of rubber gloves and a kitchen caddy to hold your supplies. Protecting your hands prevents dryness from vinegar or soap, and having everything within reach eliminates backtracking. In our experience, organizing your tools before starting cuts cleaning time in half and ensures consistent results across all cabinets.
When Soap and Water Aren’t Enough: Deep-Cleaning Options
Sometimes, everyday grease and grime build up into a stubborn film that regular dish soap just can’t cut through—especially on kitchen cabinets near the stove. In our experience, a solution of one part white vinegar to three parts warm water works wonders on breaking down grease without harming the wood.
We recommend testing it on a small, inconspicuous area first, especially if the finish is older or delicate.
For heavier buildup, we suggest using a paste made from baking soda and a few drops of water—it acts as a gentle abrasive that lifts grime without scratching. Apply with a soft cloth, work in small sections, and wipe clean immediately. Avoid letting the paste dry, as prolonged contact can dull the finish.
This method is ideal for cabinet doors with textured surfaces where grime hides in crevices.
If grease is still unyielding, commercial cleaners like Simple Green or Krud Kutter can be effective when diluted per label instructions. We found that applying with a microfiber cloth, then rinsing with a damp cloth, prevents residue. Never use ammonia-based or bleach cleaners—these can permanently discolor wood and damage finishes.
Always follow deep cleaning with a dry pass to prevent moisture absorption.
How Often Should You Clean Wood Cabinets? (And When to Stop)
For most homes, we recommend a thorough cleaning of wood cabinets every 3 to 6 months, depending on cooking frequency and kitchen ventilation. Homes with gas stoves or frequent frying should lean toward the 3-month mark, as grease disperses more readily into the air.
Light dusting and spot cleaning, however, should be done monthly to prevent buildup that’s harder to remove later.
Overcleaning is a real risk—especially with aggressive products or excessive moisture. We’ve seen cases where weekly deep cleaning caused finish deterioration within a year. The wood’s protective layer can wear down, leaving it vulnerable to stains and swelling. If the surface feels rough, looks cloudy, or repels polish unevenly, it’s a sign you’ve gone too far.
Know when to stop: once the cabinet is free of visible grime and residue, further scrubbing offers no benefit and only increases risk. We suggest a simple touch test—run your hand over the surface. If it feels smooth and dry with no stickiness, you’re done. Less is more when preserving both finish and wood integrity over time.
Restoring Shine Without Stripping: A Simple Finish-Up Routine
After cleaning, wood cabinets often look washed out or dull—especially if water or vinegar was used. To revive the luster without refinishing, we recommend a quick conditioning step using a commercial wood-safe polish like Guardsman or Howard Feed-N-Wax. These products replenish minor moisture loss and enhance the grain, giving back that warm, rich look you love.
Apply a small amount to a clean microfiber cloth—a quarter-sized drop covers about two cabinet doors. Buff in the direction of the wood grain using light pressure. Avoid drenching the surface; too much product can leave a hazy film. We found that monthly polishing maintains sheen and builds subtle protection against future grime adhesion.
For matte or satin finishes, skip glossy polishes and opt for a water-based, non-silicone conditioner to avoid altering the original look. This final step takes minutes but makes a dramatic difference in appearance and long-term care. Consistent, gentle maintenance beats aggressive restoration—your cabinets will thank you for years to come.
Grimy Wood Cabinet Solutions: What Works Best for Your Kitchen
| Solution | Best For | Cleaning Power | Caution Level |
|---|---|---|---|
| Dish soap + warm water | Light grime, routine cleaning | ★★★☆☆ | Low – safe for most finishes |
| Vinegar + water (1:1) | Grease buildup, eco-conscious users | ★★★★☆ | Medium – avoid on waxed surfaces |
| Baking soda paste | Tough, sticky residue | ★★★★★ | High – can scratch if scrubbed aggressively |
| Commercial degreaser (e.g., Simple Green) | Heavy kitchen grease, infrequent deep cleans | ★★★★★ | Medium – follow dilution instructions |
When tackling grimy wood cabinets, choosing the right solution depends on the severity of buildup and the type of finish. We recommend starting with the gentlest option—dish soap and warm water—to preserve the wood’s integrity. This method removes everyday dust and light grease without risking damage, especially on older or delicate finishes.
Always use a soft microfiber cloth to avoid micro-scratches.
For kitchens that see heavy cooking, especially with oils and butter, vinegar and water (mixed 1:1) can cut through grease more effectively. In our experience, this natural solution works surprisingly well on semi-gloss and sealed wood, but it’s not ideal for waxed or shellac finishes, which it can dull over time. Always spot-test in a hidden area first.
When grime has hardened into a sticky film, a baking soda paste (three parts soda to one part water) gives us the scrubbing power we need without solvents. Applied with a soft sponge and gentle circular motions, it lifts stubborn residue from corners and crevices. Just remember—pressure matters: scrub too hard, and you risk damaging the finish or wood grain.
What to Do If the Grime Keeps Coming Back
It’s frustrating when cabinets look clean one week and are grimy again the next. The root cause is often ongoing exposure to cooking oils, humidity, and airborne particles. We found that kitchens without proper ventilation—especially those lacking a range hood—see grime return up to 70% faster than well-ventilated ones. Addressing airflow is step one.
Another key factor is cabinet finish degradation. Over time, even durable finishes wear thin, making wood more porous and prone to absorbing grease. If cleaning feels less effective, it may not be the method—it’s likely the surface can no longer repel grime. In these cases, we suggest reapplying a protective topcoat like polyurethane after deep cleaning to restore the barrier.
Prevention beats repetition. We recommend a two-pronged strategy: weekly wipe-downs with a vinegar-dampened cloth and installing a range hood with at least 300 CFM for high-heat cooking. Also, consider switching to low-splatter cooking methods or using splatter screens. These small changes dramatically reduce the rate of buildup, keeping cabinets cleaner longer.
Frequently Asked Questions
Can I use vinegar to clean grimy wood cabinets?
Yes, we recommend a solution of equal parts white vinegar and warm water for cutting through grease. We’ve found it effectively removes grime without damaging the wood when used with a soft cloth. Always avoid oversaturating the surface and follow with a damp cloth to remove residue. For finished wood, this method is safe and eco-friendly.
How do I clean greasy kitchen cabinets without removing the finish?
We suggest using a mild dish soap mixed with warm water and a soft microfiber cloth. Gently wipe the surface, rinsing the cloth frequently, and dry immediately. In our experience, harsh scrubbing or ammonia-based cleaners can strip the finish. For stubborn grease, add a small amount of baking soda to boost cleaning power without abrasion.
What’s the best way to clean inside wood cabinets?
Start by emptying the cabinet, then wipe down interior surfaces with a mix of mild soap and warm water. We recommend using a soft sponge to avoid scratches. For sticky residue, a cloth dampened with diluted vinegar solution works well. Always dry thoroughly to prevent moisture damage, especially in corners and joints.
Do I need to remove cabinet doors to clean them properly?
We’ve found that removing cabinet doors makes deep cleaning easier and ensures even drying. If you leave them on, be careful not to saturate hinges or joints. When removed, lay them flat and clean one side at a time. Label hinges for easy reassembly and use painter’s tape to keep hardware organized.
How often should I clean wood cabinets to prevent grime buildup?
We recommend wiping down wood cabinets every 2–4 weeks, depending on kitchen activity. High grease areas near stoves need more frequent attention. In our experience, regular dusting and spot cleaning prevent heavy buildup. A deeper clean every 3–6 months keeps finishes looking fresh and extends cabinet life.
Final Thoughts
Cleaning grimy wood cabinets doesn’t require harsh chemicals or expensive products. With simple household ingredients and consistent care, we’ve seen even the most neglected cabinets regain their warmth and beauty. The key is gentle, regular maintenance that protects the wood while removing grease and dirt.
Patience and the right technique make all the difference in preserving your kitchen’s look and value.
Start with a small, inconspicuous area to test your cleaning method, then work in sections for best results. Once your cabinets are clean, maintain them with a soft cloth and mild cleaner. We’ve found that just a few minutes of care every week can save hours of deep cleaning later—keeping your kitchen looking fresh and inviting.