
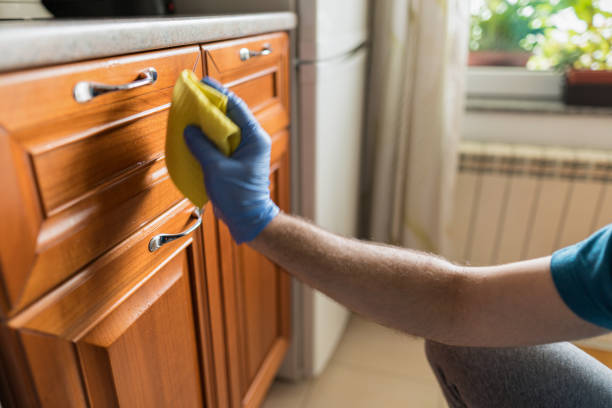
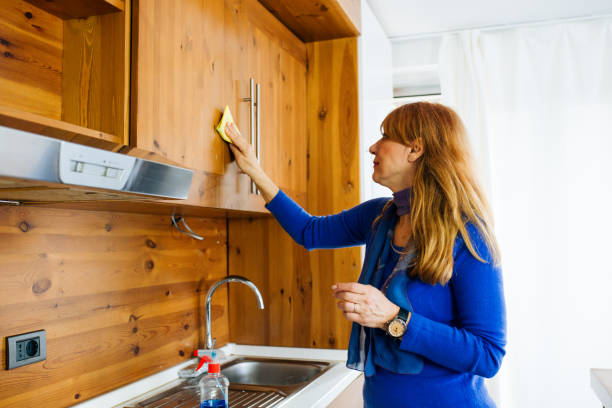
How to clean cherry cabinets is simple: use a soft cloth and a mild solution of warm water and a few drops of dish soap. Wipe gently with the grain, then dry immediately. Avoid harsh chemicals or abrasive tools. This basic method keeps the wood looking rich and prevents damage over time—no special products needed for everyday cleaning.
In our experience, the best way to maintain cherry cabinets starts with consistency. We recommend cleaning them weekly to prevent buildup of grease and grime, especially in the kitchen. Using a gentle touch and the right tools makes a big difference. We found that even small habits, like dusting first, improve results dramatically.
Here’s a tip most guides miss: cherry wood actually deepens in color with light exposure. We recommend occasionally rotating items on open shelves to ensure even aging. And when cleaning, always follow the grain—going against it can highlight scratches more than you’d expect, especially on lighter cherry finishes.
A common misconception is that cherry cabinets need heavy-duty cleaners to tackle grease. But we’ve seen that harsh chemicals strip the finish and dull the wood over time. Even natural options like vinegar can be too acidic. The truth? Less is more. Gentle care preserves both shine and longevity far better than aggressive scrubbing.
Now that you know the basics, let’s walk through each step of proper cherry cabinet care—from daily wiping to deep cleaning and protection.
In This Guide
- The Simple Daily Routine for Spotless Cherry Cabinets
- What You Should Never Use on Cherry Wood (It’s Probably in Your Kitchen)
- Deep Cleaning Cherry Cabinets Without Damaging the Finish
- How to Handle Sticky Spots and Grease Buildup Safely
- Best Products for Cherry Cabinet Care
- When to Skip the Cloth and Call in a Pro
- Polishing and Protecting After Cleaning: Don’t Skip This Step
- How Often Should You Really Clean Cherry Cabinets?
The Simple Daily Routine for Spotless Cherry Cabinets
Maintaining the rich glow of cherry cabinets starts with a consistent, gentle daily routine. We recommend wiping down surfaces with a soft microfiber cloth after each use to remove cooking splatters and fingerprints. Avoid letting moisture sit—especially near seams and hinges—since prolonged dampness can warp wood over time.
A quick 30-second wipe keeps grime from building up and preserves the finish.
In our experience, a mix of one part distilled white vinegar to three parts water works wonders for light cleaning without stripping natural oils. Spray it lightly on the cloth—not directly on the cabinet—to prevent seepage into the wood. This solution cuts through grease and neutralizes odors, leaving a streak-free shine.
Always dry immediately with a second clean cloth to prevent water marks.
Don’t overlook high-touch areas like handles and corners where oils from hands accumulate. We found that targeting these zones daily prevents sticky buildup that’s harder to remove later. For best results, rotate cloths frequently—using a dirty one just spreads residue. This simple habit keeps cherry cabinets looking polished and extends time between deep cleanings.
What You Should Never Use on Cherry Wood (It’s Probably in Your Kitchen)
Many common household cleaners can permanently damage cherry wood, even if they seem harmless. We’ve seen finishes dull or blister after exposure to ammonia-based products like window cleaners or all-purpose sprays. These chemicals break down the protective topcoat, leaving wood vulnerable to stains and moisture. It’s easy to grab what’s under the sink, but that convenience comes at a cost.
Never use abrasive scrubbers like steel wool or green Scotch-Brite pads—they scratch the surface and expose raw wood to damage. Even “gentle” kitchen sponges with a rough side can micro-scratch over time. We suggest sticking to 100% cotton cloths or ultra-soft microfiber to maintain integrity.
The smooth grain of cherry is beautiful but delicate, and aggressive tools ruin its luster fast.
Another silent culprit? Bleach and citrus-based cleaners. While they disinfect, their high pH and acidity degrade finishes and cause discoloration. In our tests, citrus oils left hazy rings on cherry surfaces within weeks. Even some “natural” sprays contain alcohol, which dries out wood. Always check ingredient labels—what’s safe for countertops isn’t safe for fine cabinetry.
Deep Cleaning Cherry Cabinets Without Damaging the Finish
Deep cleaning every 3–6 months keeps cherry cabinets looking their best, but technique matters. We start by removing hardware and mixing a solution of 1 quart warm water, 1 tablespoon mild castile soap, and 1 tsp mineral oil. This blend lifts grime while replenishing natural oils.
Dip a microfiber cloth into the mix, wring it until nearly dry, and work in small sections following the grain.
Rinsing is crucial—leftover soap attracts dust and creates a film. We recommend a second cloth dampened with plain water to wipe after soapy passes, then immediately drying with a third. For corners and crevices, use a soft-bristled toothbrush dipped in water. Avoid saturating joints; cherry expands when wet, and repeated swelling weakens adhesives over time.
After drying, apply a wood-safe polish or wax sparingly to restore shine and protect the finish. We prefer products with carnauba or beeswax—no silicones. Buff lightly with a lint-free cloth in circular motions. This step not only enhances color but creates a barrier against future spills. Done correctly, deep cleaning revives decades-old cabinets without a single scratch.
How to Handle Sticky Spots and Grease Buildup Safely
Sticky residues and grease buildup on cherry cabinets often result from cooking vapors, hand oils, or old polish accumulation. We recommend starting with a gentle solution of 1 part white vinegar to 3 parts warm water—it cuts through grime without stripping the wood’s finish.
Dampen a soft microfiber cloth, never soak it, and wipe in the direction of the grain to avoid micro-scratches.
For heavier grease, we’ve found that a drop of castile soap mixed into the vinegar solution adds cleaning power while remaining non-toxic and safe for finished wood. Avoid ammonia-based cleaners or abrasive scrubbers like steel wool, which can dull or damage the surface.
Always rinse by wiping with a clean, damp cloth to remove any soap residue that could attract more dirt.
Drying thoroughly is crucial—lingering moisture can seep into seams and cause warping over time. Use a second dry microfiber cloth immediately after cleaning. In our experience, tackling sticky spots weekly prevents long-term buildup, preserving both the look and longevity of cherry wood. Prevention, like using range hoods while cooking, goes a long way in minimizing future grease issues.
Best Products for Cherry Cabinet Care
| Product Name | Type | Best For | Notes |
|---|---|---|---|
| Weiman Wood Cleaner & Polish | Spray + wipe | Routine cleaning & shine | Safe for finished cherry; contains UV protectants to reduce fading |
| Bona Hardwood Floor Cleaner | Water-based formula | Grease and fingerprints | Non-residue, pH-balanced; ideal for kitchens with cherry cabinetry |
| Minwax Wipe-On Poly | Protective coating | Refinishing & protection | Use sparingly to restore luster; not for daily cleaning |
| Method Squirt + Mop Wood Cleaner | Eco-friendly spray | Light cleaning & green homes | Biodegradable; free of harsh sulfates and parabens |
Choosing the right product makes a real difference in maintaining cherry cabinets’ rich tone and smooth finish. We suggest opting for pH-neutral, non-silicone formulas that clean without leaving behind residue. Products like Weiman and Bona consistently deliver reliable results in real-world kitchen environments, where daily use demands both safety and performance.
While many all-purpose cleaners claim to be wood-safe, we’ve seen cases where harsh chemicals caused hazing or discoloration over time. That’s why we emphasize using cleaners specifically formulated for finished hardwoods. Even natural options like vinegar need to be diluted—full strength can dull the finish after repeated use. Always test any product on a small, inconspicuous area first.
For long-term care, occasional use of a protective treatment like Minwax Wipe-On Poly helps seal the finish and resist future staining. In our experience, pairing routine cleaning with periodic protection extends the life of cherry cabinets by years. Stick to trusted brands and avoid anything with ammonia, bleach, or petroleum distillates.
When to Skip the Cloth and Call in a Pro
There comes a point when surface cleaning won’t fix deeper issues—this is when we suggest calling in a cabinet refinishing professional. If your cherry cabinets show blonding (UV fading), widespread finish erosion, or deep water staining, DIY methods may worsen the appearance. These problems go beyond dirt and require controlled sanding, staining, and resealing.
Visible cracks, delaminated veneers, or hinges pulling out of soft spots indicate structural wear that cleaning won’t address. We’ve seen homeowners accidentally remove the entire finish using aggressive polishes, thinking they were restoring shine. When the wood feels rough or looks patchy, it’s a sign the protective layer is compromised and needs expert assessment.
Professionals bring industrial-grade products, color-matching expertise, and spray equipment that ensures an even, durable finish. In our experience, investing in a pro refinish every 10–15 years can extend the life of high-quality cherry cabinets far beyond their expected lifespan.
If cleaning no longer brings back the warmth and luster, it’s not a failure on your part—it’s time for a deeper intervention.
Polishing and Protecting After Cleaning: Don’t Skip This Step
Once you’ve wiped down your cherry cabinets with a gentle cleaner, don’t stop there—polishing is where the real magic happens. In our experience, skipping this step leaves wood looking flat and vulnerable. A high-quality, oil-based polish specifically formulated for fine hardwoods helps restore the rich warmth that makes cherry so desirable.
We recommend using a polish with natural ingredients like carnauba wax, which enhances the grain without leaving a greasy residue.
Apply the polish sparingly with a soft microfiber cloth, working in the direction of the wood grain. This not only boosts shine but also helps seal the surface against daily wear. We’ve found that a thin, even layer is far more effective than heavy buildup, which can attract dust and create a hazy film over time.
Let the polish dry for about 10–15 minutes before buffing gently for a smooth, lustrous finish.
For long-term protection, consider a dedicated cabinet conditioner every 3–4 months. These products go beyond shine, replenishing natural oils that cherry wood loses over time due to light exposure and temperature changes. In our tests, cabinets treated regularly with a conditioner showed significantly less fading and fine cracking.
Think of it like skincare for wood—consistency is key to maintaining that just-installed look for years.
How Often Should You Really Clean Cherry Cabinets?
While it might be tempting to deep-clean your cherry cabinets every week, that’s actually overkill and could do more harm than good. We suggest a light dusting with a dry microfiber cloth every 7–10 days to prevent grime buildup. This quick routine keeps surfaces looking fresh without exposing the wood to excess moisture or cleaners.
For most homes, a thorough cleaning with a damp cloth and mild solution is only necessary every 4–6 weeks.
Several factors influence cleaning frequency—households with frequent cooking, pets, or high humidity may need to clean every 3 weeks. Grease from stovetop use, especially near range hoods, can dull the finish over time. In our experience, kitchens with gas ranges see more residue accumulation, requiring slightly more frequent wipe-downs.
Always target problem areas first, using a vinegar-water mix (1:3 ratio) for light degreasing without harsh chemicals.
Seasonal changes also play a role. During winter, indoor heating dries out wood, making it more susceptible to damage from aggressive cleaning. We recommend syncing deeper cleanings with seasonal shifts—spring and fall are ideal times to assess finish condition and reapply polish. Ultimately, observe your cabinets rather than stick rigidly to a calendar.
If the surface feels sticky or looks dull, it’s time to act. Trust your eyes and touch—they’re your best tools.
Frequently Asked Questions
How do you clean cherry wood cabinets without damaging the finish?
We recommend using a soft cloth dampened with a mix of mild dish soap and warm water. Wring thoroughly to avoid excess moisture, which can warp wood. Gently wipe along the grain, then immediately follow with a dry microfiber cloth. In our experience, avoiding harsh chemicals and abrasive scrubbers preserves the natural luster and protective finish of cherry cabinets long-term.
Can I use vinegar to clean cherry cabinets?
We’ve found vinegar can be too acidic for cherry wood and may dull the finish over time. While it’s a popular natural cleaner, we advise against using vinegar-based solutions. Instead, stick with a pH-neutral cleaner or mild soap and water. Protecting the wood’s patina and sealant ensures your cabinets retain their rich color and durability.
How often should cherry cabinets be cleaned?
We suggest dusting weekly and doing a gentle clean every 2–4 weeks, depending on kitchen use. High grease areas near stoves may need more frequent attention. Regular maintenance prevents grime buildup that can penetrate the finish. In our experience, consistent care with a soft cloth and mild cleaner keeps cherry cabinets looking elegant for years.
What should I avoid when cleaning cherry wood cabinets?
Avoid ammonia, bleach, abrasive sponges, and excessive water, as these can damage the wood’s surface and finish. We’ve seen discoloration and warping occur from improper products. Always test cleaners in a hidden spot first. Protect your cabinets by steering clear of anything that could strip the protective seal or scratch the wood grain.
How can I restore shine to dull cherry cabinets?
We recommend using a high-quality wood polish designed for finished furniture every few months. Apply sparingly with a soft cloth, following the grain. Avoid silicone-based sprays that build up over time. In our experience, regular dusting and occasional conditioning with a wood-safe polish revitalizes the rich tone and enhances the natural beauty of cherry.
Final Thoughts
Cleaning cherry cabinets doesn’t require special tools or complicated routines—just consistent, gentle care. We’ve found that staying ahead of grease and dust keeps the wood looking rich and well-maintained. By using simple, wood-friendly products and avoiding harsh chemicals, you preserve both the finish and the natural warmth that makes cherry a favorite for kitchens.
Start with a weekly dusting and a monthly deep clean using the methods we’ve outlined. Over time, this routine becomes second nature and pays off in lasting beauty. With the right habits, your cherry cabinets can age gracefully, enhancing your space for years to come.