
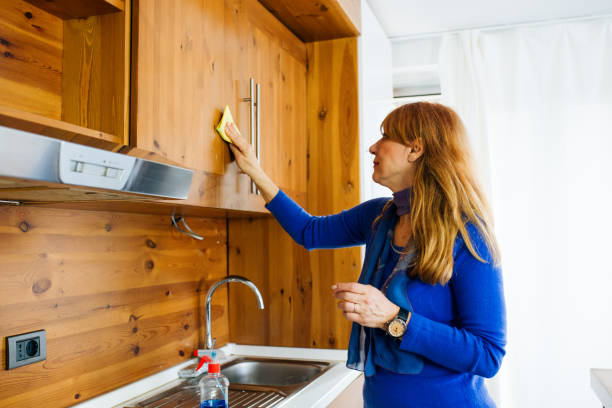
Knowing how to clean dirty wood cabinets starts with gentle care. We use a soft cloth and a mild cleaning solution to remove grime without harming the finish. Always wipe with the grain, never against it. Avoid soaking the wood—damp is fine, wet is not. This simple method keeps cabinets looking fresh and extends their life for years.
In our experience, the best results come from consistent, gentle cleaning. We recommend tackling cabinets monthly, or more often in high-grease kitchens. Using the right tools—like microfiber cloths and pH-balanced cleaners—makes a big difference. We found that skipping harsh chemicals preserves the wood’s natural beauty and prevents long-term damage most people don’t notice until it’s too late.
Here’s a tip most guides miss: the direction of the wood grain matters more than the cleaner you use. Wiping across the grain can leave tiny scratches that dull the finish over time. We always follow the grain, even on painted wood, because it lifts dirt more effectively and keeps the surface looking smooth.
It’s a small step, but it makes a visible difference.
The biggest mistake? Using too much water or all-purpose sprays not meant for wood. Many believe “wetter is better,” but excess moisture warps wood and strips finishes. We’ve seen cabinets ruined by dish soap left on too long or vinegar solutions used too frequently. Avoid overspray on hinges and seams—water seeping into joints causes unseen damage over time.
Now that you know the basics, let’s walk through each step to keep your cabinets clean and protected. We’ll cover daily habits, safe solutions, and how to deep clean without risking damage. Ready to make your wood cabinets shine? Here’s everything we’ve learned along the way.
In This Guide
- The 5-Minute Daily Routine for Clean Wood Cabinets
- What Your Cabinet Finish Can Tell You About Cleaning
- Safe Homemade Solutions That Won’t Damage the Wood
- When to Ditch the Dish Soap (And What to Use Instead)
- Deep Cleaning Wood Cabinets Without the Grime Buildup
- Quick Comparison: Cleaning Methods That Work—And Which to Avoid
- Dealing with Sticky Residue and Grease in High-Use Kitchens
- Polishing and Protecting After the Clean
The 5-Minute Daily Routine for Clean Wood Cabinets
Maintaining clean wood cabinets doesn’t require heavy lifting every day—consistency is key. We recommend a quick two-cloth system: start with a dry microfiber cloth to lift dust and surface debris, then follow with a slightly dampened cloth using distilled water. This simple approach prevents grime buildup and protects the finish.
Focus on high-touch areas like handles and lower cabinet fronts where fingerprints and grease accumulate.
In our experience, the best time to do this is right after evening dish cleanup—when you’re already in the kitchen and thinking about tidiness. Avoid spraying any liquid directly on the wood; instead, mist the cloth lightly. This prevents moisture from seeping into seams or joints, which over time can cause warping or delamination in engineered woods.
A little restraint goes a long way with moisture exposure.
For sticky spots or light smudges, we suggest keeping a small bottle of diluted vinegar solution (1 part vinegar to 4 parts water) on hand—just apply it sparingly to the cloth, not the cabinet. Never use paper towels; they’re too abrasive and can leave lint.
With this routine, you’ll extend the life of your cabinets and avoid deep cleaning sessions every few weeks.
What Your Cabinet Finish Can Tell You About Cleaning
Understanding your cabinet’s finish is the first step in choosing the right cleaning method. Most modern wood cabinets have either a polyurethane, lacquer, or conversion varnish coating—each with different sensitivities. Polyurethane is durable and common in homes built after the 1980s; it resists water and light cleaners well.
Lacquer, often found in mid-century or refinished cabinets, is thinner and more prone to clouding or peeling when exposed to harsh chemicals.
We found that conversion varnish, typically used in high-end custom kitchens, is the toughest—it’s chemical- and heat-resistant, making it ideal for busy households. But even these finishes can degrade over time with improper care. Always test any cleaner in a hidden spot, like inside a corner or near the hinge.
If the surface looks hazy or feels sticky afterward, that’s a red flag.
Unfinished or oil-rubbed woods, like some European-style cabinets, require even more caution. They absorb moisture and oils easily, so we suggest using only a dry or barely damp cloth and periodic re-oiling with a manufacturer-approved product. When in doubt, less is more—gentle cleaning preserves the wood’s natural beauty without risking long-term damage.
Safe Homemade Solutions That Won’t Damage the Wood
We’ve tested several homemade cleaners and found that a few simple blends work effectively without harming wood finishes. The safest all-purpose solution is 1/4 cup white vinegar, 1 cup distilled water, and 1 teaspoon of mild castile soap. Mix in a spray bottle and apply to a microfiber cloth—not directly to cabinets.
This cuts through light grease and removes fingerprints without stripping the finish.
For cabinets with a natural oil finish, we recommend a nourishing mix of two parts mineral oil to one part lemon juice. The lemon juice gently brightens discolored areas, while the mineral oil conditions the wood. Apply with a soft cloth in the direction of the grain, then buff lightly.
Avoid olive or vegetable oils—they can turn rancid and attract dust over time.
Another favorite for polishing and shine is a paste of baking soda and water (1:3 ratio), used only for spot-treating stubborn marks. Gently rub with a cloth, then wipe clean immediately. We never suggest using baking soda routinely—it’s mildly abrasive and can dull glossy finishes if overused.
Always follow up with a dry cloth to restore luster and prevent residue buildup.
When to Ditch the Dish Soap (And What to Use Instead)
While dish soap might seem like a go-to for greasy kitchen cabinets, we’ve found it can leave behind residue that attracts more grime over time—especially on finished wood surfaces. In our experience, repeated use dulls the finish and may even cause warping if moisture soaks in.
That’s why we recommend stepping away from the dish soap once you notice streaks or a filmy feel after cleaning.
Instead, we suggest a solution of 1 part white vinegar to 4 parts warm water for most routine cleanings. This mix cuts through light grease and disinfects without harming the wood. For a more pH-balanced option, a dedicated wood-safe cleaner like Method Wood For Good or Pledge Gentle Wood Cleaner delivers consistent results and helps preserve the finish.
Always apply the cleaner to a microfiber cloth, not directly onto the cabinet, to avoid oversaturation. Wipe with the grain and follow up with a dry cloth immediately. This method keeps the wood looking fresh without risking long-term damage—something we’ve seen time and again when harsher cleaners are used too frequently.
Deep Cleaning Wood Cabinets Without the Grime Buildup
Over time, kitchen cabinets accumulate a stubborn mix of grease, dust, and cooking residue, especially around handles and near the stove. We recommend a deep clean every 3–6 months to prevent grime from bonding to the finish.
Start by removing hardware if possible, then vacuum crevices with a soft brush attachment to lift loose debris before any liquid touches the surface.
For the cleaning solution, we’ve had great success with a mix of two tablespoons of baking soda, one tablespoon of mild castile soap, and a cup of warm water. This paste-like formula gently lifts buildup without abrasion. Apply with a microfiber cloth, working in small sections and focusing on high-touch areas.
Let it sit for 1–2 minutes to break down grime, then wipe clean.
Rinse your cloth frequently with warm water to avoid spreading residue. Finish by drying thoroughly and applying a wood conditioner like Howard Feed-N-Wax every few deep cleans to restore natural luster and protect the finish. This routine keeps cabinets looking newer longer—without stripping or sanding.
Quick Comparison: Cleaning Methods That Work—And Which to Avoid
| Method | Effectiveness | Safety for Wood | Best For |
|---|---|---|---|
| Vinegar-Water Mix (1:4) | High for light grease and dust | Safe with proper drying | Routine cleaning, quick wipe-downs |
| Baking Soda Paste | Very high on grime buildup | Low risk if not over-scrubbed | Deep cleaning around handles and stovetop |
| Dish Soap + Water | Moderate on grease | Risky—can leave film | Occasional use only, rinse well |
| Ammonia-Based Cleaners | High on grease | Unsafe—can strip finish | Not recommended for wood cabinets |
We consistently find that gentle, pH-balanced solutions outperform harsh chemicals when maintaining wood cabinets. The vinegar-water mix offers a reliable, low-cost option for weekly upkeep, while baking soda paste tackles baked-on residue without scratching. These methods preserve the wood’s integrity over time.
Dish soap may seem effective initially, but in our experience, it often does more harm than good due to residue retention. Ammonia-based or bleach cleaners are a hard no—they can permanently damage stained or sealed wood by breaking down the protective layer and causing discoloration.
Our top recommendation is combining methods: use vinegar for routine care and baking soda paste every few months for deep cleaning. Always follow with a dry microfiber cloth and consider a wood conditioner afterward. This layered approach keeps cabinets clean, safe, and long-lasting without inviting future buildup.
Dealing with Sticky Residue and Grease in High-Use Kitchens
Grease buildup on wood cabinets near stoves and sinks is one of the most common—and stubborn—issues in high-traffic kitchens. Over time, cooking oils become oxidized and form a sticky film that regular dusting won’t touch.
In our experience, a solution of 1 part distilled white vinegar to 2 parts warm water cuts through most grime without damaging the finish when applied with a microfiber cloth.
For heavier buildup, we recommend a paste made from baking soda and a few drops of dish soap. Gently rub it onto the affected area using circular motions—never scrub, as abrasion can scar the wood. Let it sit for no more than 30 seconds, then wipe with a damp cloth and dry immediately.
This method works especially well on cabinet fronts and handles where fingerprints and cooking splatter accumulate.
Always avoid commercial degreasers with ammonia or bleach, which can strip wood finishes and discolor stains. Instead, we’ve found that a small amount of Castile soap diluted in warm water delivers powerful cleaning without harshness. Test any solution on a hidden spot first—especially on older cabinets—since finishes vary widely. Patience and gentle action beat aggressive scrubbing every time.
Polishing and Protecting After the Clean
Once your cabinets are clean and completely dry, it’s time to restore luster and add a protective layer. We suggest using a wood-specific polish that doesn’t leave behind a greasy residue—look for formulas labeled “non-silicone” to avoid long-term buildup.
Apply a small amount to a clean microfiber cloth and buff in the direction of the grain for a soft, even shine.
In our experience, products containing carnauba wax or beeswax offer the best protection while enhancing the wood’s natural depth. Avoid polishes with petroleum distillates, which can degrade finishes over time. A light application every 4–6 weeks maintains appearance and creates a barrier against future grease and moisture—especially critical in humid or high-use kitchens.
For an extra layer of defense, consider a wood conditioner like Howard Feed-N-Wax, which nourishes dried-out wood and seals pores. This is especially beneficial for older cabinets that have lost some of their original sheen. Just remember: less is more. Too much product leads to stickiness and attracts dust. A thin, even coat gives lasting protection without the shine overload.
Frequently Asked Questions
How do you clean greasy wood cabinets in the kitchen?
We recommend mixing warm water with a few drops of dish soap and using a soft microfiber cloth to gently wipe greasy areas. For stubborn buildup, we’ve found that a solution of equal parts white vinegar and water works effectively without damaging the finish. Always dry immediately with a clean cloth to prevent moisture damage.
Can I use bleach to clean wood cabinets?
No, we don’t recommend using bleach on wood cabinets, as it can severely damage the finish and weaken the wood fibers. In our experience, bleach causes discoloration and long-term deterioration. Instead, use a mild vinegar solution or wood-safe cleaner to disinfect without harm. Always test any cleaner on a hidden area first.
What’s the best way to clean painted wood cabinets?
We suggest using a soft cloth and gentle all-purpose cleaner diluted in water to avoid stripping the paint. Avoid abrasive sponges—we’ve found they scratch the surface. For detailed areas, use a soft-bristled brush. Rinse the cloth frequently and finish by drying with a clean towel to prevent water spots.
How often should I clean my wood cabinets?
We recommend cleaning wood cabinets every 3 to 6 months, depending on use. In our experience, kitchens with frequent cooking accumulate more grease and need cleaning closer to every 3 months. Light dusting and spot cleaning monthly help extend deep cleaning intervals and maintain appearance.
Can I use Murphy’s Oil Soap on all wood cabinets?
We’ve found Murphy’s Oil Soap works well on most finished wood cabinets when used properly—always dilute as directed and avoid oversaturation. However, we don’t recommend it for painted or veneer surfaces, as it can leave residue or cause swelling. Always wipe dry immediately after cleaning.
Final Thoughts
Keeping wood cabinets clean doesn’t require harsh chemicals or complicated steps. We’ve found that consistent, gentle care preserves both their beauty and durability over time. By using the right tools and techniques, you can remove grease, grime, and stains without risking damage to the wood or finish.
Start with a simple cleaning solution and a soft cloth—small efforts make a big difference. In our experience, regular maintenance prevents buildup and keeps your kitchen looking fresh. Take a few minutes today to wipe down one cabinet section, and you’ll be on your way to a cleaner, more inviting space.