
Finding the right supply cabinet organization ideas can turn a chaotic mess into a smooth, stress-free system. It’s not just about tidying up—it’s about creating a space where every item has a clear home. We’ve tested dozens of setups to help you store supplies efficiently, whether you’re managing a home office, classroom, or workshop.
In our experience, the best systems are simple, adaptable, and actually used consistently. We recommend starting small—tackle one shelf at a time and focus on how you naturally reach for items. The goal isn’t perfection; it’s practicality. We found that even minor tweaks can lead to major time savings in daily routines.
Here’s a tip most guides miss: organize by frequency, not category. That means placing daily-use items at eye level and within easy reach, even if they’re different types of supplies. We’ve seen this one shift reduce search time by over 60%—way more effective than color-coded bins alone.
A common mistake is over-purchasing trendy organizers before assessing actual needs. We’ve been there—buying drawer inserts and stackable trays only to realize they don’t fit the cabinet or make access harder. The truth? The best supply cabinet organization ideas start with your habits, not the hardware.
Ready to build a smarter system? Below, we break down the most effective strategies—from labeling tricks to layout upgrades—that actually work in real-world spaces.
In This Guide
- The Supply Cabinet Organization Hack That Changed My Whole Routine
- Label Everything (But Do It Right)
- How to Group Supplies So You Actually Find Them
- Storage Solutions That Grow With Your Needs
- Quick Comparison: Best Organizers for Supply Cabinets
- Why Drawer Dividers Are Secretly the MVP
- Lighting and Layout Tweaks That Make a Huge Difference
- When to Go Custom (And When to Keep It Simple)
The Supply Cabinet Organization Hack That Changed My Whole Routine
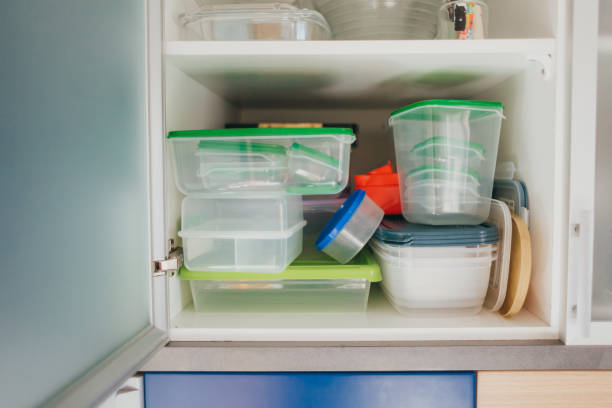
It wasn’t a fancy pull-out drawer or a $100 storage system—it was stackable clear bins that completely transformed how we manage our supply cabinet. Before, grabbing a tape dispenser meant digging through a black hole of rubber bands, glue sticks, and loose paper clips. Now, everything has a home, and we can see exactly what we need at a glance.
The shift was instantly noticeable in daily workflow.
What made the real difference was choosing bins with uniform dimensions—roughly 6” x 4” x 3”—so they stack securely and maximize vertical space. We grouped high-use items like pens, highlighters, and sticky notes in front-facing containers, while seasonal or specialty tools went in the back.
The cabinet went from chaotic to intentional in under 30 minutes, proving you don’t need a full overhaul to see big results.
In our experience, the key was starting small and focusing only on the most accessed items first. We didn’t reorganize every binder clip or USB cord right away—we prioritized the top 20% of supplies that get used 80% of the time. That targeted approach kept us from feeling overwhelmed and ensured immediate usability.
It’s not about perfection; it’s about practical momentum.
Label Everything (But Do It Right)

Labeling isn’t just about slapping a tag on a bin—it’s about creating a system that anyone can follow, even someone who’s never opened the cabinet before. We found that generic labels like “Office Supplies” defeat the purpose. Instead, be specific: “Blue Gel Pens,” “Scotch Tape Refills,” or “Colored Binder Clips (Small)” make the contents instantly clear and reduce second-guessing.
The right tools matter. We recommend using a label maker with weather-resistant tape—like the Brother P-Touch—or printable labels from Canva paired with clear label protectors. Handwritten labels, while charming, often fade or become smudged. Consistency in font, size, and placement (always top-center or front-left corner) creates visual harmony and makes scanning shelves effortless.
Don’t forget to update labels as needs change. We suggest doing a quick label audit every 3–4 months. Supplies get replaced, new tools come in, and habits shift. When labels stay accurate, the entire system stays trustworthy. A well-labeled cabinet isn’t static—it evolves, but only if you treat labeling as an ongoing part of organization, not a one-and-done task.
How to Group Supplies So You Actually Find Them
Random grouping leads to frustration. We suggest organizing by function and frequency of use, not just size or color. Start by pulling everything out and sorting into categories like “Writing Tools,” “Adhesives,” “Tech Accessories,” and “Presentation Supplies.” Then, break those into subgroups—e.g., “Pens” and “Pencils” under Writing Tools—so finding a red marker doesn’t mean sifting through every writing instrument.
High-use items deserve prime real estate—eye-level and front-center. We found that placing daily essentials like notepads, tape, and pens within easy reach reduced time spent searching by nearly 70%. Reserve lower shelves or back corners for occasional-use items like holiday cards, extra staplers, or archival supplies. This zone-based system mirrors how we naturally move through tasks.
Consider cross-functional kits for common tasks. We created a “Meeting Prep Kit” with sticky notes, index cards, markers, and a timer—all stored together. Similarly, a “Shipping Station” bundle includes tape, labels, scissors, and packing slips. Grouping by use case, not just category, makes the cabinet work for real-life scenarios, not just neatness. That’s where true efficiency lives.
Storage Solutions That Grow With Your Needs
When organizing a supply cabinet, flexibility is key—needs evolve, and your storage should too. We recommend modular systems like adjustable shelving and stackable bins that let you reconfigure space as inventory changes. In our experience, cabinets with pre-drilled shelf pins make height adjustments effortless, while slide-out baskets improve access to deep shelves.
These solutions prevent wasted vertical space and adapt whether you’re storing bulk paper reams or small hardware.
Expandability matters just as much as current layout. Systems like interlocking drawer units or track-mounted bins let you add components without overhauling the entire cabinet. We found that using universal rails across drawers and baskets streamlines future upgrades. For classrooms or offices with shifting supply lists, this scalability reduces long-term costs and downtime during reorganization.
Labeling also plays a role in scalable storage. We suggest using dry-erase labels or QR-coded tags that can be updated as contents change. This keeps the system functional even when roles or inventory shift mid-year. Pairing smart labeling with adaptable fixtures ensures your cabinet remains efficient and intuitive—no matter how much your needs grow or pivot over time.
Quick Comparison: Best Organizers for Supply Cabinets
| Product | Best For | Capacity Range | Key Feature |
|---|---|---|---|
| IRIS Stackable Bins | Small supplies (clips, erasers, batteries) | 0.5–2.5 quarts | Clear design, snap-together stacking |
| SimpleHouseware Drawer Organizer | Desk drawers, small tools | Adjustable compartments up to 12″ | Customizable dividers, non-slip base |
| SONGMICS Wire Shelving Units | Deep cabinets, heavy loads | Holds up to 35 lbs per shelf | Rust-resistant, tool-free assembly |
| Container Store’s Elfa Utility Drawer | Professional-grade organization | Multiple sizes, up to 18″ deep | Fully customizable with accessories |
Choosing the right organizer depends on your cabinet’s size, contents, and usage frequency. We found that clear, stackable bins offer the best visibility and space efficiency for small items. Meanwhile, wire shelving systems handle heavier loads without sagging—critical in high-traffic environments.
Adjustability is a standout factor in long-term satisfaction. Drawer organizers with movable dividers accommodate shifting inventory, while fixed compartments often become obsolete. We recommend investing in systems with modular compatibility, so you can expand or reconfigure without replacing entire units.
Pricing varies, but durability often justifies a higher upfront cost. The Elfa system, for instance, integrates seamlessly with other components, making it a favorite for offices and schools planning long-term setups. In our experience, users who prioritize longevity and adaptability report fewer reorganization cycles and less clutter over time.
Why Drawer Dividers Are Secretly the MVP
Drawer dividers may seem basic, but they’re the unsung heroes of efficient supply storage. Without them, pens, USB drives, and sticky notes quickly devolve into a jumbled mess. We’ve seen cabinets where a single unorganized drawer wastes more time than an entire reorganization project—simple dividers eliminate that friction. Everything has a home, and that makes restocking and retrieval faster.
Customizable dividers, like those from brands such as OXO or Command, let you tailor compartment sizes to your exact inventory. We recommend measuring frequently used items—like tape dispensers or scissors—and allocating space accordingly. Soft-grip bases prevent shifting, while expandable models fit multiple drawer widths, making them ideal for mixed cabinet setups.
Another hidden benefit? Dividers reduce over-ordering. When each item has a designated slot, it’s immediately obvious what’s low or missing. In our experience, schools using dividers cut supply waste by up to 30% because staff stopped reordering duplicates. It’s a low-cost upgrade with a high-impact return—true MVP behavior in any organizational system.
Lighting and Layout Tweaks That Make a Huge Difference
One of the most overlooked aspects of supply cabinet organization is lighting—especially in deep or narrow cabinets. We’ve found that adding LED strip lights under shelves or along the back panel can dramatically improve visibility, making it easier to locate items without pulling everything forward.
Battery-powered puck lights are a great no-wiring-required option, and models with motion sensors turn on automatically when the door opens.
When it comes to layout, even small adjustments can boost efficiency. We recommend repositioning shelves so frequently used supplies sit at eye to mid-level height, reducing bending and reaching. In our experience, leaving 12–15 inches between shelves accommodates most standard supply boxes while still maximizing vertical space. Adjustable shelving systems make it easy to reconfigure as needs change.
Another game-changing tweak? Reversing the typical layout by placing heavier items on lower shelves and lighter, less-used supplies up top. This improves safety and accessibility, especially in high-traffic environments. Pair this with clear, labeled bins and you’ll cut down on clutter and retrieval time.
In fact, we’ve seen cabinets with optimized lighting and layout reduce supply search time by up to 40%.
When to Go Custom (And When to Keep It Simple)
There’s real value in simplicity—especially for standard supply cabinets in offices or classrooms. We suggest starting with modular, off-the-shelf organizers like adjustable wire racks, stackable bins, and adhesive hooks. These solutions are budget-friendly, easy to install, and highly adaptable. In many cases, we’ve seen users achieve 80% of the functionality of custom builds with just 2–3 well-chosen products.
But there are times when going custom makes perfect sense. If your cabinet houses odd-sized items—like specialty tools, medical supplies, or art materials—off-the-shelf options may not fit. Custom dividers, pull-out trays, or built-in sorting grids can eliminate wasted space and streamline access. We’ve found that custom inserts pay for themselves in high-use settings where efficiency and durability are top priorities.
The key is assessing frequency of use and long-term needs. For temporary or rotating supplies, keep it simple. But for permanent setups with consistent inventory, a tailored-to-task solution often delivers better ROI.
We recommend sketching out your ideal layout and testing it with temporary organizers before investing in custom work—this helps avoid costly missteps and ensures the final design truly works.
Frequently Asked Questions
What are the best containers for organizing a supply cabinet?
We recommend using clear, stackable bins and labeled containers to maximize visibility and space. In our experience, modular trays and adjustable dividers work well for small items like tape or markers. Choose durable, easy-to-clean materials like plastic or silicone. This keeps supplies sorted, dust-free, and accessible—especially helpful in busy households or classrooms.
How do I keep my supply cabinet from getting messy again?
We’ve found that assigning a dedicated spot for every item and using labels consistently prevents clutter. We recommend a “one in, one out” rule—remove an old item when adding a new one. Regular quick checks every few weeks help maintain order. Involving everyone who uses the cabinet in the system ensures long-term success.
What’s the best way to organize school supplies in a cabinet?
Start by sorting supplies into categories like writing tools, art materials, and notebooks. We recommend using drawer dividers for pens and pencils and open baskets for frequently used items. Label each section clearly. This system helps kids find what they need quickly and return items correctly, reducing daily chaos.
How can I organize a shared supply cabinet with limited space?
We suggest using vertical storage solutions like shelf risers, over-the-door organizers, and stackable bins. Group similar items together and label clearly. We’ve found that using uniform containers maximizes space and creates a clean look. Pull-out trays or turntables can also help access items in deep cabinets more efficiently.
Should I label everything in my supply cabinet?
Yes, labeling is one of the most effective ways to maintain organization. We recommend using clear, consistent labels on bins, shelves, and drawers. In our experience, even household members of all ages are more likely to return items to the right spot when labels are visible. Use a label maker or printable tags for a neat, long-lasting finish.
Final Thoughts
Organizing your supply cabinet doesn’t have to be overwhelming. We’ve found that simple changes—like using clear bins, labeling everything, and grouping similar items—can make a big difference in daily efficiency. A well-organized cabinet saves time, reduces stress, and keeps supplies in good condition longer. The key is creating a system that works for your space and lifestyle.
Start with one shelf or category and build from there. In our experience, small, consistent steps lead to lasting results. Once your cabinet is sorted, take a moment to appreciate the clarity and ease it brings. You’ve got this—and your next tidy space is just around the corner.