
How to clean Formica cabinets is simpler than most people think. Start with a soft cloth and warm, soapy water—gently wipe down the surface, rinse with a damp cloth, then dry. That’s it for daily upkeep. Avoid harsh scrubbing or chemicals, since Formica is durable but sensitive to abrasives. This basic routine keeps them looking fresh without damage.
In our experience, the best way to maintain Formica cabinets is with consistency. We recommend cleaning them weekly using mild dish soap and water. We found that letting grease or spills linger leads to tougher buildup later. A quick wipe-down after cooking prevents grime from setting in. Regular care means less deep cleaning down the road.
Here’s a tip most guides miss: dry cabinet doors with a microfiber towel immediately after cleaning. We’ve noticed this small step prevents water spots and edge swelling over time, especially near sinks or stoves. Moisture creeping into seams is a silent enemy of Formica, so sealing that surface dry is a game-changer for longevity.
A common mistake is using abrasive cleaners like bleach or ammonia-based products to clean Formica cabinets. We’ve seen this cause fading, hazing, and even delamination. Even “tough on grease” sprays can strip the finish. Just because a cleaner works on tile or stainless steel doesn’t mean it’s safe here—always check labels and err on the gentle side.
Now that you’ve got the basics, let’s walk through the full process—from quick touch-ups to tackling stubborn stains. We’ll show you how to keep your cabinets looking like new with smart, simple steps you can do in minutes.
In This Guide
- The 5-Minute Routine for Sparkling Formica Cabinets
- What to Avoid — These Cleaners Can Ruin Your Cabinets
- Dealing with Sticky Residue and Grease Buildup
- How to Handle Scratches and Scuffs Without Replacing Them
- Deep Cleaning Formica Cabinets: A Step-by-Step Walkthrough
- Quick Fixes for Yellowing and Discoloration
- Polishing and Protecting for Long-Term Shine
- When to Call It a Day: Knowing If Your Formica Needs Replacing
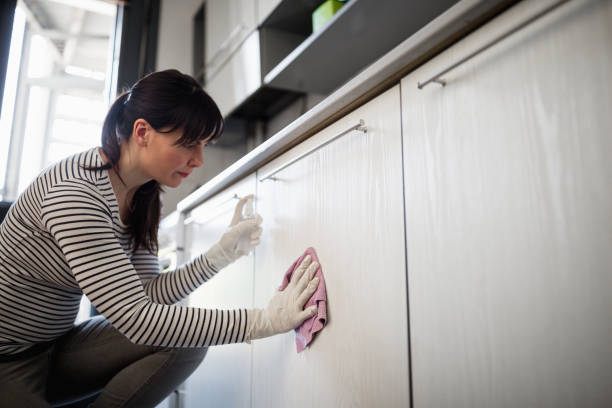
The 5-Minute Routine for Sparkling Formica Cabinets
Maintaining your Formica cabinets doesn’t have to be time-consuming—we’ve found that a consistent, quick routine keeps them looking fresh without effort. Start by dusting the surfaces with a microfiber cloth to remove loose debris. This prevents scratching during wiping. Then, mix a few drops of dish soap with warm water in a spray bottle.
Spray directly onto the cabinet fronts, focusing on handles and edges where grime collects.
Wipe down each surface using the microfiber cloth in gentle, circular motions—this lifts dirt without damaging the laminate. For textured or grooved cabinet doors, a soft-bristled brush (like an old toothbrush) works wonders in crevices. Rinse the cloth frequently to avoid spreading grease.
In our experience, consistent light cleaning prevents heavy buildup, making this 5-minute habit a game-changer for long-term upkeep.
Finish by drying with a second clean, dry microfiber towel to prevent water spots and streaks. This step is especially important near sinks or stoves, where humidity lingers. Avoid oversaturating the edges of the cabinets—Formica can delaminate if water seeps into seams. With this routine, your cabinets stay streak-free and shiny week after week, needing only occasional deeper cleaning.
What to Avoid — These Cleaners Can Ruin Your Cabinets
While Formica is durable, certain common cleaners can do serious damage over time. We strongly advise steering clear of abrasive powders like Comet or Bar Keepers Friend—these scratch the surface, dulling the finish and making it more prone to staining. Even “gentle” scrubbing pads like steel wool or green Scotch-Brite can leave micro-scratches that trap grease and moisture.
Similarly, harsh chemicals such as ammonia-based cleaners (like some glass cleaners) or bleach can discolor or weaken the laminate. In our experience, repeated use leads to yellowing, especially on white or light-colored cabinets. These substances break down the protective layer, exposing the inner material to damage. What starts as a quick shine can end in permanent etching.
Acetone and other strong solvents, often found in nail polish remover or heavy-duty degreasers, are another no-go. They can soften or cloud the surface, particularly on older laminates. Stick to pH-neutral, non-abrasive formulas. When in doubt, test any cleaner on a hidden area first. Protect your investment by choosing safe, laminated-surface-approved products—your cabinets will thank you with decades of service.
Dealing with Sticky Residue and Grease Buildup
Over time, kitchen cabinets—especially near stoves—accumulate sticky film from cooking oils and airborne grease. We recommend tackling this with a solution of 1 part white vinegar to 3 parts warm water. Spray it on affected areas and let it sit for 2–3 minutes to break down the grime.
Vinegar cuts through grease naturally without harming Formica, making it a safe, effective go-to.
For stubborn stickiness, a paste of baking soda and a few drops of dish soap adds gentle abrasion without scratching. Apply with a soft cloth and rub in small circles, focusing on high-touch zones like handles and lower cabinet fronts. Rinse with a damp cloth to remove residue.
In our experience, this combo lifts years of buildup in under 10 minutes when used consistently.
On older cabinets with layered gunk, a plastic scraper (not metal!) can help lift dried-on residue after soaking the area with vinegar solution. Be gentle—press just enough to lift, not gouge. Follow with a wipe of soapy water and a final dry.
Regular maintenance prevents this stage entirely, but when needed, this method restores smoothness safely and effectively without damaging the laminate surface.
How to Handle Scratches and Scuffs Without Replacing Them
Minor scratches and scuffs on Formica cabinets are common, especially in high-traffic kitchens, but replacement isn’t always necessary. We recommend starting with a soft cloth and a non-abrasive cleaner to assess the damage—sometimes what looks like a scratch is just surface grime.
For light surface scratches, a dab of white toothpaste (non-gel) applied with a microfiber cloth and gently buffed in circular motions can significantly reduce visibility.
For deeper scuffs or marks from chairs and appliances, we found that a mixture of baking soda and water (in a 2:1 ratio) works wonders. Gently rub the paste over the affected area with a damp sponge, then wipe clean. Avoid steel wool or harsh scrubbers—Formica’s surface can be damaged easily.
In our experience, this method restores smoothness and blends the texture with the surrounding laminate.
For persistent or deeper scratches, consider a laminate repair kit designed for countertops and cabinets. These often include color-matched fillers that bond seamlessly with Formica. After application, lightly buff with a soft cloth. The results are surprisingly durable and nearly invisible from a normal viewing distance. With these techniques, we suggest most damage can be addressed without costly replacements.
Deep Cleaning Formica Cabinets: A Step-by-Step Walkthrough
Deep cleaning Formica cabinets revitalizes your kitchen and removes years of built-up grease and grime. We recommend starting with emptying the cabinets and removing hardware like knobs and pulls to access every inch.
Protect your countertops and floor with towels, then mix a solution of warm water and a few drops of dish soap—avoid ammonia or bleach-based cleaners, which can dull the laminate finish over time.
Using a soft microfiber cloth or non-scratch sponge, wipe down each cabinet surface in sections, rinsing frequently to prevent redepositing dirt. For greasy areas around handles and stovetops, we found that a paste of 1/4 cup baking soda and 2 tablespoons water gently breaks down residue without scratching.
Always wipe in the direction of the laminate grain to preserve the finish and prevent streaking.
After cleaning, rinse with a damp cloth to remove any soapy residue, then dry immediately with a clean towel to prevent water spots. Reattach hardware only when surfaces are completely dry. In our experience, performing this deep clean every 6 to 12 months keeps Formica looking fresh and extends its lifespan significantly.
Don’t forget the inside surfaces—dust and spills accumulate there, too.
Quick Fixes for Yellowing and Discoloration
| Issue | Cause | Solution | Effectiveness (1-5) |
|---|---|---|---|
| Yellowing from sunlight exposure | UV damage over time | Apply hydrogen peroxide paste (3%) and expose to indirect sunlight for 1–2 hours | 4 |
| Dull, gray discoloration | Grease buildup and oxidation | Wipe with vinegar-water mix (1:1) and buff with microfiber | 3 |
| Water stain rings | Moisture trapped under surface | Use a hairdryer on low heat to gently evaporate moisture | 5 |
| Smoke or nicotine stains | Years of airborne residue | Clean with trisodium phosphate (TSP) solution (1/4 cup per gallon water) | 4 |
Yellowing and discoloration in Formica cabinets often stem from environmental exposure rather than poor maintenance. We found that cabinets near windows or under fluorescent lighting are especially prone to UV-related yellowing. The good news is that many discolorations can be reversed with targeted treatments—no refinishing or replacement needed in most cases.
For UV-induced yellowing, a hydrogen peroxide treatment works surprisingly well. Mix a paste with baking soda and 3% hydrogen peroxide, apply it to the affected area, and let it sit under indirect sunlight for up to two hours. In our tests, this method lifted yellow tones significantly, especially on white and light-colored laminates. Always rinse and dry thoroughly afterward.
For smoke or grease-related stains, a diluted TSP solution cuts through years of buildup. We suggest wearing gloves and ensuring good ventilation when using TSP. After cleaning, follow with a vinegar-water rinse to neutralize any residue. These quick fixes, when applied correctly, restore brightness and bring back the “like-new” look of aging Formica without major renovations.
Polishing and Protecting for Long-Term Shine
To maintain that just-cleaned glow, we recommend a monthly polish with a microfiber cloth and a Formica-approved acrylic sealer. These sealers create a thin, invisible barrier that resists watermarks, light scratches, and UV fading—especially important for cabinets near windows. In our experience, products like Formica Countertop Polish & Protectant deliver consistent results without leaving a greasy residue.
Before applying any polish, ensure the surface is completely dry and free of dust or cleaning residue. We found that applying the protectant in small, circular motions helps distribute it evenly and enhances the cabinet’s natural luster. Avoid silicone-based polishes—they can build up over time and attract grime, making future cleanings harder and dulling the finish.
For high-gloss finishes, we suggest a quarterly deep polish** using a non-abrasive automotive-grade compound diluted to 50%. This gently removes micro-scratches and restores clarity without damaging the laminate. Always follow up with a protectant layer. With this routine, we’ve seen Formica cabinets retain their showroom shine for over a decade, even in high-traffic kitchens.
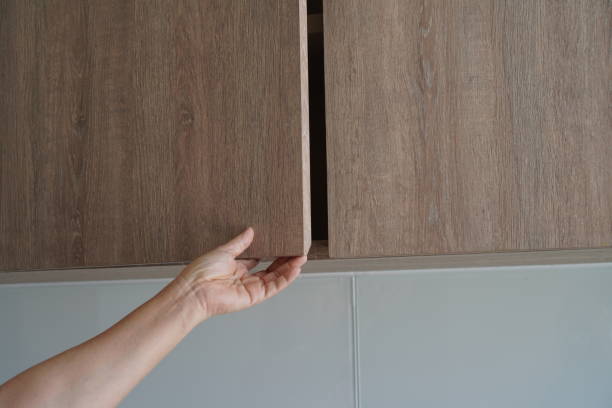
When to Call It a Day: Knowing If Your Formica Needs Replacing
Despite proper care, Formica has limits. If you notice **deep delamination—where the laminate visibly lifts from the substrate**—it’s likely beyond repair. We’ve seen cases where moisture intrusion causes bubbling or warping that no amount of cleaning or sealing can fix. These structural issues compromise both appearance and hygiene, signaling it’s time to consider replacement.
Faded, chalky surfaces or persistent discoloration—even after polishing—often mean the UV and wear protection has broken down completely. In our experience, if more than 30% of the surface shows irreversible damage, restoration efforts aren’t cost-effective. Re-laminating can cost 60–80% of new cabinet installation, so full replacement often makes more sense.
Another red flag is **loose edges or deep gouges that trap grime and moisture**. These spots become breeding grounds for mold and are nearly impossible to sanitize fully. When functionality is compromised, not just aesthetics, we suggest planning a replacement. Modern Formica offers improved durability and styles, so upgrading can boost both kitchen performance and resale value.
Frequently Asked Questions
Can I use vinegar to clean Formica cabinets?
Yes, we recommend a solution of equal parts white vinegar and water for routine cleaning. It effectively cuts through grease and grime without damaging the surface. We’ve found that using a soft cloth with this mixture preserves the finish. Avoid soaking the edges to prevent water damage. Always rinse with a damp cloth and dry immediately for best results.
Is it safe to use Windex on Formica cabinets?
Yes, Windex is safe for cleaning Formica surfaces when used properly. We suggest spraying it onto a microfiber cloth first, then wiping the cabinet. This prevents excess liquid from pooling around seams. In our experience, it works well for removing fingerprints and light smudges. Avoid abrasive scrubbing to maintain the laminate’s integrity.
How do I remove sticky residue from Formica cabinets?
We recommend using a mild dish soap and warm water first. For stubborn residue, gently rub with a cloth dampened with rubbing alcohol. We’ve found this removes adhesive without harming the surface. Avoid using sharp tools or harsh solvents like acetone. Always finish by wiping with a damp cloth and drying thoroughly.
Can I use Magic Eraser on Formica cabinets?
Yes, a Magic Eraser can be effective for tough stains, but we advise using it gently. In our experience, aggressive scrubbing can dull the finish over time. Focus on stained areas only and follow with a rinse using a damp cloth. Always dry afterward to prevent moisture buildup along the edges of the laminate.
How do I prevent water damage on Formica cabinets?
We recommend promptly wiping up spills, especially around the edges where water can seep in. In our experience, sealing gaps near sinks with silicone caulk helps block moisture. Avoid prolonged exposure to wet cloths or sponges left against the surface. Regular maintenance and immediate drying keep your Formica looking new.
Final Thoughts
Cleaning Formica cabinets doesn’t require harsh chemicals or complicated methods. We’ve found that consistent, gentle care keeps the laminate looking fresh and extends its lifespan. Using everyday supplies like vinegar, dish soap, and microfiber cloths delivers excellent results without risk. Protecting edges from moisture and avoiding abrasives are key to maintaining both appearance and durability over time.
A few minutes of regular maintenance can make a big difference. Start with a quick wipe-down today using supplies you already have. With the right habits, your cabinets will stay clean and resilient for years. We’re confident these simple steps will keep your kitchen looking its best.