
Looking for diy pantry shelves ideas? They’re simple, customizable storage solutions you can build yourself to maximize space and keep food organized. Whether you have a walk-in pantry or a small closet, adding shelves helps you see what you have, reduce waste, and make meal prep easier—without spending a fortune.
In our experience, the best pantry shelves combine function and simplicity. We found that even basic designs can transform cluttered spaces when placed at the right height and built with durable materials. We recommend starting small—like a single wall-mounted unit—before expanding. It’s surprising how much impact one solid shelf can have.
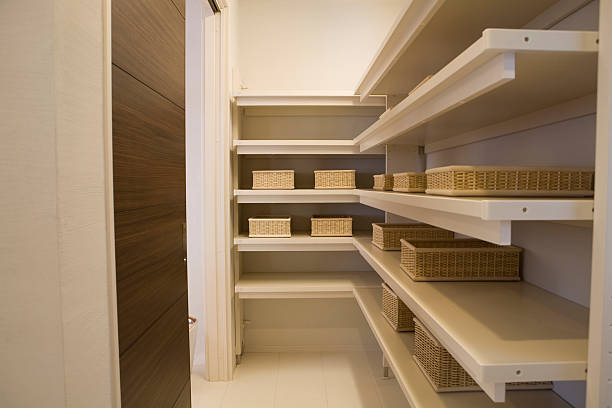
Here’s a tip most guides skip: leave a little extra depth—about 1–2 inches more than standard shelf depth—if you plan to use baskets or bins. In our builds, this small adjustment makes a huge difference in usability. It prevents items from crowding the front edge and makes pulling containers out feel seamless—especially with heavier goods.
A common mistake? Assuming all walls can support heavy shelves without checking for studs. We’ve seen too many DIYers anchor into drywall alone, only to watch shelves sag or collapse. Always use a stud finder or heavy-duty drywall anchors. Skipping this step risks both your shelves and your safety—don’t underestimate load weight.
Now that you’ve got the basics, let’s dive into practical builds, smart upgrades, and budget-friendly picks that work in real kitchens. These ideas are tested, adaptable, and perfect for weekend projects.
In This Guide
- No-Frills Pantry Shelves You Can Build This Weekend
- How to Choose the Right Materials Without Overspending
- Pantry Shelves That Make the Most of Awkward Spaces
- Budget-Friendly DIY Pantry Shelves Ideas Under $50
- Quick Comparison: Shelf Types and Where They Work Best
- Lighting and Details That Upgrade Basic Shelves
- What to Do When Your Walls Aren’t Level
- Smart Storage Add-Ons for Your DIY Pantry Shelves
No-Frills Pantry Shelves You Can Build This Weekend
Simple doesn’t mean flimsy—our go-to design uses 1×12 pine boards and metal L-brackets for sturdy, no-fuss shelving. With just a circular saw, level, and drill, you can assemble a full pantry wall in under six hours. We recommend spacing shelves 12 to 14 inches apart to fit standard jars and cereal boxes without wasted vertical space.
For a cleaner look, use paint-grade poplar instead of pine—though it costs a bit more, it sands and finishes beautifully. We’ve found that pre-cut boards from home centers save time and reduce errors, especially for beginners. Anchor each bracket to a stud if possible, or use toggle bolts in drywall for reliable support.
Don’t overlook adjustable shelving systems like IKEA ALNO or steel uprights with clips—they’re budget-friendly and let you reconfigure as needs change. We suggest labeling shelf zones (canned goods, snacks, baking) with removable vinyl labels. This weekend project pays off fast with a pantry that’s organized, accessible, and built to last.
How to Choose the Right Materials Without Overspending
Selecting materials is where budgets can spiral—but we’ve found smart trade-offs that keep costs down without sacrificing strength. Pine and poplar are excellent for painted shelves, while birch plywood offers a smoother finish for visible areas. We suggest avoiding oak and maple unless you’re aiming for high-end finishes—they’re beautiful but pricey and harder to work with for beginners.
For shelving supports, 2×2 hardwood cleats mounted to wall studs outperform flimsy plastic brackets. In our experience, spending $10 more on solid wood cleats prevents sagging over time. Pair them with ¾-inch plywood shelves—anything thinner risks bowing under heavy loads like canned goods or appliances.
Look for “project panels” at hardware stores—these pre-sanded, smaller sheets of plywood cost as little as $20 and are perfect for pantry builds. We recommend sealing raw wood with a water-based polyurethane to resist moisture and stains. Choosing the right materials isn’t about splurging—it’s about strategic spending for long-term durability.
Pantry Shelves That Make the Most of Awkward Spaces
Tight corners, sloped ceilings, or gaps beside appliances don’t have to go to waste. We’ve seen homeowners gain up to 30% more storage by installing custom L-shaped shelves or tiered corner units in odd nooks. Use a laser level to map out angles precisely, then cut shelves to fit snugly—every inch counts in compact pantries.
For spaces under stairs or in closets, consider pull-out wire baskets or stackable acrylic bins on low shelves. These maximize depth and keep items visible. We recommend mounting narrow vertical spice racks on the back of doors or between cabinets—many overlook this space, but it can hold 20+ spice jars.
In our experience, floating shelves in unused vertical zones—like above a pantry door—add hidden capacity for infrequently used items. Use ¾-inch MDF for a smooth, paintable surface that’s cheaper than solid wood. With a little creativity, even the trickiest spots can become functional, organized storage zones.
Budget-Friendly DIY Pantry Shelves Ideas Under $50
Creating functional pantry storage doesn’t have to drain your wallet. We’ve found that floating wood shelves made from repurposed lumber or discounted pine boards from a local hardware store can cost as little as $20 for three shelves. Pair them with black iron pipe brackets (around $8 each) for an industrial look that’s sturdy and stylish.
These materials are easy to cut and install with basic tools, making them ideal for beginners.
Another affordable option we recommend is using lattice panels as tiered shelf dividers inside existing cabinets. At under $15, a single panel can be cut and mounted vertically to create stacked levels for cans and spices. When painted to match your pantry, they blend seamlessly while doubling visible storage. It’s a sneaky-smart way to maximize dead space without major construction.
For renters or those avoiding wall modifications, stackable plastic crates or wooden apple boxes (often $5–$10 each at farmers’ markets or online) make flexible, no-install shelves. We suggest reinforcing taller stacks with L-brackets and anchoring them to the wall for safety. Add peel-and-stick contact paper to the fronts for a custom look—think faux wood grain or subway tile. Total cost?
Rarely more than $45 for a three-tier setup.
Quick Comparison: Shelf Types and Where They Work Best
| Shelf Type | Best For | Material Cost | Installation Time |
|---|---|---|---|
| Floating Wood Shelves | Small pantries, modern aesthetics | $15–$35 | 1–2 hours |
| Wire Grid Shelving | Deep pantries, heavy items | $25–$50 | 30–60 mins |
| Adjustable Cabinet Inserts | Over-the-door or built-in cabinets | $20–$40 | 15–30 mins |
| Stackable Crates | Renters, temporary setups | $10–$45 | 10–20 mins |
Choosing the right shelf type depends on your pantry layout, storage needs, and how permanent you want the solution to be. We’ve seen floating wood shelves shine in narrow spaces where floor clearance matters. Their clean lines make small areas feel open, and they’re perfect for displaying attractive jars or baskets.
Just make sure to anchor them into studs for safety.
Wire grid shelves, often found in utility or garage sections, offer unmatched airflow and visibility. They’re ideal for deep pantries where items get lost in the back. We found that pairing them with clear acrylic bins keeps spices and packets organized. The open design also makes cleaning spills a breeze—just wipe through the gaps.
Adjustable cabinet inserts are a game-changer for awkward or shallow storage nooks. These slide-in units, often made of bamboo or metal, let you customize height and compartment size. We suggest measuring your cabinet depth and door swing before buying. Stackable crates, while less formal, deliver serious flexibility. They’re perfect for seasonal rotation or moving storage between rooms.
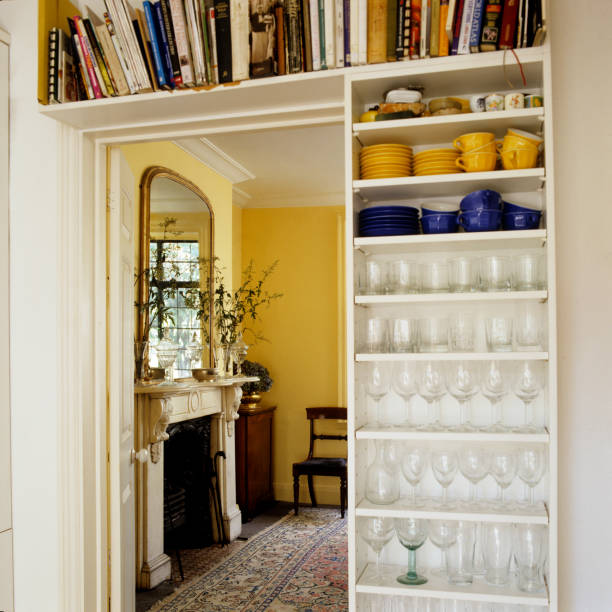
Lighting and Details That Upgrade Basic Shelves
Adding lighting to your pantry shelves transforms them from functional to fabulous. We’ve found that LED strip lights with adhesive backing (around $12–$18) provide even illumination under shelves, making it easy to spot ingredients at a glance. Look for ones with a 3000K warm white tone—it’s cozy without washing out labels.
For plug-in models, route cords behind cans or use cord clips to keep things tidy.
Another upgrade we love is using labelled glass jars or uniform canisters to create a cohesive look. Even a simple pantry feels like a boutique kitchen when everything is stored in matching containers. Use a chalkboard label system for flexibility—just wipe and rewrite when contents change. This also helps reduce food waste by making inventory clear at a glance.
Don’t overlook trim and edging details. Adding a simple wood lip or metal guard rail (about $5 per shelf) prevents items from slipping off the edge. We recommend painting the lip a contrasting color for visual pop.
Finally, consider anti-slip shelf liners in textured vinyl or cork—they keep bottles from sliding and add a soft touch underfoot when standing in the pantry.
What to Do When Your Walls Aren’t Level
It’s more common than you think—walls that look straight but aren’t actually level. When installing DIY pantry shelves, even a 1/8-inch deviation can cause wobbly, misaligned shelves. We recommend starting with a long, high-quality bubble level or a laser level to map out the true horizontal plane across your wall.
Don’t rely on baseboards or existing trim as guides—they’re often uneven due to settling or rushed installations.
When you find inconsistencies, don’t panic. One effective fix is using shims behind your shelf brackets or cleats. These thin wedges, often made of wood or plastic, compensate for gaps and ensure your shelf sits flat. We’ve found that stacking multiple shims and securing them with finish nails creates a rock-solid base.
For a cleaner look, sand them flush and paint to match the shelf frame.
Another pro tip: install a continuous support ledger board along the wall instead of individual brackets. Attach the ledger first—leveling it carefully—then rest your shelves on top. This method not only hides imperfections but also provides uniform support across the entire length. In our experience, it’s the best approach for floating-style or heavy-duty pantry shelves storing canned goods or appliances.
Smart Storage Add-Ons for Your DIY Pantry Shelves
| Add-On | Best For | Installation Tip |
|---|---|---|
| Adjustable shelf risers | Tall bottles, stackable containers | Use non-slip models with guardrails |
| Under-shelf baskets | Snacks, spice packets, small items | Clip-on types require no drilling |
| Turntable lazy Susans | Corner shelves, condiments, oils | Mount with locking base for stability |
| Label holders & chalkboard panels | Batch-cooked meals, dry goods | Place at eye level for quick scanning |
Maximizing pantry efficiency isn’t just about shelf placement—it’s about layering in smart accessories. We’ve seen pantry organization transform with simple additions like under-shelf wire baskets, which instantly double usable space by capturing the gap below each shelf. These are perfect for holding tea boxes, seasoning packets, or fruit snacks, keeping them visible and within reach.
For deep shelves where items get lost in the back, lazy Susans are a game-changer. We suggest installing them on lower or corner shelves to rotate oils, vinegars, or jars effortlessly. Choose models with a non-slip surface and a center bearing that supports weight without wobbling. Even a 12-inch turntable can organize six to eight items without crowding.
Don’t overlook labeling systems. We recommend chalkboard labels or adhesive label holders on each shelf front to identify contents at a glance. Pair this with clear, uniform containers for flour, sugar, and pasta—it streamlines refills and reduces visual clutter. These small upgrades pay off daily, turning your DIY pantry into a high-function, low-friction storage zone.
Frequently Asked Questions
What are the cheapest materials for DIY pantry shelves?
We recommend using pine boards or oriented strand board (OSB) for budget-friendly shelves. Pair them with metal L-brackets or wooden cleats for easy, sturdy support. In our experience, unfinished lumber from local suppliers cuts costs significantly. Always seal wood with a food-safe finish, especially in high-moisture pantries.
How much weight can DIY pantry shelves hold?
Weight capacity depends on materials and support. We’ve found that ¾-inch plywood anchored into wall studs with heavy-duty brackets can safely hold 50–75 pounds per shelf. For heavier items like appliances or canned goods, use double cleats or vertical dividers to distribute weight evenly and prevent sagging over time.
How do I keep pantry shelves from sagging?
To prevent sagging, we use shelf supports every 16 inches and avoid spans over 36 inches without a center brace. Thicker wood like 1×12 pine or plywood resists bending. In our builds, adding a front lip trim or a back cleat also reinforces rigidity and keeps items from falling behind shelves.
Can I install shelves without drilling into walls?
Yes, but with limitations. We’ve had success using adhesive shelving brackets or tension rods for lightweight baskets and short-term use. However, for permanent, heavy-duty storage, we recommend anchoring into studs. Freestanding shelving units are a great no-drill alternative that offer stability and flexibility.
What’s the best shelf spacing for a pantry?
We suggest 12 to 15 inches between shelves to accommodate most containers and small appliances. Adjustable shelf pins allow customization later. Leave at least 18 inches for tall items like cereal boxes or wine bottles. In our experience, mixing shelf heights—some narrow for spices, others deep for pots—maximizes pantry efficiency.
Final Thoughts
Creating your own pantry shelves doesn’t require advanced skills or a big budget. We’ve found that thoughtful planning and quality materials make a lasting difference in both function and appearance. Whether you’re organizing a walk-in pantry or a small closet, DIY shelves let you customize every inch to match your storage needs and style.
Start with measuring your space and sketching a simple layout. Gather affordable materials and take your time with leveling and securing each shelf. We believe even first-time builders can achieve professional-looking results with patience and care. Your organized, efficient pantry is just a few cuts and screws away—so grab your tools and begin today.