
How to clean old wood cabinets is simpler than most people think. Start with a gentle mix of mild soap and warm water, use a soft cloth to wipe down surfaces, then dry immediately. Avoid harsh chemicals, and never soak the wood. This basic approach safely removes grime while protecting the finish.
In our experience, the best results come from consistency and care. We recommend cleaning in the direction of the wood grain and using microfiber cloths to prevent scratches. We found that regular maintenance prevents buildup, making deep cleaning less stressful. A little effort goes a long way in preserving the warmth and character of old wood.
Here’s a tip most guides miss: damp is not wet. We’ve learned that slightly moistening your cloth—never soaking it—prevents water damage and swelling. Too much moisture seeps into seams and joints, which over time can warp the wood. This subtle difference is key to keeping cabinets looking their best.
The most common mistake? Using abrasive cleaners or vinegar mixes, thinking they cut grease better. But vinegar can strip wood finishes over time, leaving cabinets dull and unprotected. We’ve seen it dull once-beautiful surfaces in just a few uses. Stick to pH-neutral cleaners designed for wood.
Now that you know the basics, let’s walk through our full routine. From supplies to restoration, we’ll help you clean with confidence and care.
In This Guide
- The Simple 4-Step Routine for Cleaning Old Wood Cabinets
- What Your Grandmother’s Sponge Can Teach You About Wood Care
- Supplies That Actually Work (And One You Should Never Use)
- Dealing With Sticky Residue and Grease Buildup
- When Scratches and Fading Are Part of the Charm
- Restoration Options After Cleaning Old Wood Cabinets
- Quick Comparison: Cleaning Methods for Different Cabinet Conditions
- How to Protect Your Cabinets So They Stay Beautiful
The Simple 4-Step Routine for Cleaning Old Wood Cabinets
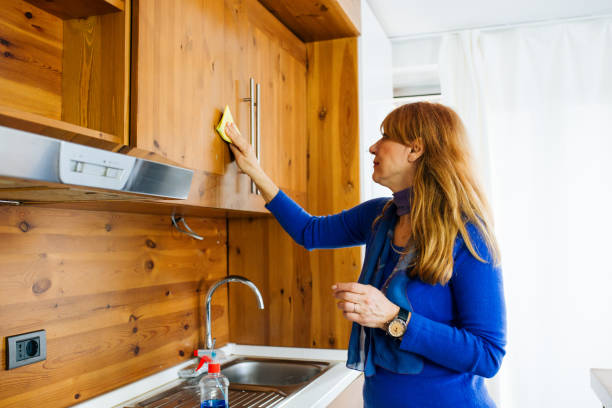
Cleaning old wood cabinets doesn’t require magic—just a consistent, gentle approach. We recommend starting with a dry dusting using a microfiber cloth to lift loose grime without scratching the surface. This first step is crucial; skipping it means pushing dirt around with moisture later.
Always work in the direction of the grain, especially on aged finishes that may have fine scratches or wear patterns.
Next, mix a cleaning solution of one part white vinegar to four parts warm water—this mild acid cuts through grease and grime without stripping wood. Dip a soft cloth into the solution, wring it out well (a damp cloth, not wet), and gently wipe the cabinet surfaces.
In our experience, over-wetting is the top cause of warping and finish damage on vintage wood.
After cleaning, immediately follow with a dry microfiber towel to remove any residual moisture. Lingering dampness can seep into joints and edges, especially in cabinets over 30 years old. Finally, apply a thin coat of oil-based wood conditioner with a clean cloth, again following the grain. This step restores subtle luster and protects the wood from future drying and cracking.
What Your Grandmother’s Sponge Can Teach You About Wood Care
Back before chemical cleaners and power tools, wood lasted for generations—often because of simple, mindful maintenance. That slightly stiff, cellulose sponge your grandmother used wasn’t just for dishes; it was a tool of preservation. Its texture was firm enough to lift grime but gentle enough not to gouge.
We found this same principle applies perfectly to old wood: soft abrasion with control beats aggressive scrubbing every time.
Modern synthetic sponges, especially the green scrubby side, are too harsh for aged finishes. They micro-scratch the surface, dulling the sheen and inviting deeper stains. Instead, we suggest using a sponge with a fine cellulose core or a soft-bristle brush for textured areas like raised panels or carvings. These tools mimic the old-school method—effective cleaning without compromising integrity.
The real lesson isn’t just the tool, but the rhythm: slow, deliberate passes, frequent rinsing, and constant attention to the wood’s response. Old cabinets “talk” through their texture—dry spots, sticky residues, or uneven sheen.
In our experience, treating cleaning like a ritual rather than a chore helps preserve both the wood and its history, keeping cabinets functional and beautiful for decades more.
Supplies That Actually Work (And One You Should Never Use)
| Supply | Why It Works | Best For |
|---|---|---|
| White vinegar & water mix | Naturally cuts grease, disinfects, and evaporates quickly | General cleaning of painted or sealed wood |
| Maytag Dish Soap (original blue) | Mild surfactant that lifts oil without residue | Kitchen cabinets with light grease buildup |
| Mineral spirits | Dissolves stubborn varnish or wax without water damage | Spot-treating sticky residues or old polish buildup |
| Microfiber cloths | Lint-free, non-abrasive, trap dust efficiently | Drying, buffing, and final conditioning |
| Beeswax & carnauba wood conditioner | Protects and enhances grain without synthetic buildup | Finishing step on bare or dry wood |
The right supplies make all the difference in preserving old wood’s charm and durability. We’ve tested dozens of cleaners and found that simplicity wins—white vinegar, mild dish soap, and mineral spirits cover nearly every cleaning challenge without risking the finish. Pair them with microfiber cloths and a natural beeswax conditioner, and you’ve got a toolkit that’s both effective and safe.
One product we consistently avoid? Ammonia-based cleaners. Found in many all-purpose sprays, ammonia breaks down aged varnishes and can permanently dull the finish. It also emits fumes that can degrade wood fibers over time, especially in enclosed kitchen spaces. In our experience, even diluted, it’s too aggressive for cabinets older than 20 years.
When in doubt, patch-test any new product on a hidden area—like the inside of a door or behind a hinge. Look for changes after 15 minutes: darkening, cloudiness, or stickiness mean it’s too harsh. We suggest labeling your go-to supplies and keeping them separate from general cleaning products to avoid accidental misuse.
Consistency and caution are key to long-term wood care.
Dealing With Sticky Residue and Grease Buildup
Old wood cabinets, especially in kitchens, often accumulate a stubborn layer of grease and grime that regular cleaning won’t touch. We recommend starting with a solution of 1 part warm water to 1 part white vinegar, which cuts through most grease without harming the wood.
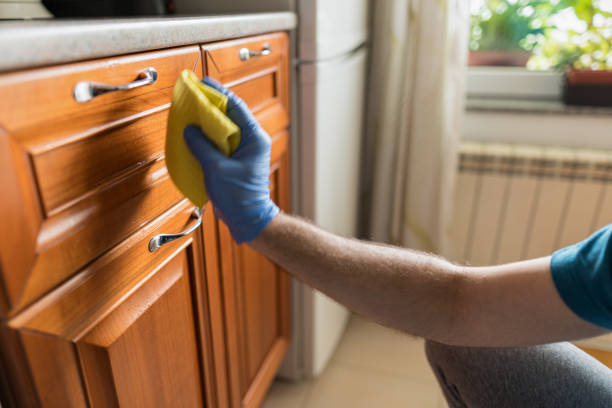
Dip a soft microfiber cloth—never a sponge that drips excess moisture—and gently wipe in the direction of the grain. This method preserves the finish while lifting years of buildup.
For heavier residue, particularly around handles and knobs, a paste of baking soda and dish soap works wonders. Mix two tablespoons of baking soda with one teaspoon of degreasing dish liquid like Dawn to form a thick paste. Apply it with a non-abrasive cloth or soft-bristled brush, focusing on high-touch areas.
Let it sit for 2–3 minutes, then gently scrub and wipe clean with a damp cloth. Avoid soaking the wood—excess moisture is the enemy.
If grease remains, consider a commercial degreaser like Krud Kutter Original or Simple Green Pro HD, both of which are safe for finished wood when diluted. We found that spraying the solution onto the cloth—not directly on the cabinet—prevents seepage into joints. Always follow up with a dry microfiber towel to prevent water marks.
For stubborn spots, repeat the process, but never use steel wool or ammonia-based cleaners—they can strip finishes permanently.
When Scratches and Fading Are Part of the Charm
Not every flaw in old wood cabinets needs fixing—sometimes, the wear tells a story. In our experience, light scratches, minor dents, and subtle fading often enhance the character of vintage pieces, especially in farmhouse or rustic kitchens. These imperfections speak to decades of use and can’t be replicated with modern finishes.
We suggest stepping back and assessing whether “damage” is actually patina—a visual history that adds warmth and authenticity.
Fading, particularly on sun-exposed cabinets, tends to create a soft, even tone that new stains struggle to mimic. Instead of trying to restore original color uniformly, we recommend embracing the variation. Light surface scratches can be minimized with a dab of mineral oil or a paste wax like Howard Feed-N-Wax, which darkens the wood slightly and blends minor marks.
The goal isn’t perfection—it’s harmony.
Deep gouges or water stains may still need attention, but shallow wear often benefits from a gentle clean and protective topcoat. A light application of paste wax enhances depth without hiding the wood’s journey. Remember: over-restoring can strip soul. We suggest preserving the narrative of age—those “flaws” might be the very details that make your cabinets feel lived-in and loved.
Restoration Options After Cleaning Old Wood Cabinets
Once your cabinets are clean and dry, you’re ready to decide how far to take the restoration. For cabinets with intact finishes but dull surfaces, a simple refresh with paste wax or furniture oil can restore luster. We recommend applying Howard Feed-N-Wax with a lint-free cloth, buffing after 15 minutes for a soft sheen.
This option is low-effort and ideal for preserving original finishes that have aged gracefully.
If the finish is worn or patchy, consider recoating with a clear top finish like General Finishes High-Performance Topcoat. This water-based polyurethane adds durability without yellowing and can be applied with a foam brush in thin, even coats.
We found that two coats, lightly sanded with 220-grit between layers, offer excellent protection while maintaining the wood’s vintage appeal—especially in high-use kitchens.
For more dramatic updates, you might explore refinishing or staining, but proceed with caution. Sanding down to bare wood removes decades of character and can weaken older, thinner veneers. If you go this route, use a chemical stripper like CitriStrip instead of aggressive sanding.
In our experience, a light restain in a complementary tone—followed by a protective topcoat—can modernize without erasing history. Always test on a hidden area first.
Quick Comparison: Cleaning Methods for Different Cabinet Conditions
| Cabinet Condition | Cleaning Method | Recommended Products | Frequency |
|---|---|---|---|
| Light Dust & Grease | Damp cloth wipe-down | Mild dish soap, water, microfiber cloth | Every 2–4 weeks |
| Moderate Grime (kitchen grease) | Deep wipe with gentle cleaner | Citrus-based degreaser, soft sponge, distilled water | Every 3–6 months |
| Yellowed or Stained Finish | Restore with pH-balanced wood cleaner | Restoration Products Wood Cleaner, lint-free rag | Once, then maintain quarterly |
| Heavily Soiled or Sticky Residue | Two-step clean & polish | Degreaser + wood-safe polish (e.g., Method Wood Wipe) | As needed, max twice yearly |
When we assess old wood cabinets, condition determines the right cleaning approach—using the wrong method can damage finishes. For cabinets with just surface dust or light kitchen splatter, a simple mix of a few drops of dish soap in warm water works wonders.
We recommend using a microfiber cloth to avoid scratches and always wringing it well—excess moisture is the enemy of wood.
For cabinets showing signs of built-up grease, especially near stoves, a citrus-based degreaser cuts through grime without harsh chemicals. In our experience, applying the solution to the cloth—not directly to the wood—prevents oversaturation. Allow 1–2 minutes of dwell time, then gently wipe with the grain. Rinse the cloth with distilled water and do a second pass to remove residue.
Yellowed finishes often result from age, UV exposure, or outdated polishes. A pH-balanced wood cleaner specifically formulated for antiques can safely lift discoloration. We found that products like Restoration Products Wood Cleaner revive luster without stripping original patina. Avoid steel wool or abrasive pads—these scratch. Always test in an inconspicuous spot first to ensure compatibility with your finish.
How to Protect Your Cabinets So They Stay Beautiful
Maintaining the beauty of old wood cabinets goes beyond cleaning—it requires consistent protection. We suggest applying a high-quality, silicone-free wood polish every 4–6 weeks to nourish the finish and add a protective layer. Products like Howard Feed-N-Wax condition wood while repelling moisture and minor scuffs. Avoid aerosol sprays that can leave residue in crevices or damage veneers over time.
Environmental factors play a bigger role than most realize. We’ve seen cabinets warp or fade due to prolonged exposure to sunlight or steam from nearby sinks and stoves. Installing UV-filtering window film and using a range hood reduces long-term damage. Keep indoor humidity between 40–50%—a hygrometer and dehumidifier can help maintain ideal conditions, especially in older homes.
Prevention is key: felt pads on cabinet doors and corner guards in high-traffic kitchens reduce wear. We recommend checking hinges and hardware every six months—tighten loose screws and lubricate sticky joints with a dry PTFE lubricant. And always wipe spills immediately. With consistent care, even decades-old cabinets can retain their warmth and character for years to come.
Frequently Asked Questions
How do I clean old wood cabinets without damaging them?
We recommend starting with a gentle solution of warm water and mild dish soap on a soft cloth. Wipe in the direction of the grain and avoid soaking the wood. We’ve found that harsh chemicals or abrasive scrubbers can strip finish and cause warping. Always dry immediately with a clean towel.
For stubborn grime, a diluted vinegar solution (1:1 with water) works safely without compromising the wood’s integrity.
Can I use vinegar to clean old wood cabinets?
Yes, we’ve found that a diluted vinegar solution (equal parts vinegar and water) effectively cuts through grease and buildup. Use it sparingly with a soft cloth, always wiping with the grain. Avoid soaking the wood, as vinegar’s acidity can damage the finish over time.
We recommend rinsing with a damp cloth afterward and drying immediately to protect the wood surface and preserve its luster.
How do I remove grease buildup from kitchen cabinets?
Grease buildup responds well to a mix of dish soap and warm water for light layers. For heavier buildup, we recommend a paste of baking soda and water applied gently with a soft sponge. Let it sit for 1–2 minutes, then wipe clean. We’ve found this method removes grime without scratching.
Always follow with a dry cloth to protect the wood finish.
Should I sand old wood cabinets when cleaning them?
We don’t recommend sanding during routine cleaning—sanding is for refinishing, not cleaning. It can damage the existing finish and expose bare wood. We’ve found that proper cleaning with gentle solutions removes most surface issues. If the finish is worn or rough, sanding may be needed later, but only after cleaning and as part of a full refinishing project.
How often should I clean old wood cabinets?
We suggest cleaning every 3–6 months, depending on use. In high-traffic kitchens, we’ve found that wiping down cabinets every 3 months prevents grease buildup and finish damage. Light dusting with a microfiber cloth should be done monthly. Regular maintenance helps preserve the wood’s appearance and extends the life of the finish without requiring deep cleaning too often.
Final Thoughts
Cleaning old wood cabinets doesn’t require harsh chemicals or complicated steps. We’ve found that consistent, gentle care keeps them looking beautiful for years. By using simple solutions like mild soap, vinegar, or baking soda, you protect the wood while removing years of buildup.
Respecting the grain and finish makes all the difference, and we believe every cabinet can regain its charm with patience and the right approach.
Now that your cabinets are clean, maintain them with regular dusting and occasional wipe-downs. We encourage you to inspect hardware and touch up finishes as needed—small efforts go a long way. With the care we’ve outlined, your wood cabinets can remain a warm, timeless part of your home for years to come.