
Refreshing old kitchen cabinets doesn’t require a full remodel. How to refresh old kitchen cabinets comes down to cleaning, updating finishes, and swapping hardware. Whether you paint, refinish, or replace doors, the goal is to revive their look without starting over. With a few smart updates, worn cabinets can look fresh and modern in just a few days.
In our experience, the most effective refreshes start with assessing cabinet condition—solid wood can be sanded and stained, while laminate often responds best to paint. We recommend focusing on prep work; skipping it leads to peeling and uneven results. We found that even outdated styles gain new life with a fresh coat and updated hardware.
Here’s a tip most guides miss: cleaning with a deglosser before sanding makes prep faster and more effective. Old cabinets collect grease and waxy buildup that sandpaper alone won’t fix. We’ve seen dramatic differences just by using a proper deglosser—it ensures paint or stain bonds better and lasts longer, especially in high-use kitchens.
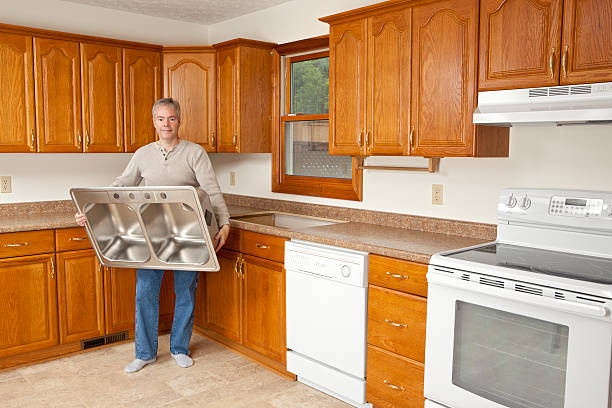
The biggest mistake? Thinking all cabinets need to be replaced when they’re just outdated. We’ve seen homeowners spend thousands unnecessarily. In reality, refacing or repainting often delivers the same visual impact at a fraction of the cost. Most structural issues are fixable—only severe water damage or rot truly demands replacement.
Now that you know the basics, let’s walk through each step to get professional-looking results. From prep to final touches, we’ll cover the smartest, most cost-effective ways to bring your kitchen back to life.
In This Guide
- The Fastest Way to Refresh Old Kitchen Cabinets Without Replacing Them
- Paint or Refinish? Which Route Saves You Time and Money
- How to Clean and Prep Cabinets Like a Pro (Skip This and Regret It)
- Cabinet Makeover Options: From Budget Refresh to Full Transformation
- Hardware Swaps That Instantly Upgrade Old Kitchen Cabinets
- Quick Comparison: Refresh Methods Side by Side
- When to Call in a Pro (And When to DIY)
- Smart Touches That Make Refurbished Cabinets Look Brand New
The Fastest Way to Refresh Old Kitchen Cabinets Without Replacing Them
When time is tight but your kitchen feels outdated, swapping out cabinet hardware is the single fastest upgrade we recommend. In under an hour, new knobs and pulls can transform the entire look—think matte black, brushed brass, or vintage nickel for instant style. We’ve seen dated oak cabinets go from tired to trendy just by pairing them with modern fixtures.
While painting or refinishing takes days, hardware replacement requires no drying time, special tools, or prep work. Just unscrew the old and screw in the new. For best results, measure existing hole spacing first—most standard pulls are 3 inches or 96mm center-to-center.
Choose styles that contrast with your door shape; sleek bars on Shaker doors, for example, create instant modern appeal.
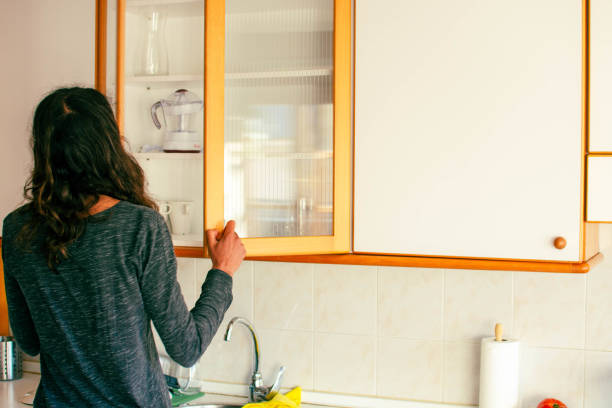
Don’t stop at hardware—clean or replace cabinet fronts with peel-and-stick veneer panels for a bigger impact without the mess. These self-adhesive woodgrain or solid-color skins install in minutes and hide wear and tear beautifully.
In our experience, combining updated hardware with a fresh front surface gives the most dramatic transformation in the least amount of time—under 3 hours total for most kitchens.
Paint or Refinish? Which Route Saves You Time and Money
| Factor | Painting | Refinishing (Stripping & Staining) |
|---|---|---|
| Time Required | 2–4 days | 5–7 days |
| Avg. Material Cost (10-cabinet kitchen) | $80–$150 | $120–$200 |
| Sanding Level | Medium (deglossing + light scuff) | Heavy (full stripping to bare wood) |
| Durability | High (with proper topcoat) | Very High (natural wood protection) |
| Best For | Laminate, thermofoil, or painted cabinets | Solid wood with good grain |
Painting wins for speed and affordability—especially if your cabinets aren’t solid wood. We’ve found that a high-adhesion primer like Zinsser Bullseye 1-2-3 followed by a cabinet-grade paint such as Benjamin Moore Advance delivers a smooth, durable finish in less time. The process involves cleaning, light sanding, priming, and two coats of paint—much faster than stripping old varnish.
Refinishing, on the other hand, is labor-intensive and better suited for solid wood cabinets with good structural condition. Stripping old finish with chemical removers takes hours, and multiple applications are often needed. We suggest this route only if you love the wood’s natural grain and want to restore its original warmth—otherwise, it’s effort without payoff.
For most homeowners, painting offers the best balance: 60–70% less labor and long-lasting results when done right. Refinishing costs more in both time and supplies, and one missed spot can ruin the look. Unless you’re aiming for a high-end, natural wood aesthetic, we recommend painting as the smarter, faster, and more budget-friendly choice.
How to Clean and Prep Cabinets Like a Pro (Skip This and Regret It)
Proper prep is the most overlooked step—yet it’s the reason some DIY paint jobs peel within months. We can’t stress this enough: clean cabinets thoroughly before any upgrade. Start with a degreaser like TSP (trisodium phosphate) or a 50/50 mix of vinegar and water for eco-friendly cleaning.
Grease and grime hide in corners, under handles, and along the bottom edges—especially in cooking zones.
After cleaning, sand every surface lightly with 120-grit sandpaper to scuff the finish and help paint or primer adhere. Even if your cabinets look smooth, gloss or laminate surfaces need this step. Wipe down with a tack cloth afterward—regular rags leave lint and dust.
For textured doors, use a soft brush or microfiber pad to reach grooves without damaging the surface.
Finally, remove all hardware and door hinges—painting around knobs leads to messy edges. Label each door’s position with tape to avoid reinstallation confusion. In our experience, skipping even one prep step leads to bubbling, peeling, or uneven coverage. Taking 4 extra hours to prep saves 40 hours of future frustration.
Proper cleaning and sanding are the foundation of a pro-level refresh—don’t rush them.
Cabinet Makeover Options: From Budget Refresh to Full Transformation
When it comes to updating old kitchen cabinets, we’ve found there’s no one-size-fits-all solution—your approach depends on budget, timeline, and how dramatic a change you want. A budget refresh might include cleaning, minor repairs, and reapplying finish, costing under $200 and taking a weekend. This is ideal for cabinets with solid construction but tired surfaces.
For a mid-range upgrade, consider painting or staining, adding new molding, or installing glass inserts. These changes can transform the kitchen’s look for $500–$1,500. In our experience, cabinet painting delivers one of the highest perceived value increases, especially when paired with proper prep and high-quality primer.
If you’re ready for a full transformation, replacing doors or refacing entire cabinets offers a near-remodel effect without the cost or mess of full replacement. High-end refacing runs $2,000–$5,000 but can mimic a custom kitchen. We suggest assessing cabinet box integrity first—many older cabinets are built better than modern ones, making refacing a smart long-term investment.
Hardware Swaps That Instantly Upgrade Old Kitchen Cabinets
Swapping out old, dated hardware is one of the fastest and most impactful upgrades we recommend for aging cabinets. Replacing worn knobs and pulls with modern finishes like matte black, brushed brass, or oil-rubbed bronze can completely shift the kitchen’s style—often for less than $100. We’ve seen this single change make a 1990s kitchen feel contemporary overnight.
When selecting new hardware, pay attention to size, spacing, and style cohesion. For example, 3-inch center-to-center pulls work best on drawers over 18 inches wide, while smaller knobs (1–1.25 inches) suit narrow doors. Consider mixing pulls on drawers with knobs on doors for visual interest—we’ve found this combo adds depth without clutter.
Don’t overlook functional upgrades like soft-close hinges or touch-latch systems. While they require minor installation work, these additions improve daily use and signal a high-end finish. Pro tip: measure existing holes or be ready to patch and re-drill. We suggest using a template jig for consistent alignment—nothing ruins the look faster than crooked hardware.
Quick Comparison: Refresh Methods Side by Side
| Method | Cost Range | Time Required | Impact Level |
|---|---|---|---|
| Hardware Swap | $50–$150 | 2–4 hours | High (instant visual lift) |
| Cabinet Painting | $300–$1,000 | 3–5 days | Very High (full aesthetic change) |
| Refacing Doors | $1,500–$4,000 | 1–2 weeks | Extreme (like new cabinets) |
| Full Replacement | $5,000–$15,000 | 2–4 weeks | Maximum (structural overhaul) |
Each cabinet refresh method offers distinct advantages, and we’ve seen homeowners achieve stunning results by choosing the right fit for their goals. The table above breaks down key factors to help prioritize options—whether you’re on a tight budget or ready for a major kitchen evolution.
Hardware swaps deliver the quickest return on effort and cost, making them ideal for renters or short-term updates. Painting, while more labor-intensive, transforms the entire space and works especially well with solid wood or well-constructed laminate cabinets. We emphasize proper prep—sanding, cleaning, and priming—for lasting results.
Refacing strikes a balance between cost and transformation, preserving cabinet boxes while updating doors and veneers. Full replacement, though expensive and disruptive, allows for layout changes and modern storage solutions. In our experience, most older kitchens benefit most from a mix—like painting plus new hardware—delivering big impact without overspending.
When to Call in a Pro (And When to DIY)
Refreshing your kitchen cabinets can be a rewarding DIY project, especially if they’re structurally sound but just look tired. We recommend tackling the job yourself when you’re only replacing hardware, cleaning and deglossing surfaces, or applying a new coat of paint.
In our experience, these tasks are manageable with basic tools and a weekend of effort, saving you hundreds in labor costs.
However, if your cabinets have rotten wood, sagging frames, or misaligned doors due to foundation issues, it’s time to call in a professional. Structural repairs often require precise measurements, specialized fasteners, and sometimes custom woodwork. We found that attempting complex fixes without experience can lead to uneven doors, poor alignment, or even safety concerns—especially with heavy upper cabinets.
Another red flag: if you’re considering a full refacing with custom veneers or integrating new cabinet runs into your layout, professional installation ensures seamless results. Pros have access to industrial tools and finishes that last longer than retail alternatives. For anything beyond cosmetic updates, we suggest budgeting for expert help—it’s an investment in both durability and resale value.
Smart Touches That Make Refurbished Cabinets Look Brand New
A fresh coat of paint or stain does wonders, but the real transformation comes from thoughtful finishing details. We recommend upgrading to soft-close hinges and drawer slides—they’re affordable and add a high-end feel. Replacing outdated knobs and pulls with modern finishes like matte black or brushed brass instantly elevates the entire kitchen.
Even a $50 hardware swap can make cabinets feel custom.
Adding under-cabinet lighting is another game-changer. LED strips not only improve functionality but also highlight your new finishes, especially in darker cabinets. We suggest warm white (3000K) for a cozy glow. Trim gaps with caulked seam lines and add decorative molding to plain box fronts—these small additions mimic the look of built-in cabinetry without the cost.
Don’t overlook the interior. Line shelves with peel-and-stick vinyl in marble or wood patterns for a luxe touch. We’ve seen organizers like pull-out spice racks or corner lazy Susans turn awkward spaces into highlights. Finally, ensure all doors align perfectly and gaps are consistent—this attention to detail separates a pro-level refresh from a rushed DIY job.
Frequently Asked Questions
Can I refresh kitchen cabinets without sanding?
Yes, you can refresh cabinets without sanding by using a liquid deglosser to remove the finish and improve paint adhesion. In our experience, thorough cleaning and proper deglossing work well for smooth surfaces in good condition. However, we recommend light sanding for glossy finishes or peeling areas to ensure durability. Skipping prep entirely may lead to chipping.
What’s the cheapest way to update old kitchen cabinets?
We’ve found that painting cabinets and replacing hardware is the most budget-friendly refresh. A quality paint job can transform dated wood or color, while new knobs and pulls add modern style. We recommend using a bonding primer and semi-gloss finish for longevity. This approach costs a fraction of replacement and delivers impressive results with minimal effort.
Is painting kitchen cabinets worth it?
Yes, painting is worth it if your cabinets are structurally sound. We’ve seen many kitchens completely transformed with a fresh coat of paint. It boosts curb appeal and modernizes the space at a low cost. In our experience, proper prep and durable paint yield long-lasting results that stand up to daily use in high-traffic kitchens.
How long does a cabinet painting project take?
A typical cabinet refresh takes 3–5 days, depending on cabinet size and drying time. We recommend removing doors and painting them separately to speed up the process. Allow at least 24 hours between coats for proper curing. In our experience, rushing drying leads to smudges and reduced durability—patience pays off.
Can I use regular paint on kitchen cabinets?
No, regular wall paint isn’t suitable for cabinets. We recommend using trim or cabinet-specific paint with a semi-gloss or satin finish. These formulas are designed to resist grease, moisture, and frequent cleaning. In our experience, brands like Sherwin-Williams ProClassic or Benjamin Moore Advance deliver the best durability and smooth finish for high-use areas.
Final Thoughts
Refreshing old kitchen cabinets doesn’t require a full remodel to make a big impact. We’ve seen how simple updates like painting, replacing hardware, and cleaning grime can breathe new life into a tired kitchen. With the right prep and materials, even budget-friendly changes can deliver a fresh, modern look that enhances both function and style.
Start with one step—cleaning, painting, or swapping hardware—and build from there. In our experience, even small efforts create noticeable results. Take your time, follow proven methods, and enjoy transforming your space. You’ll be surprised how much better your kitchen feels with just a few thoughtful updates.